How to use Proton VPN on Linux
- Reading
- 3 mins
- Category
- Proton VPN apps
There are two official ways to use Proton VPN on Linux:
Proton VPN Linux GUI app
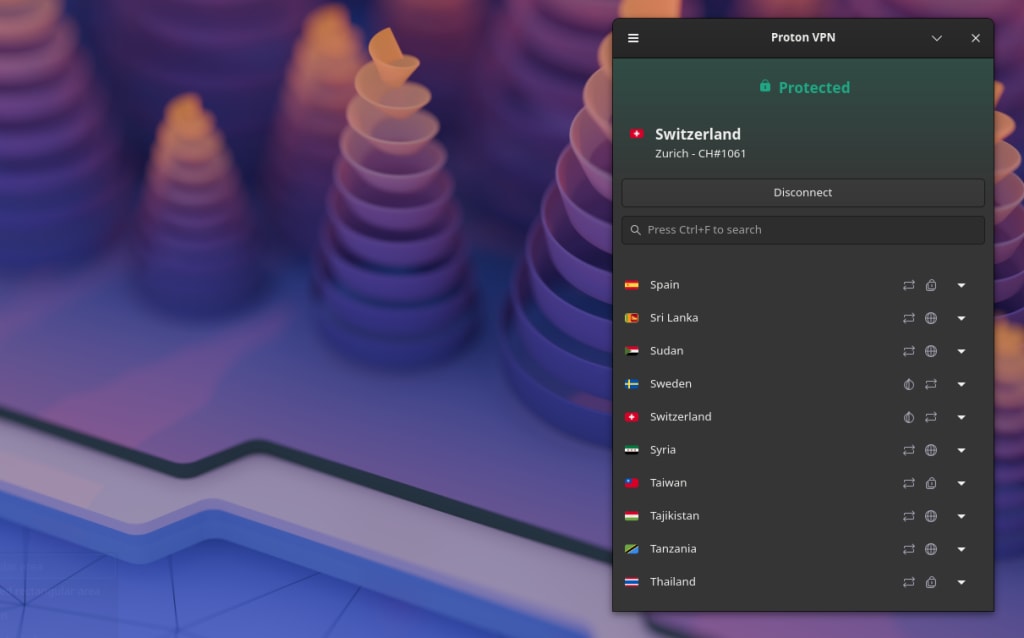
The official Proton VPN Linux GUI app (with a graphic user interface) lets you protect your Linux devices with Proton VPN while controlling the VPN via an intuitive and easy-to-use graphical interface.
We officially support the latest stable versions of the following distributions using the GNOME desktop environment. Click on a link for full setup instructions:
Proton VPN is available on Arch Linux as a package(new window) maintained by a dedicated community contributor. We’re working towards providing official support for Arch. In the meantime, support may be limited.
Reports indicate that our Linux GUI app works on other distros and desktop environments, but support for other distributions and configurations may be limited.
Note that the Linux GUI app requires the gnome-keyring(new window) (it may also work with KDE’s KWallet, but this is not officially supported). To use split tunneling (optional), systemd-resolved(new window) is also required.
Our official Linux GUI app is the best way to use Proton VPN on your Linux PC. It natively supports advanced Proton VPN features, including:
- NetShield Ad-blocker
- Kill Switch
- VPN Accelerator
- Moderate NAT
- Port forwarding
- Custom DNS
- Auto-connect at startup
- IPv6
- Pin servers to tray
Proton VPN CLI
The Proton VPN CLI (command-line utility) runs from the Linux terminal. It’s officially supported on the latest stable versions of:
- Debian
- Ubuntu
- Fedora
The CLI is also available on Arch Linux . Official support for Arch is in progress.
- Arch
It may work on other Linux distributions, but support for other distros may be limited.
Learn how to install and use the Proton VPN Linux CLI
Note that the Linux CLI requires the gnome-keyring(new window) (it may also work with KDE’s KWallet, but this is not officially supported) and NetworkManager(new window).
Please also note that the CLI doesn’t currently work on headless setups.
Don’t know which distro you’re running?
If you’re not sure what Linux distribution you’re running, open a terminal window and run:
cat /etc/*release
In the output, look for:
- PRETTY_NAME: This is the name of your distribution and its version number. Proton VPN actively supports the latest versions of Debian, Ubuntu, and Fedora.
- ID_LIKE: If your distro is a derivative of another distro, you’ll see its “parent” distribution(s) listed here. In the example below, KDE Neon is based on Ubuntu, which itself is based on Debian.
If you’re using a distro that’s based on one of our officially supported distros, there’s a very good chance it will work with no or few problems. But support may be limited.

Other ways to use Proton VPN on Linux
Where possible, we strongly recommend using our official Linux GUI app or Linux CLI. However, there are certain situations where you may wish to use a third party app instead.
You can configure OpenVPN or WireGuard® manually on Linux using either NetworkManager or the command line. Note that if we retire a server, you may need to download new configuration files.
- Learn how to manually configure OpenVPN for Proton VPN on Linux
- Learn how to manually configure WireGuard on Linux
We currently don’t support installation of our official tools through Flatpak(new window) or elsewhere. Community contributors have published unofficial versions that you can use, but you do this at your own risk. These may work, but they’re not developed by us and we can’t provide support for them.