How to manually configure OpenVPN for Proton VPN on Linux
- Reading
- 6 mins
- Category
- Linux
OpenVPN is an now old VPN protocol that, although still robustly secure, is bloated and slow compared to powerful, sleek, and secure modern VPN protocols, such WireGuard®. This why we are working toward discontinuing support for OpenVPN on our official apps.
Where possible on Linux, we recommend using our official Linux app (GUI) or Linux CLI, or manually configuring WireGuard.
If this isn’t possible, you can manually configure OpenVPN on Linux using third-party clients. In this guide, we’ll show you how to configure OpenVPN on any Linux distribution using the command line or NetworkManager (for those who prefer a GUI).
- Preparing for OpenVPN
- How to manually configure OpenVPN CLI
- How to use OpenVPN with NetworkManager
- How to check for DNS leaks
Preparing for OpenVPN
Before we start, you’ll need two things:
1. An OpenVPN configuration file
Sign in to account.protonvpn.com, go to Downloads → OpenVPN configuration files, and download an OpenVPN configuration file for Linux.
Learn how to download an OpenVPN configuration file from Proton VPN
2. Your OpenVPN username and password
While still signed in to account.protonvpn.com, go to Account → OpenVPN username to view your OpenVPN username and password. Note that these are not your regular Proton Account username and password.
Learn how to access your Proton VPN OpenVPN username and password
How to use OpenVPN with NetworkManager
This is the recommended way to manually configure OpenVPN if your distribution supports NetworkManager(new window).
This guide was created using Ubuntu 22.04, but the instructions are very similar on any system that supports NetworkManager. If your desktop environment uses NetworkManager, there’s a good chance that it already supports OpenVPN. If it doesn’t, you can easily install OpenVPN support in NetworkManager:
On Debian and Ubuntu-based distributions, enter:
sudo apt-get install network-manager-openvpn-gnome
On Fedora, enter:
sudo dnf -y install NetworkManager-openvpn NetworkManager-openvpn-gnome
On Arch, enter:
sudo pacman -S networkmanager-openvpn
Log out of your Linux session, then log in again for the changes to take effect.
Once NetworkManager supports OpenVPN, you can configure it. To do this:
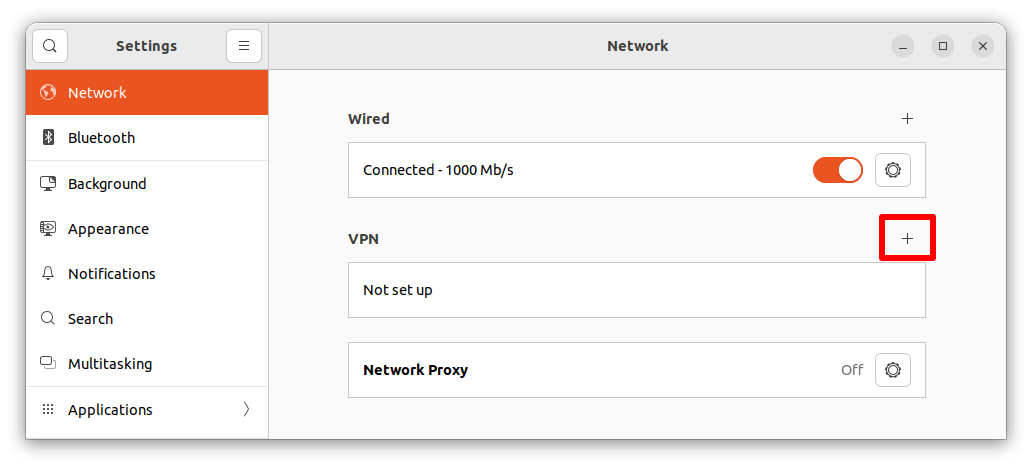
1. Go to Settings → Network → VPN → +.
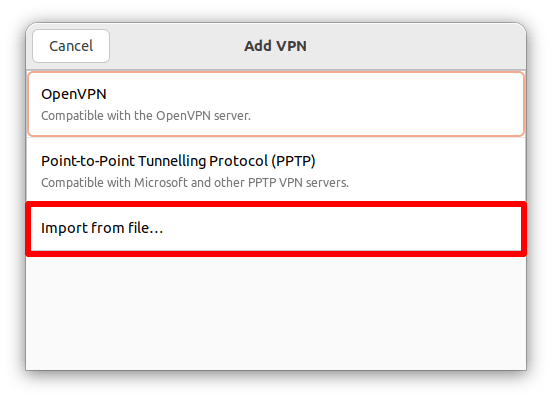
2. Select Import from file… and use your default file manager to Open the OpenVPN configuration file you downloaded earlier.
3. Go to Authentication and enter your OpenVPN Username and Password into the relevant fields. Click Add when you’re done

4. Back at Settings → Network → VPN, toggle the switch next to the OpenVPN connection you just set up to on. You can configure as many connections as you like.

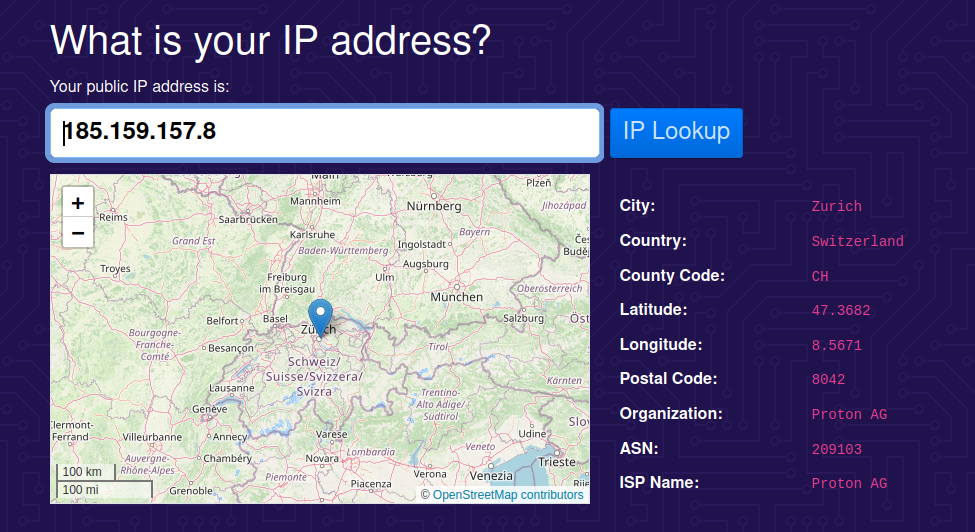
You’re now connected to Proton VPN. To verify this, visit our free secure IP scanner(new window). Since this is a manual connection, you should also check DNS leaks.
To disconnect from Proton VPN, simply toggle the switch off.
How to manually configure OpenVPN CLI
This method is more complicated than using NetworkManager, and is only recommended for very specific use cases. Note also that newer distributions (including the latest versions of Ubuntu) don’t support openresolv, and so the following method won’t work with them. The NetworkManager method described above will work on most distros (including Ubuntu).
In this guide, we’ll show you how to set up OpenVPN on Debian, Fedora, and Arch (including Manjaro).
1. Install OpenVPN
Open a terminal window and:
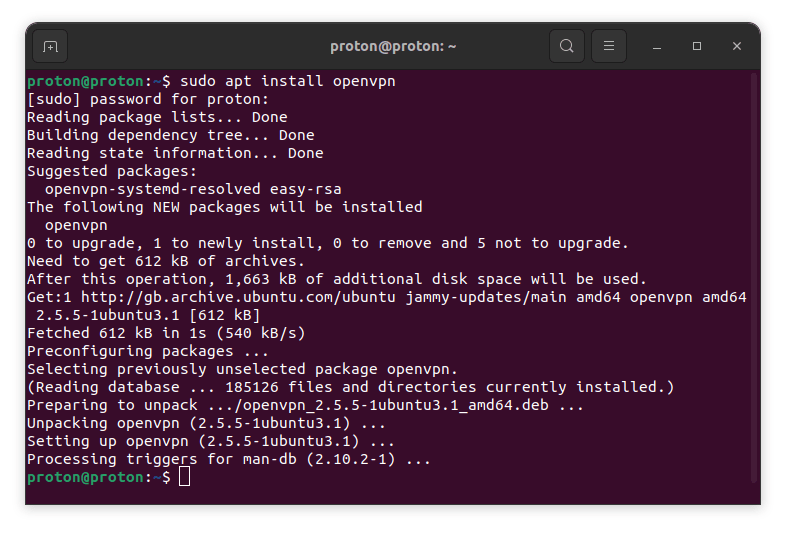
On Debian and Ubuntu-based distributions, enter:
sudo apt install openvpn
On Fedora, enter:
sudo dnf install openvpn
On Arch, enter:
sudo pacman -S openvpn
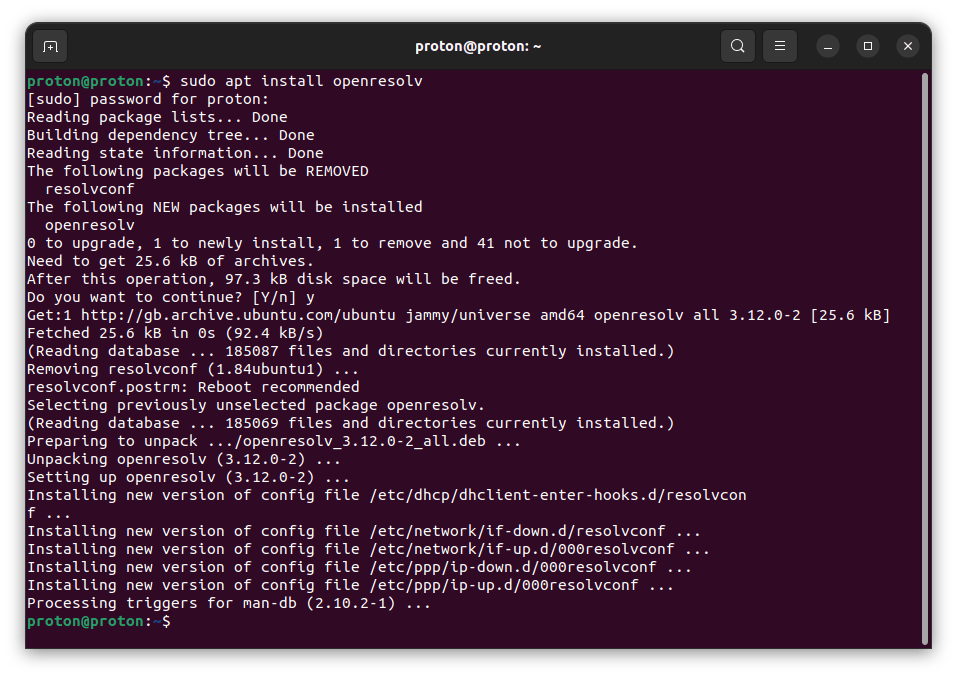
2. Install openresolv
You need openresolv (an open-source implementation of resolvconf(new window)) to properly configure DNS and prevent DNS leaks.
Learn more about DNS and DNS leaks
On Debian and Ubuntu-based distributions, enter:
sudo apt install openresolv
On Fedora, enter:
sudo dnf install openresolv
On Arch, enter:
sudo pacman -S openresolv
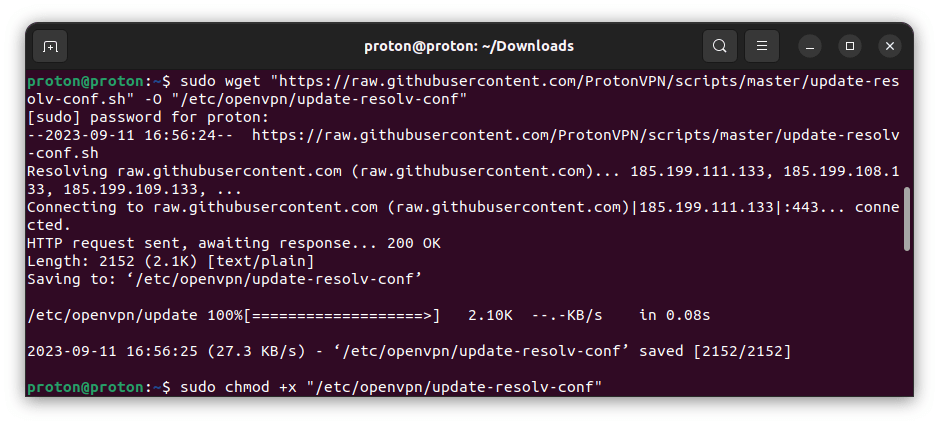
3. Download the following DNS update script
Again, this is needed to ensure that DNS is configured correctly. Wget is pre-installed on most Linux distros. Run:
sudo wget "https://raw.githubusercontent.com/ProtonVPN/scripts/master/update-resolv-conf.sh" -O "/etc/openvpn/update-resolv-conf"
Followed by:
sudo chmod +x "/etc/openvpn/update-resolv-conf"
4. Change the directory to where you downloaded your OpenVPN configuration file
Enter
cd <path>
For example:
cd ~/Downloads
5. Connect to a VPN server using OpenVPN
Run:
sudo openvpn <config.ovpn>
Where <config.ovpn> is the name of the OpenVPN configuration file you downloaded earlier.
For example:
sudo openvpn node-ch-02.protonvpn.net.udp.ovpn
Enter your OpenVPN username and password when prompted.
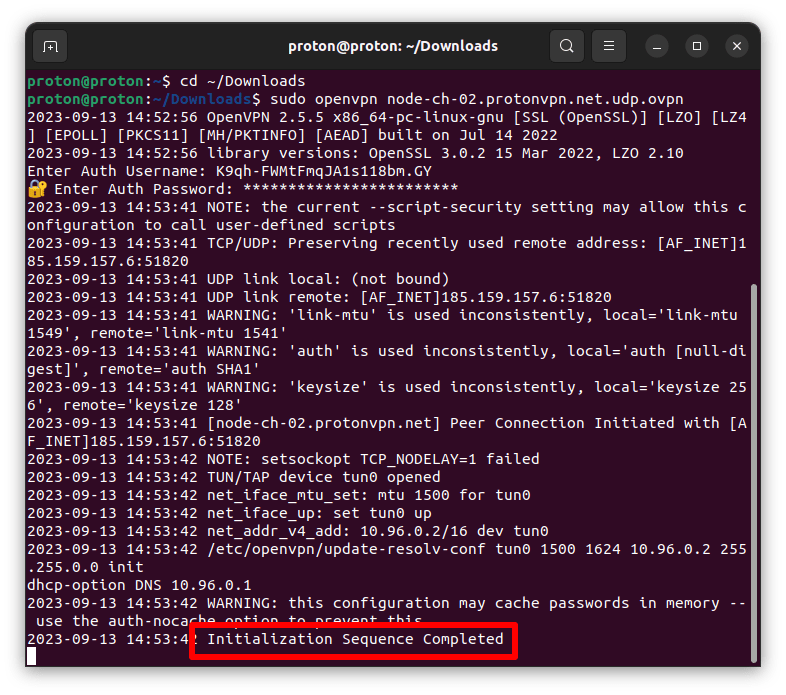
You should see a message saying Initialization Sequence Completed. This means you’re successfully connected to Proton VPN. You can verify this by visiting our free secure IP scanner(new window). Since this is a manual connection, you should also check for DNS leaks.

To disconnect from the VPN server, simply close the terminal window.
How to check for DNS leaks
After visiting our free secure IP scanner, go to www.dnsleaktest.com(new window) and run the Standard test.

When the test is complete, look at the first three sets of numbers of the returned IP addresses. These should all match the first three sets of numbers of your IP address, as shown on our free secure IP scanner.
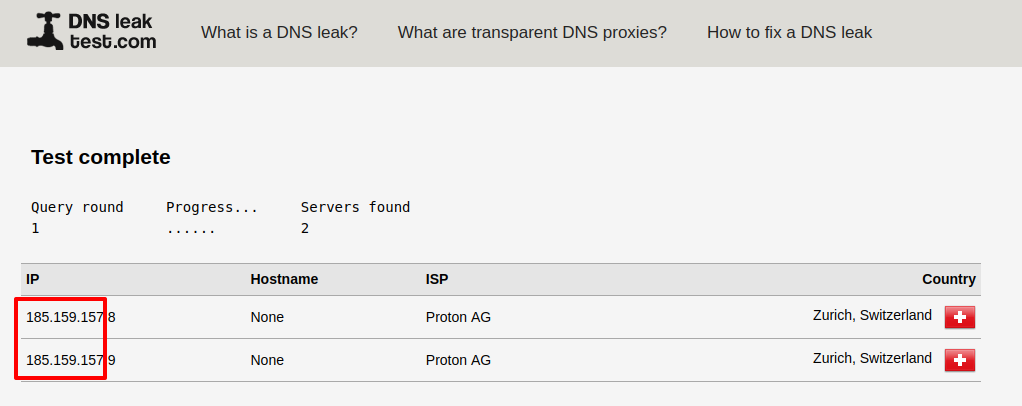
If they don’t, then you have a DNS leak.