How to use the Proton VPN app for Windows
- Reading
- 11 mins
- Category
- Proton VPN apps
In this article, we look at how to install and use the Proton VPN app for Windows 10+. We cover:
How to install Proton VPN for Windows
- Sign in to Proton VPN
- Connect to the fastest country allowed by your plan
- Change server (if you’re on a Free plan)
- Connect to a specific location or special server (if you have a paid Proton VPN plan)
- Recent and pinned connections
- Profiles
- Your Proton VPN account
- Connection
- General
- Support
- Improve Proton
How to install Proton VPN for Windows
By default, Windows 10 and 11 only allow you to install apps from the Microsoft Store. To install the Proton VPN app, you’ll need to allow apps to be installed from other sources. To do this (if you haven’t done so already), open Windows Settings → Apps & features → Choose where to get apps and select Anywhere from the dropdown menu.
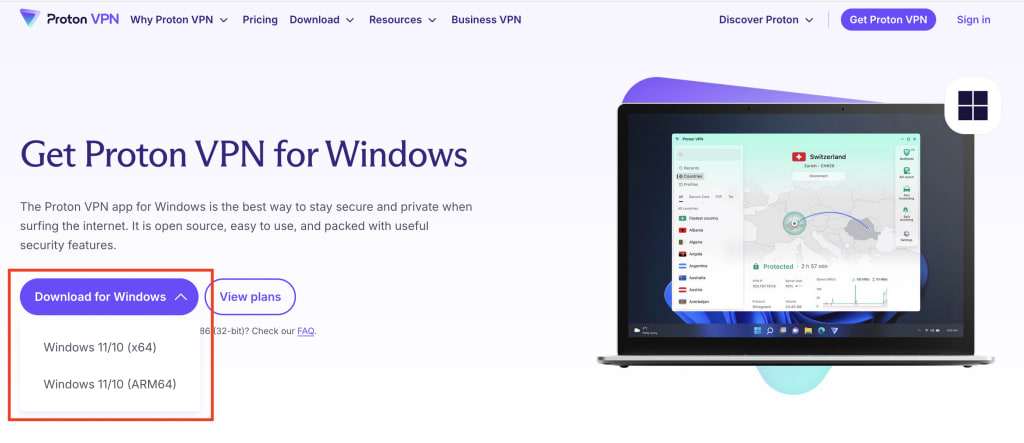
1. Visit our Proton VPN for Windows page, click the Download for Windows button and select the version of Windows 11 or 10 that you’re running (x64 or ARM64). If in doubt. most people are running x86 systems.
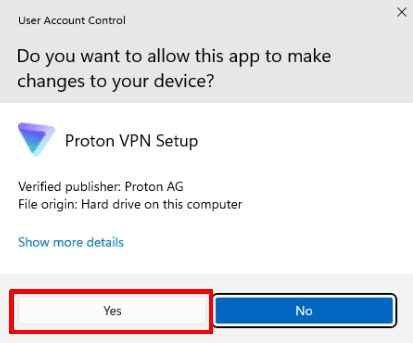
2. Once you’ve downloaded the EXE file, double-click on it to open it and click Yes when asked if you want to allow the app to make changes to your device.
3. This will open the Proton VPN installation wizard. Choose the language you’d like to use from the dropdown menu and click OK.

4. Click Next to use the default Windows Start menu folder for Proton VPN. If you want to use a different folder, click Browse and locate where you’d like Proton VPN to appear in your Start menu. Click Next when you’re done.

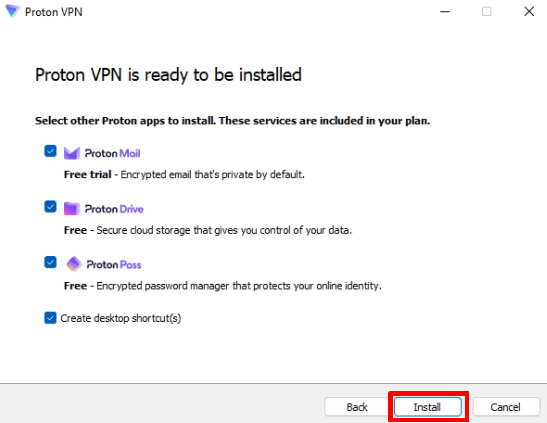
5. You can automatically install other Proton apps included in your plan. Deselect any that you don’t wish to install, then click Install to continue.
6. Review your choices and select Install to continue.

7. Wait for the app to install onto your system.

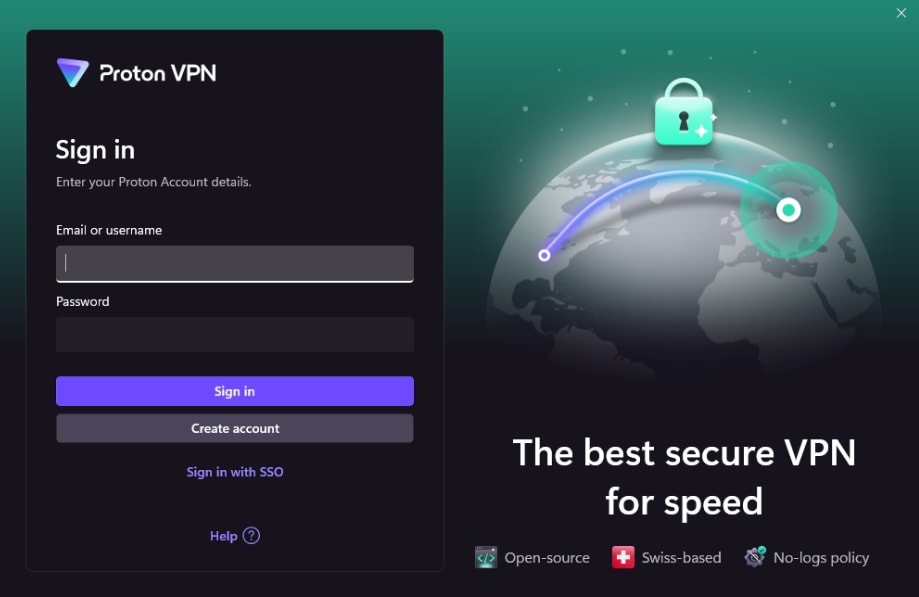
8. Once the app is installed, the setup wizard will close and the Proton VPN app will start. You can now sign in to your Proton Account.
How to connect to Proton VPN
Sign in to Proton VPN
Open Proton VPN from your taskbar or the desktop icon. Sign in using the username and password you created when you signed up and click Sign in.
If you haven’t created a Proton VPN account yet, you can use the Create Account button or click here. Note that if you’ve signed up for any Proton service (such as Proton Mail, Proton Drive, or Proton Pass), you can use the same username and password to sign into Proton VPN.
If your organization uses set up single sign-on (SSO), click Sign in with SSO instead.
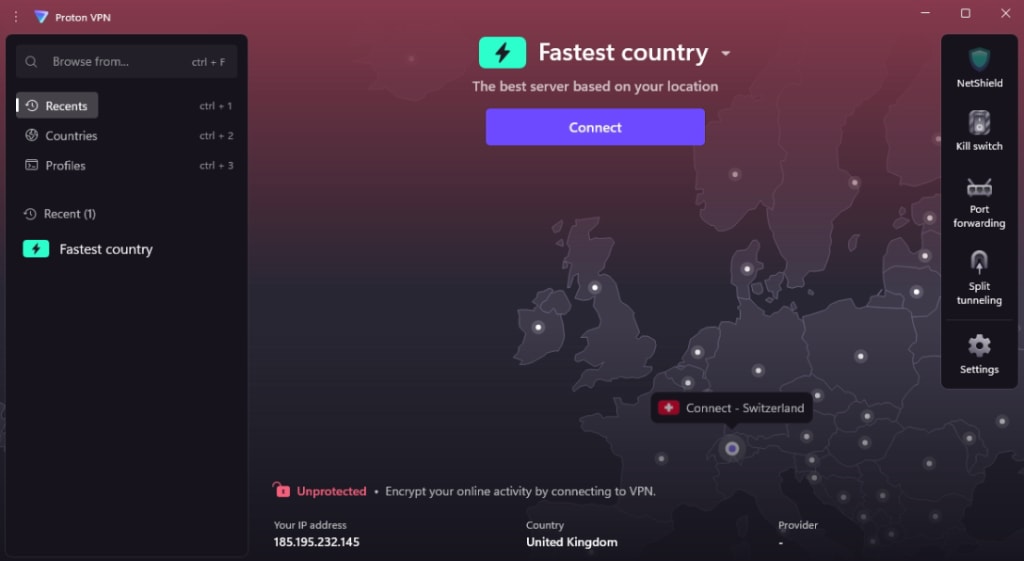
Connect to the fastest country allowed by your plan
If you’re on our Free plan, select Connect to automatically connect to the fastest free server for your location.
If you’re on a paid plan, select Connect to automatically connect to the fastest server for your location. We have Plus servers in 110+ countries worldwide (you can also select Fastest country in the Countries tab – see below). Note that you can change your default connection (what happens when you click Connect).

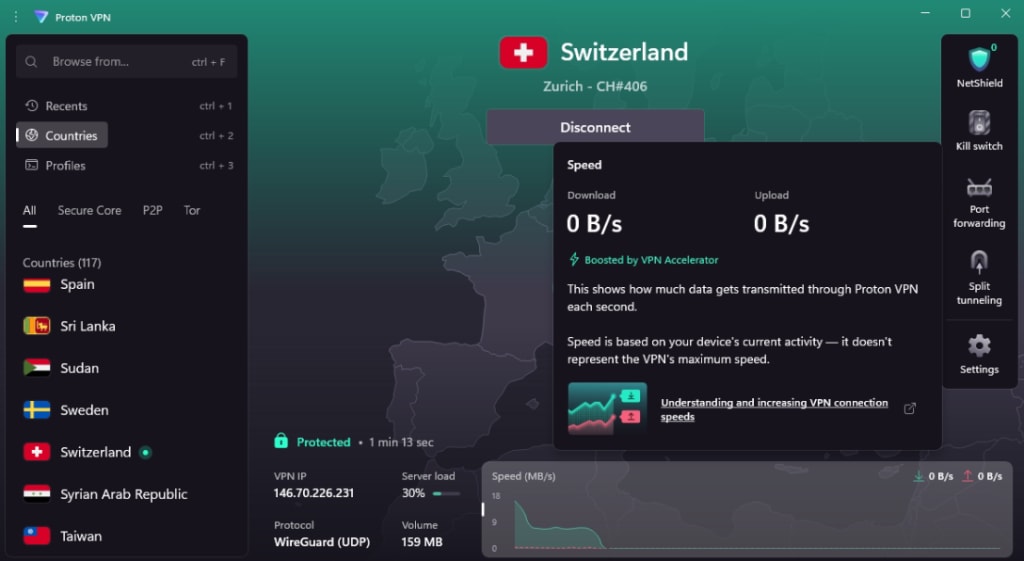
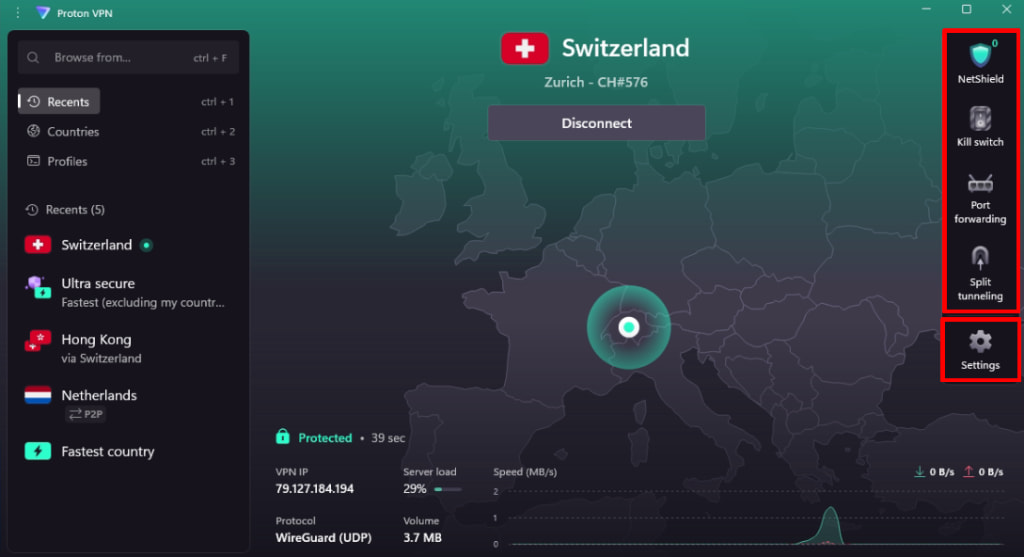
Once connected, the Home screen will turn green and show the location of the server you’re connected to on a map, together with information about your connection (such as the server IP address, server load, connection speed, VPN protocol, and volume of data transferred through the VPN connection).
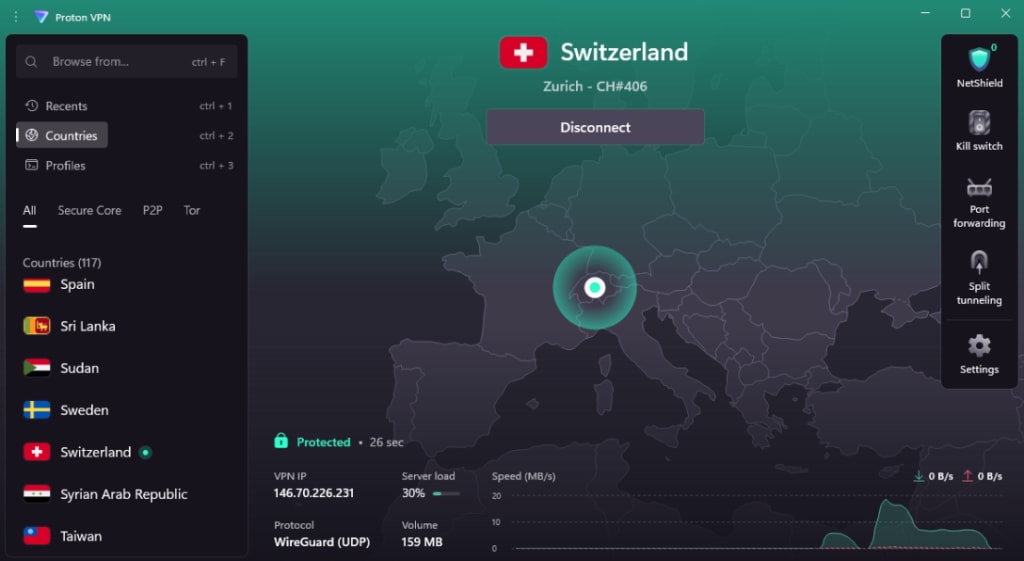
Click on any of these information elements to see more details and an explanation.
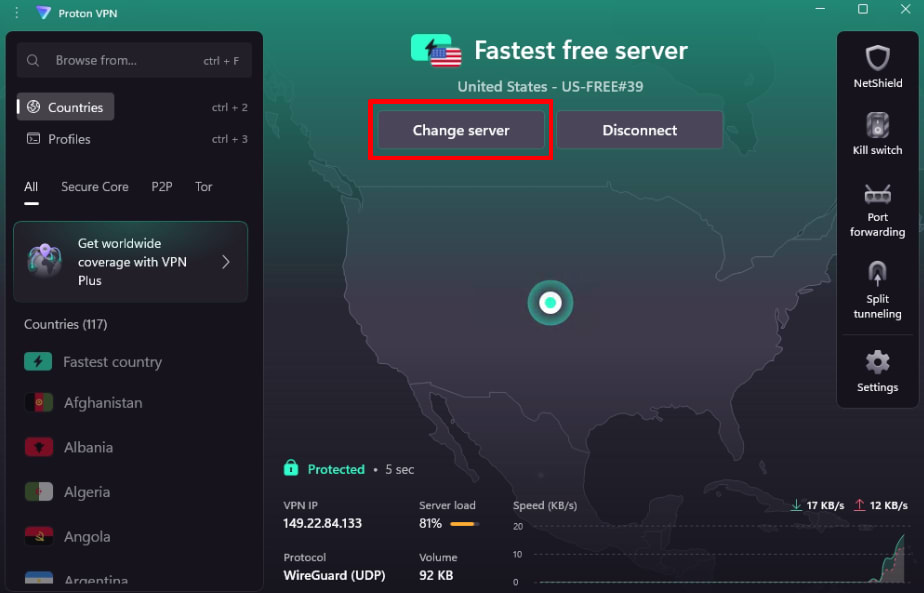
Change server (if you’re on a Free plan)
Once connected to a random free server, you can change the server to one in a different random country (the Netherlands, Japan, Romania, Poland, Norway, Switzerland, Singapore, Mexico, Canada, and the United States) following a short cooldown period. To do this, simply select Change server on the Home screen.
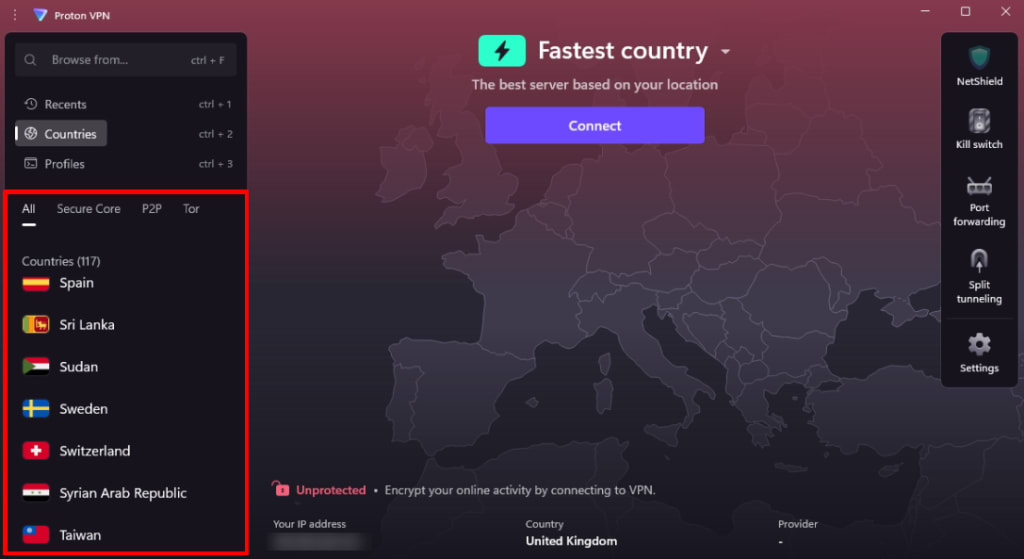
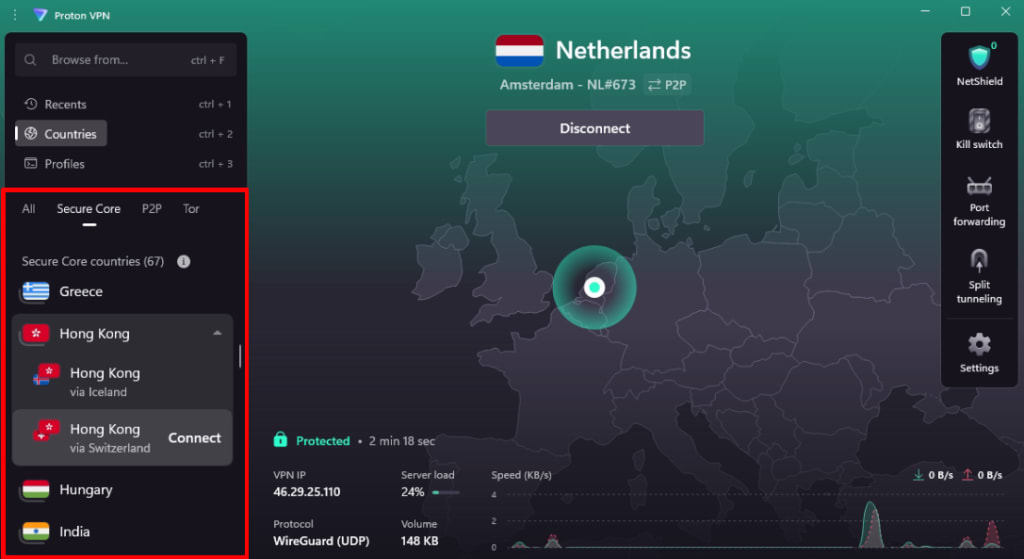
Connect to a specific location or special server (if you have a paid Proton VPN plan)
If you’re on any paid Proton VPN plan, you can connect to any of our high-speed servers in 110+ countries. To connect to the fastest server in the country of your choice, simply select it from the Countries → All list. We’ll automatically connect you to the fastest server in that country (factoring in your location and server loads).
To connect to a specific city in a country, click ⏷ next to the country and select the city from the dropdown list. To connect to a specific server in a city, click ⏷ next to the city and select the server from the dropdown list.
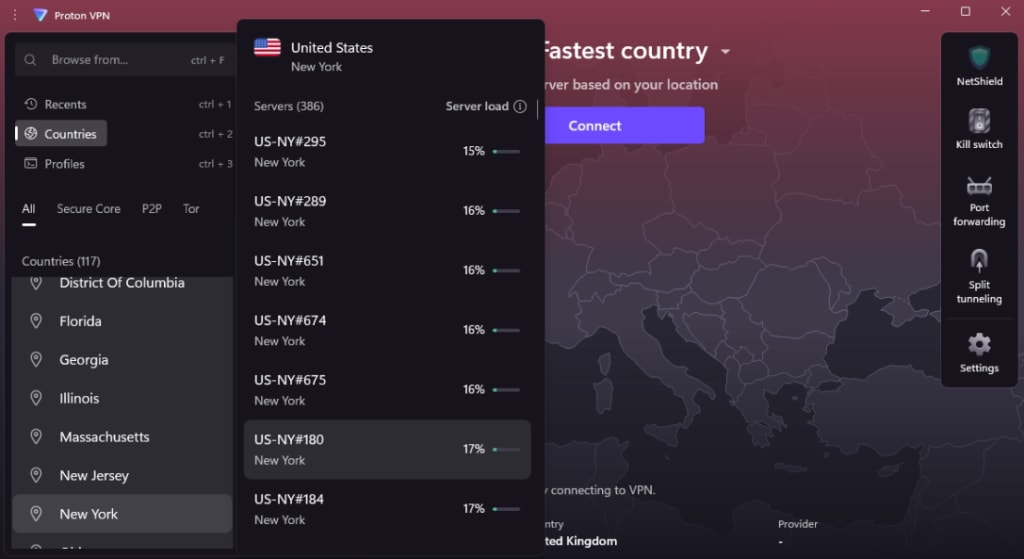
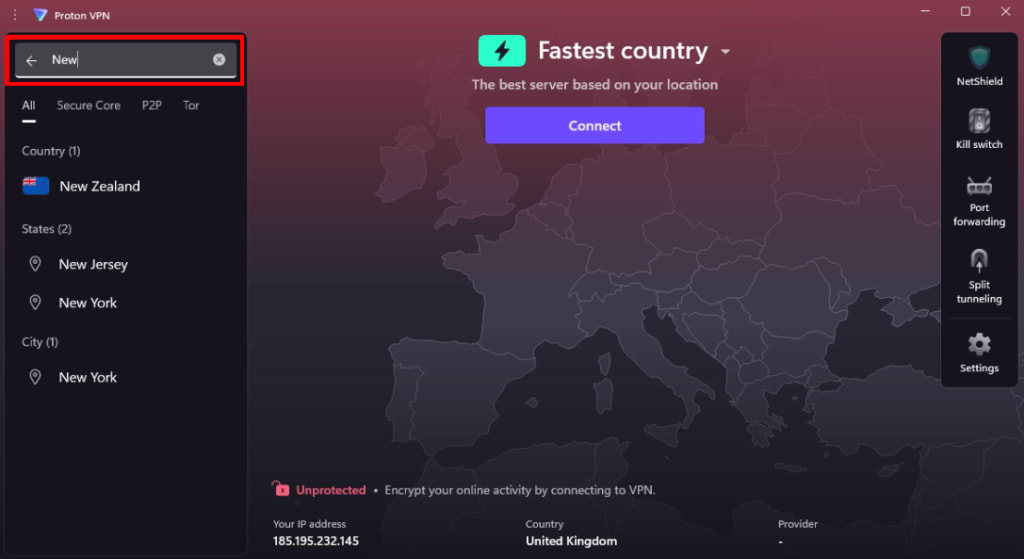
You can find any country, city, or server by typing its name into the Search bar.
You can also select a country using the map.
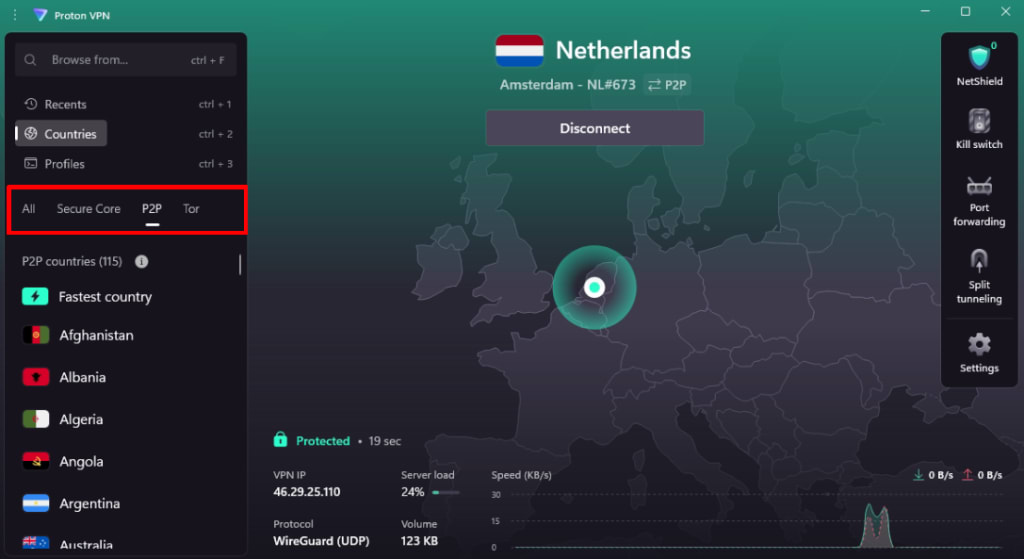
Some Proton VPN servers have special uses. These are:
- Secure Core: Our ultra-secure double-VPN solution
- P2P: Our dedicated P2P and torrenting servers
- Tor: Connect to the Tor network through Proton VPN without the need for Tor Browser
Select the relevant filter tab to see a list of countries and servers that support the feature.
If you simply select a Secure Core country, your connection will be automatically routed via the best Secure Core server location (Iceland, Sweden, or Switzerland) for your chosen country. If you prefer, click ⏷ next to the country to select a Secure Core server location from the dropdown list. (Note that not all Secure Core countries support all Secure Core server locations.)
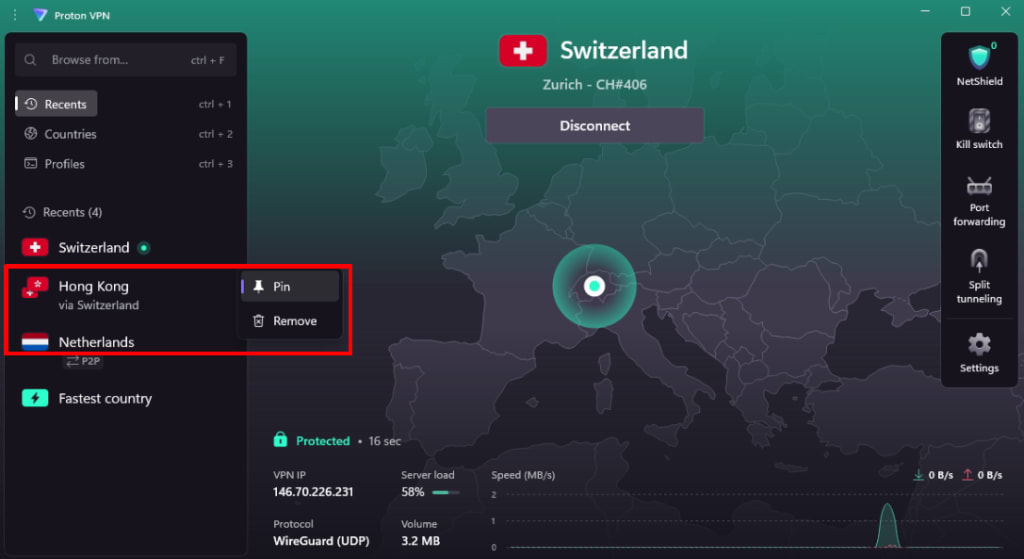
Recent and pinned connections
On the left of the Home screen, you can see a list of countries, cities, servers, and profiles (see below) that you recently connected to. Simply click on one of these to connect in the same way as you did before.
If you regularly connect in a certain way, you can pin any connection to the Recents list for easy access. To do this, ⋮ next to the country, city, server, or profile → Pin.
Profiles
For even greater control over connections you use often, you can create a VPN connection profile. Select the Profiles list to see profiles that you’ve already created, or click +New profile to create a new one.
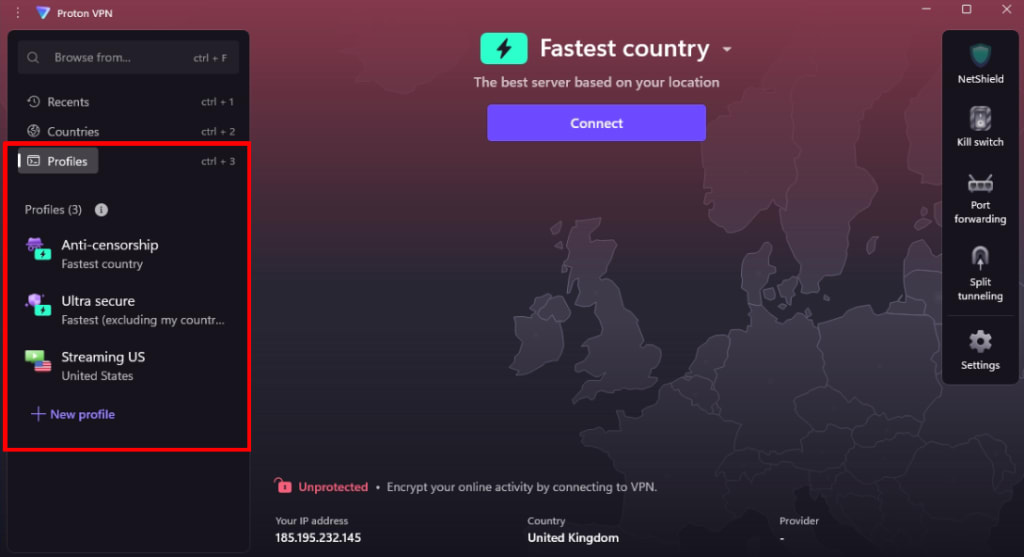
Learn more about creating and using VPN connection profiles
Proton VPN’s mission is to make privacy the default for everyone, and we will always offer a 100% free service for those who need us the most. However, to access many of our optional advanced features, you’ll need a paid Proton VPN plan. Features, settings, and servers that require a paid Proton VPN plan are clearly marked with a Proton+ badge. To access these features and support our mission, please consider upgrading to a paid Proton VPN plan.
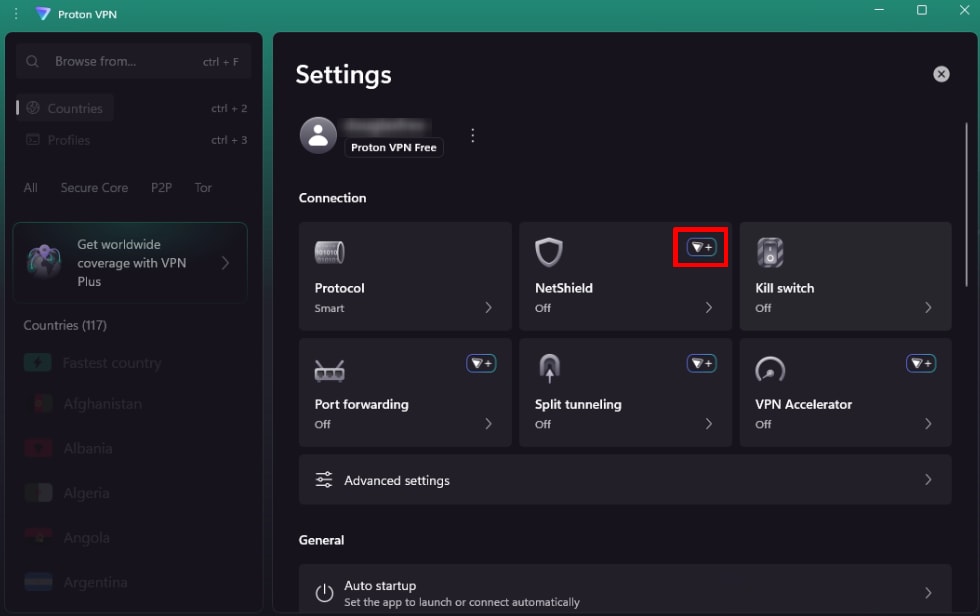
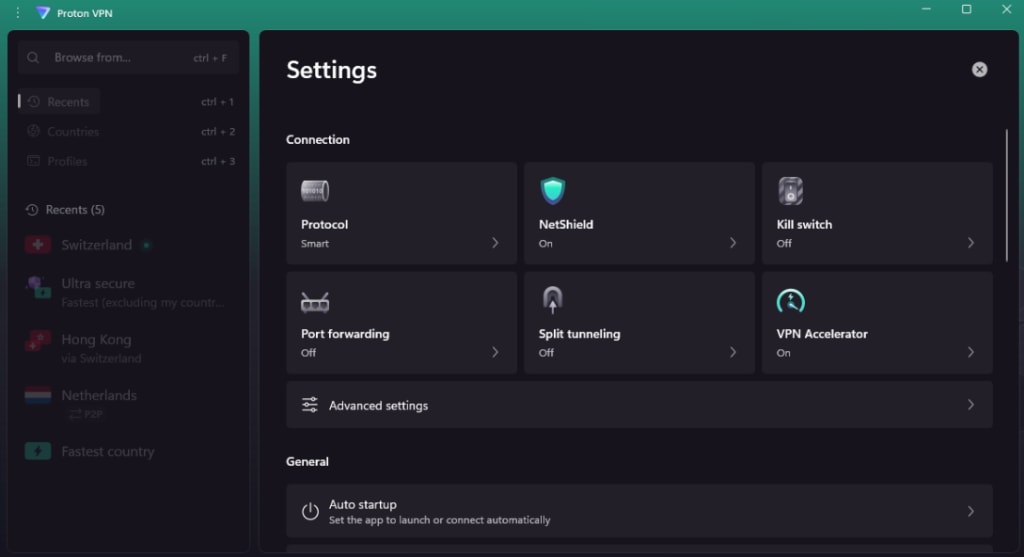
Proton VPN Settings
Select ⚙ Settings access the Proton VPN for Windows app’s more advanced settings and features. For convenience, we’ve also provided shortcuts to some of these advanced features on the Home page.
You can now configure the Proton VPN’s apps settings and advanced features.
Your Proton VPN account
Click on your Proton VPN account to:
- Manage your account (will open account.protonvpn.com in your default web browser)
- Sign out
- Exit the app
Connection
- Protocol
- NetShield Ad-blocker
- Kill switch and advanced kill switch
- Port forwarding
- Split tunneling
- VPN Accelerator
Advanced settings:
- Custom DNS servers
- NAT type
- OpenVPN network driver (TUN or TAP – you should leave this alone unless you know what you’re doing)
- Disable IPv6 traffic
- Alternative routing(new window)
- Allow LAN connections
General
- Auto startup (configure whether the app auto connects when you start Windows and whether it auto connects when the app starts)
- Default connection (customize what happens when you click the Connect button)
- Notifications (configure whether you receive notifications from our app)
- Language (select your preferred language)
- Theme (dark, light, or follow your system’s default theme)
- Beta access
- Automatic updates
Support
- Support center (opens the Proton VPN support pages in your browser)
- Report an issue
- Debug logs (our customer support staff may request these to help troubleshoot problems)
- About (app version number, licensing information, and a changelog)
- Developer tools (leave these alone unless you know what you’re doing)
Improve Proton
At the bottom of the page, you can find a Restore default settings button that will restore the app to its default settings.