We discuss how to change the IP address of your Windows 10 or Windows 11 device. This doesn’t change your IP address on the internet, although we’ll look at that as well.
- Changing your IP address on Windows
- How to change your external IP address on Windows
- How to hide your external IP on Windows using Proton VPN
- Change your Windows IP address using a VPN router
- How to change your local IP address on Windows
- Why change your local IP address on Windows?
- Local IPv4 vs. IPv6 addresses
- How to change your IP address on Windows 10
- How to change your IP address on Windows 11
- Frequently asked questions
Changing your IP address on Windows
An IP address uniquely identifies every device connected directly to a network. Networks can be large or small. Large networks are known as wide area networks (WANs), the most notable example being the internet.
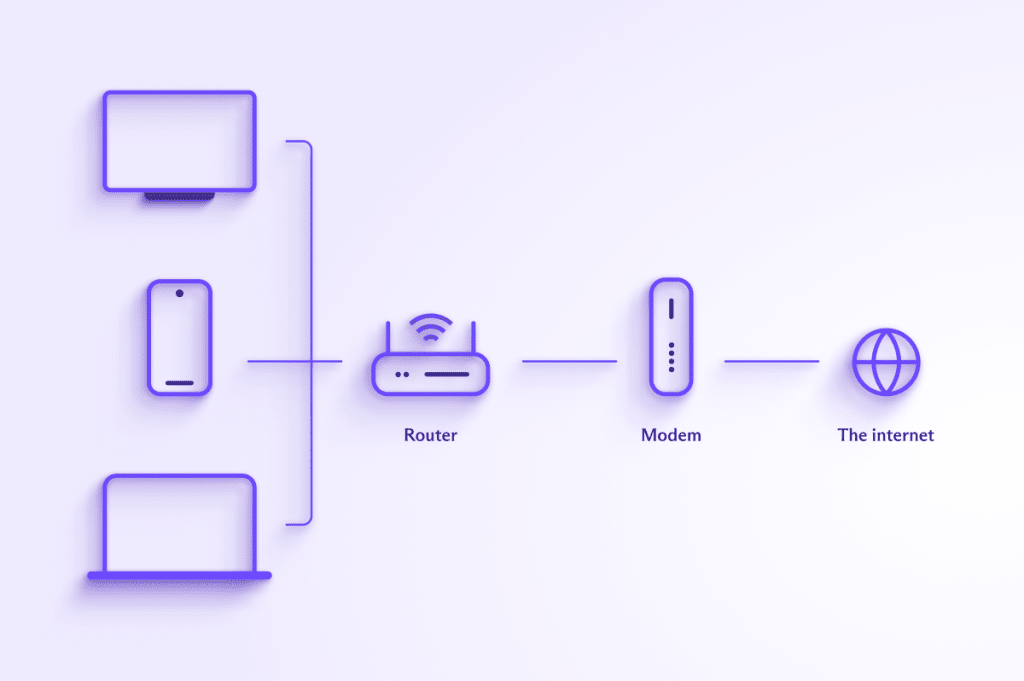
Local area networks (LANs) are small networks that connect devices within a limited area, such as a home, office, or school. Devices connected to a local area network usually connect to the internet via a router and modem.
In this article, we look both at how to change your Windows device’s external IP address that websites, P2P peers, and apps see and also how to change its local IP address that other devices on your local area network use to identify it.
- How to change your external IP address on Windows
- How to change your local IP address on Windows
How to change your external IP address on Windows
Your external IP address is the IP address you use to connect to the internet. It’s the IP address that anyone on the internet sees, including websites, P2P peers, and the backend servers that your apps connect to. Your external IP address is assigned to you by your internet service provider (ISP).

Most Windows devices connect indirectly to the internet via a WiFi or wired Ethernet connection to a router. The router then connects to a modem (these two are often combined into the same device), which connects to the internet.
In this scenario, your Windows PC’s external IP address that anyone on the internet can see is actually your router’sIP address. All devices that connect to the internet via that router will share the same external IP address (unless you somehow hide your IP address).
There are several ways to hide your Windows device’s IP address when using the internet, including:
All of these methods route your internet connection to another computer so that you appear to access the internet from that computer’s IP address (in the case of Tor, your connection is routed through a series of “nodes”, so you appear to access the internet from the last “exit node” in the chain). This is known as proxying your connection.
Of these ways to proxy your connection, the most effective, useful, and convenient method is to use a commercial VPN service such as Proton VPN. We are a 100% free VPN service with no logs, no data restrictions, and no artificial speed limits.
We offer this free service because we believe privacy is a fundamental human right that should be available to everyone. If you want to support our mission and access a range of premium features, such as NetShield Ad-blocker, more than 3,000 servers in more than 65 countries, the ability to stream content from around the world, and more, you can sign up for a premium plan.
How to hide your external IP on Windows using Proton VPN
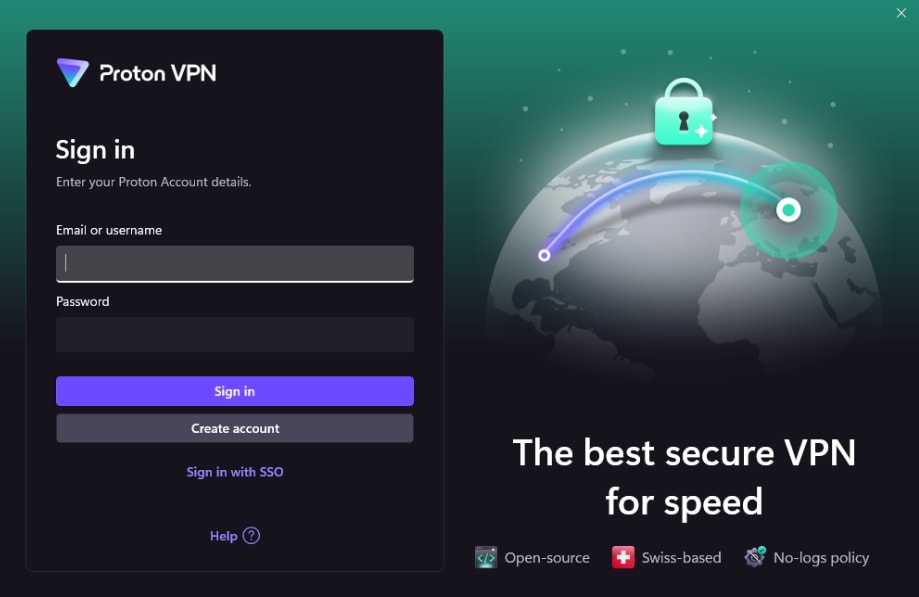
1. Sign up for a free Proton VPN account.
2. Download and install the Proton VPN Windows app
3. Open the app and sign in using your Proton Account username and password.
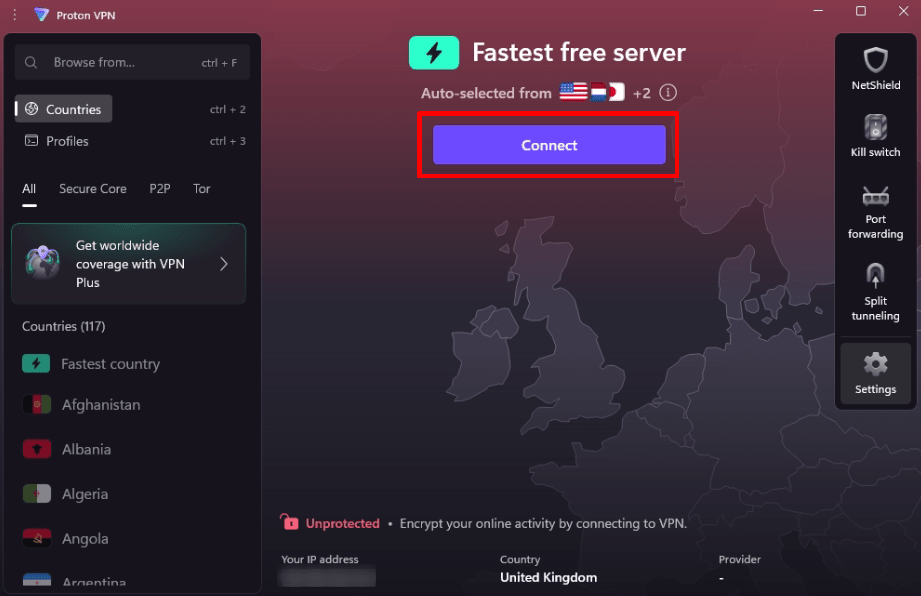
4. Click Connect to let the app pick the best server for your location.
To connect to servers in 110+ countries worldwide, access a wide selection of advanced featured, and support Proton’s mission to make privacy the default for everyone, please consider upgrading to a paid Proton VPN plan.
Your real IP address is now hidden so that it cannot be seen by websites, P2P peers, or other observers on the internet.
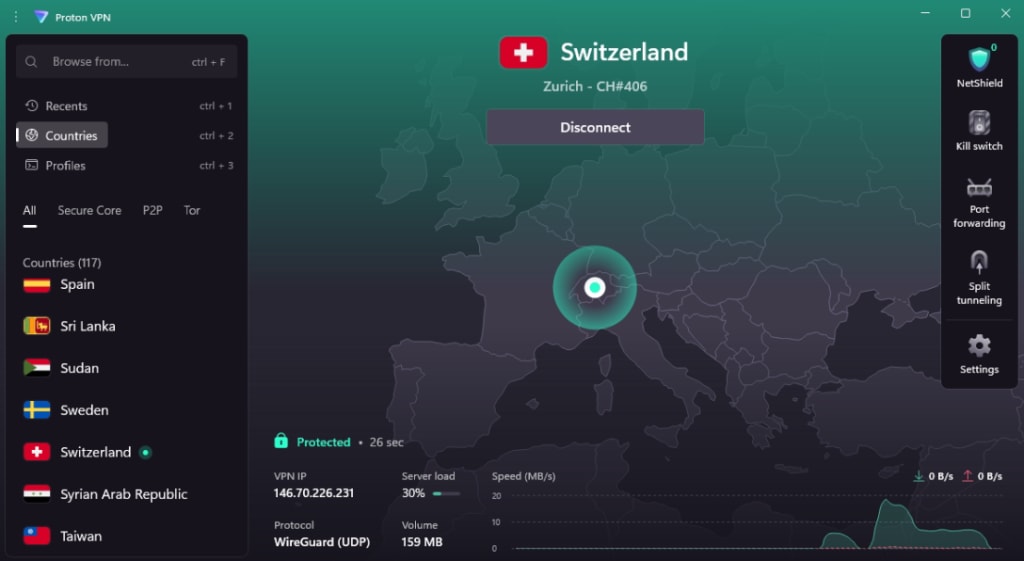
To make sure your IP address changed, visit a website such as our free secure IP scanner(new window) with and without the VPN connection.

Change your Windows IP address using a VPN router
Another way to change the external IP address of your Windows PC is to connect it to a VPN router. This is a router configured to route all devices connected to the internet through it (including Windows devices) through a VPN service such as Proton VPN.
Learn how to configure Proton VPN on your router
How to change your local IP address on Windows
Your local IP address is the IP address that your Windows device uses on your local area network (LAN). Your router uses it to send incoming data to the correct device, and other devices on the same local network can see your device’s local IP address.
A common type of LAN is the home network, where all your household’s laptops, smartphones, tablets, smart devices, games consoles, smart TVs, and other internet-capable devices connect to the internet via a router and modem supplied by your internet service provider (ISP).
Devices connected to a LAN do not connect directly to the internet, so no one on the internet can see their IP addresses. They see your modem’s IP address (unless it’s proxied — see above).
Below, we look at how to change your local IP address on Windows 10 and Windows 11. This changes your devices’ IP address on your LAN but doesn’t affect the IP address seen on the internet because that’s your modem’s IP address.
Why change your local IP address on Windows?
By default, most routers dynamically assign IP addresses to devices on a local network using the Dynamic Host Configuration Protocol (DHCP)(new window).
This means the IP address to your Windows PC may change depending on your network configuration (for example, when you take your Windows laptop out of the house and then return with it).
If other devices on your network access your Windows PC via its IP address, it’s a good idea to configure a static IP for it that your router will not change. For example, this would be useful if you use your Windows device as a media or LAN games server.
Local IPv4 vs IPv6 addresses
Windows 10, Windows 11, and most modern routers can use IPv6. Globally, Internet Protocol version 4 (IPv4) addresses are running out. To solve this problem, the much longer Internet Protocol version 6 (IPv6) address system is being rolled out, which vastly increases the number of addresses available.
However, the local IP addresses issued by your router are for private use only and are not affected by the IPv4 global shortage. So while it is possible to configure your Windows device to use an IPv6 address, there’s little point in doing so.
Learn more about IPv4 vs. IPv6
How to change your local IP address on Windows 10
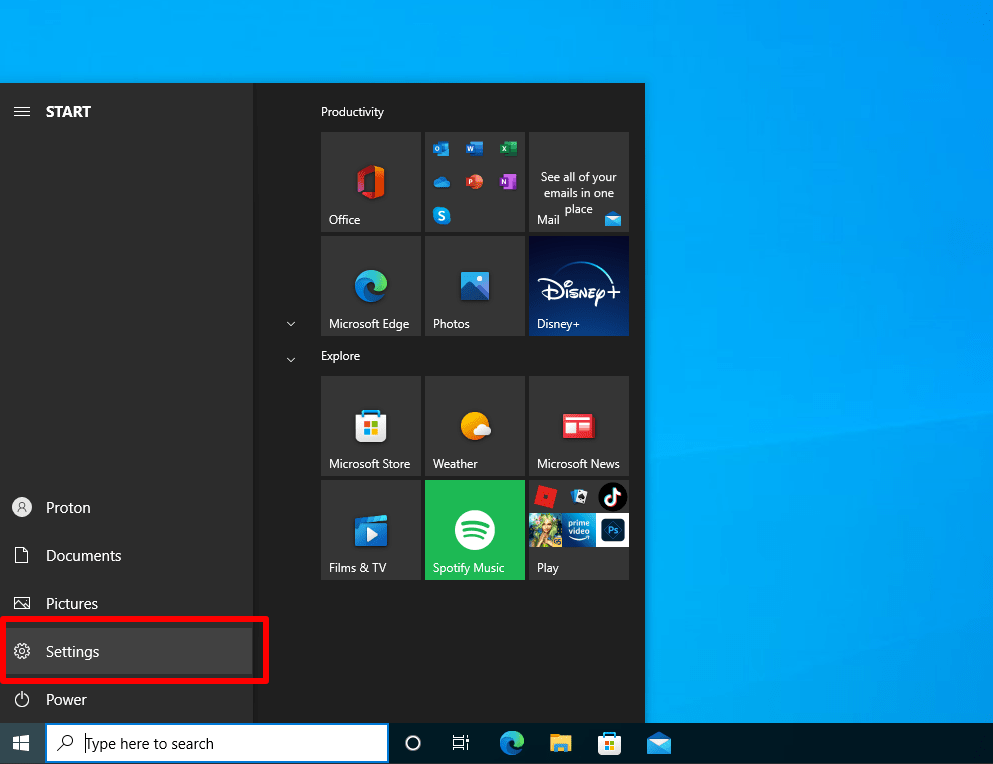
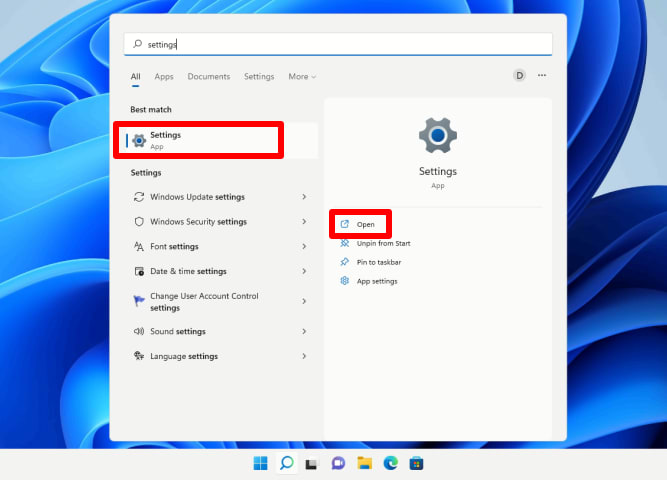
1. Go to Start → Settings
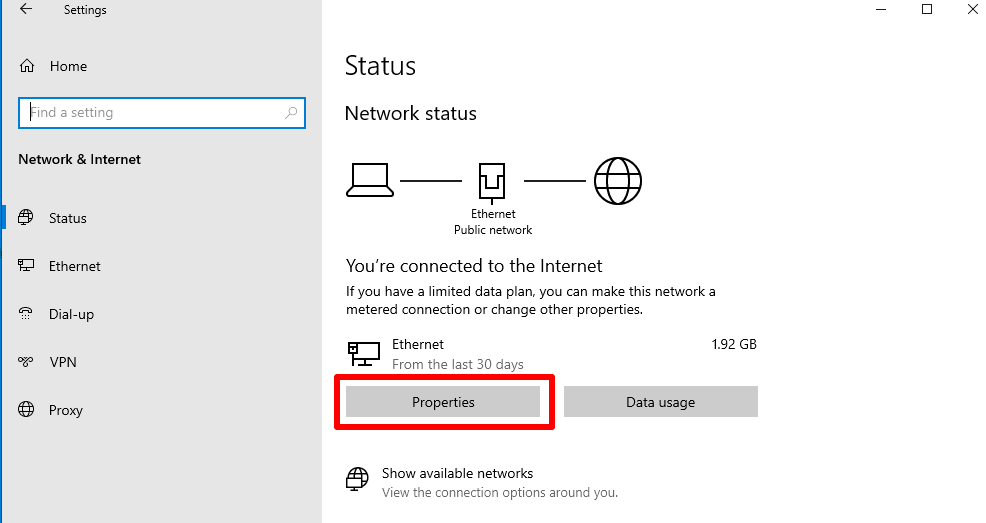
2. Select Network & Internet

3. Select your internet connection (WiFi or Ethernet) and click on Properties.
4. Go to IP settings → IP assignment → Edit.
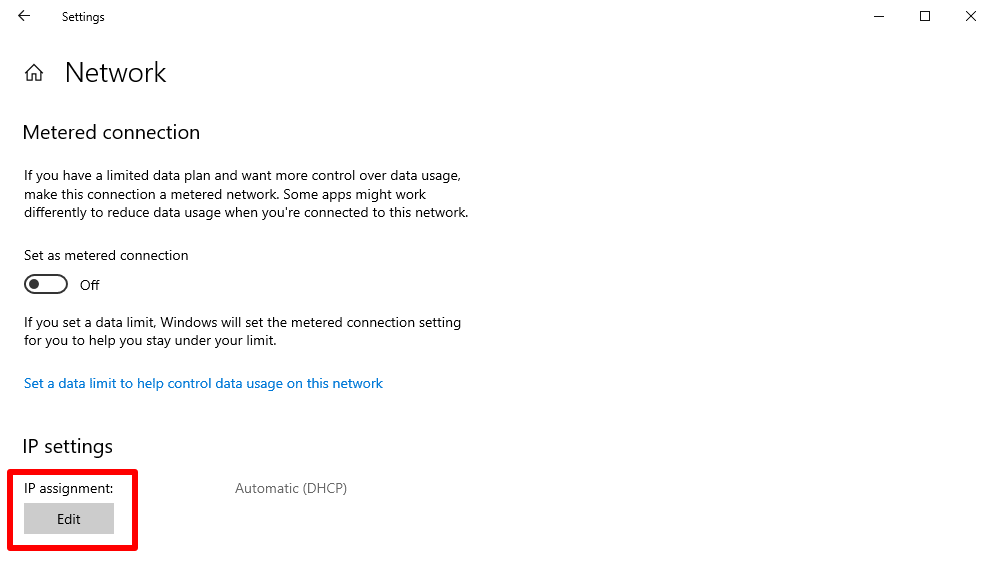
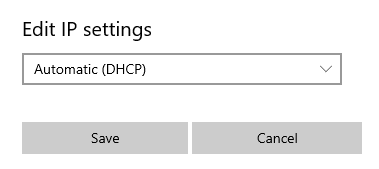
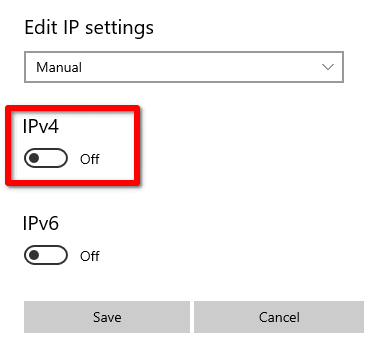
5. Click Automatic (DHCP) and select Manual from the dropdown menu.
6. Toggle the IPv4 switch on.
7. Fill in the IP settings.
- IP address — This can be any numeric value in the 192.168.x.2 – 192.168.x.254 IP address range, where x is the third number (octet) in your Gateway address. For example, if your Gateway address is 192.168.1.1, choose a value in the 192.168.1.2 – 192.168.1.254 IP address range (such as 192.168.1.225). If you have a non-standard Gateway address, the IP address should not be the same as your Gateway address.
- Subnet prefix length — 24
- Gateway — Enter the IP address of the router or modem your PC is connected to. This is usually either 192.168.0.1 or 192.168.1.1
- Preferred DNS — Enter the IP address of a DNS server or DNS service (for example, 9.9.9.9 for Quad9)
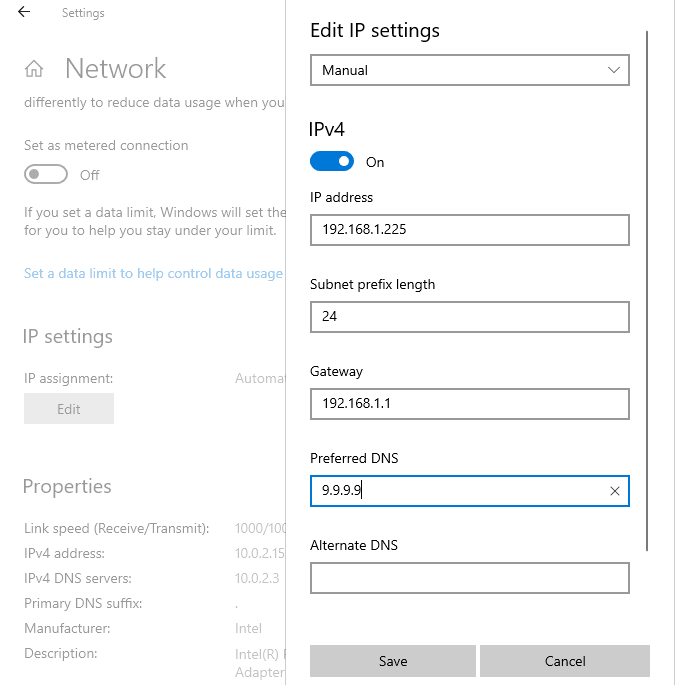
Click Save when you’re done.
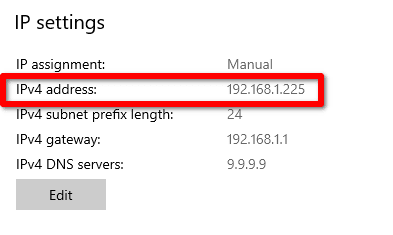
8. You’ve successfully changed your IP address.
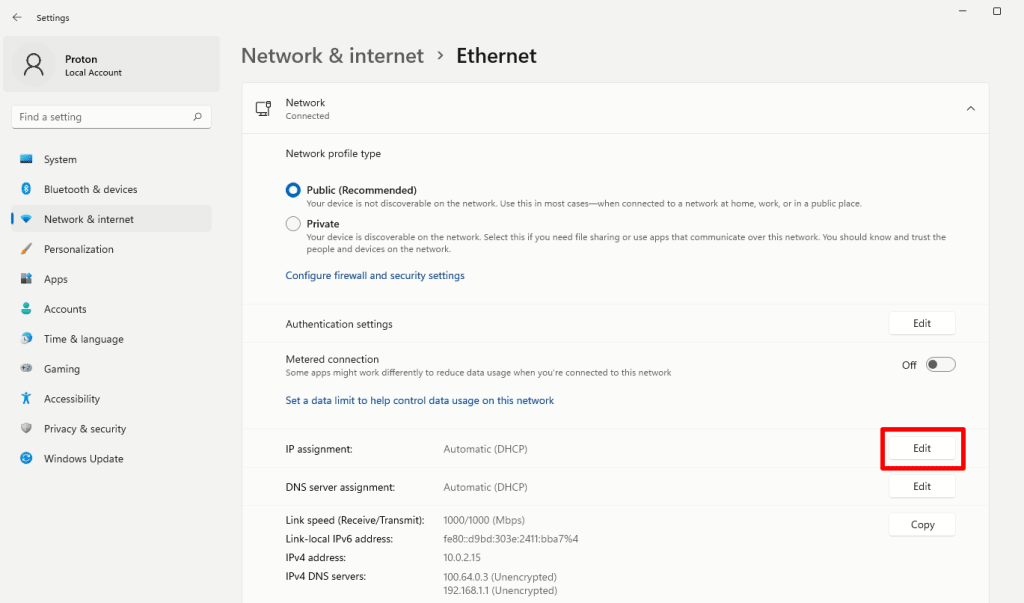
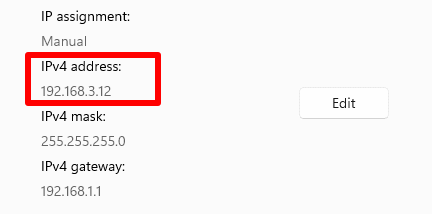
How to change your local IP address on Windows 11
1. Open the Settings app.
2. Go to Network & internet and select your network interface (Ethernet or WiFi).

3. If you have an Ethernet connection, click on IP assignment → Edit.
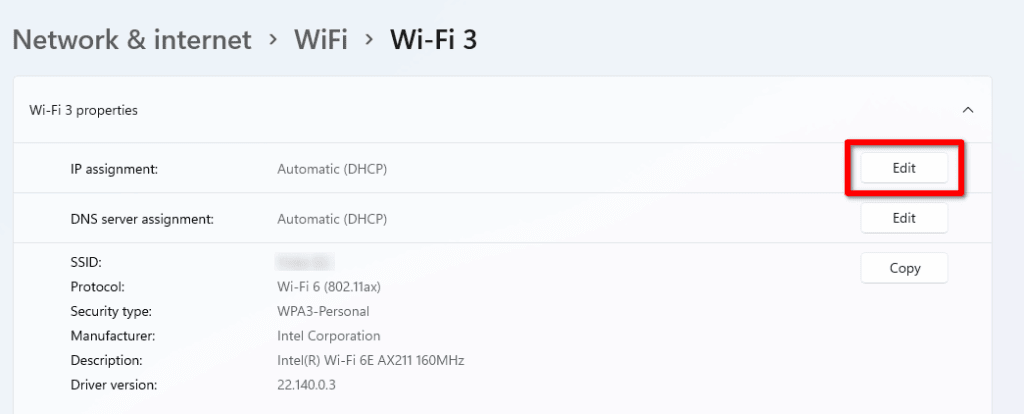
If you have a WiFi connection, click Hardware properties…

Followed by IP assignment → Edit.
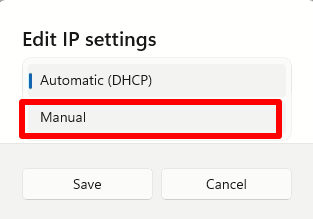
4. Click Automatic (DHCP) and select Manual from the dropdown menu.
5. Toggle the IPv4 switch On.

6. Fill in the IP settings.
- IP address — This can be any numeric value in the 192.168.0.0 – 192.168.255.255 IP address range.
- Subnet mask — If you know your subnet mask address, enter it. If not, enter 255.255.255.0.
- Gateway — Enter the IP address of the router or modem your PC is connected to. This is usually either 192.168.0.1 or 192.168.1.1.
- Preferred DNS — Enter the IP address of a DNS server or DNS service (for example, 9.9.9.9)
- Preferred DNS encryption — Choose the level of DNS encryption you prefer (if DNS server supports it).

Click Save when you’re done.
7. You’ve successfully changed your IP address.
Troubleshooting
If you can no longer connect to the internet after making these changes, there are two possible reasons:
1. Two or more devices on your network have the same IP address
Check the IP addresses of all devices on your network and manually change any that have the same IP address using the instructions above.
2. Incorrect subnet mask
To find the name of your network’s subnet mask, Open the Command Prompt ap or Windows PowerShell app and enter the following command:
ipconfig
Look for the Subnet Mask entry under your Ethernet or Wireless LAN adapter Wi-Fi connection.

Frequently asked questions
To change the external IP address of your laptop or PC that anyone on the internet sees, you’ll need to use an external service such as Tor or Proton VPN.
Proton VPN offers apps for Windows, macOS, Linux, and Chrome OS (via our Android app). If you’re not sure what operating system (the software that underpins how all your apps can run and work together and allows you to interact with your apps) you’re using, then it’s most likely Windows.
This guide also shows you how to change the local IP address on Windows 10 and Windows 11 PCs and laptops. This only changes the IP address of your computer on your local network.
When configuring the IP address on most devices (including Windows 11 devices), you’ll be asked to enter the subnet mask (which in most cases will be 255.255.255.0). On Windows 10, however, you’ll be asked to enter the subnet prefix length instead. A subnet mask of 255.255.255.0 translates into a subnet prefix length of 24 bits, so in most cases, you should enter 24.
If your subnet mask is not 255.255.255.0, you can use a subnet calculator(new window) to determine the correct subnet prefix length for your subnet mask.