How to download WireGuard configuration files
- Reading
- 3 mins
- Category
- Download and installation
WireGuard® is a secure and fast VPN protocol, now available in our Windows, macOS, Android, and iOS/iPadOS apps.
If you are on one of these platforms then we strongly recommend using WireGuard via our apps as this is the easiest way to use WireGuard, and it allows you to benefit from many of Proton VPN’s advanced features. For example:
- Kill switch and permanent kill switch
- Smart protocol
- DNS leak protection(new window)
- Port forwarding (Windows only)
However, Proton VPN’s implementation of WireGuard follows the official open-source specifications for the protocol. This means that advanced users can use any WireGuard client that also matches official specifications to connect to Proton VPN servers using WireGuard. This includes WireGuard clients built into routers.
To configure a third-party WireGuard client for use with Proton VPN, you need to download a WireGuard configuration file.
How to download a WireGuard configuration file
1. Sign in to account.protonvpn.com and go to Downloads → WireGuard configuration.
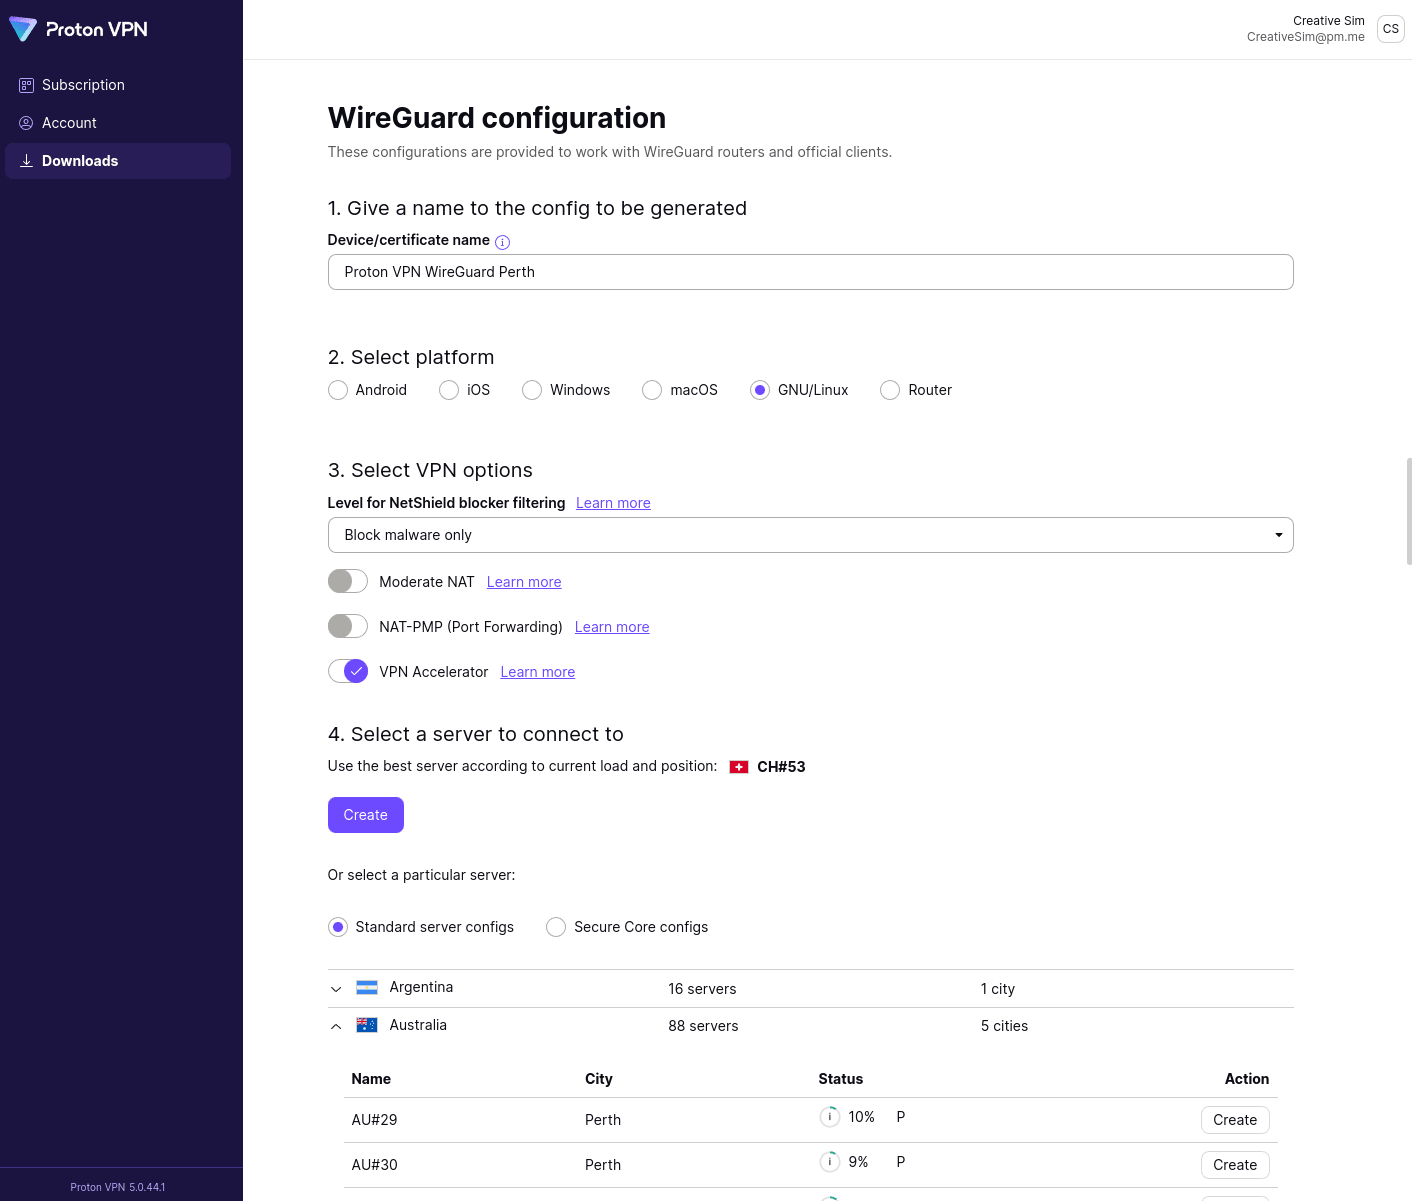
2. Create a name for the config you are about to generate and then select:
- Platform
- VPN options (Netshield Ad-blocker filtering level, Moderate NAT, VPN Accelerator)
- Server to connect to (choose from the list or accept our recommended server based on current server load and your location)
Click Create.
Note that if you are on a Free plan, the only VPN option available to you is VPN Accelerator. To access more advanced features, you can upgrade. To do this, log in to account.protonvpn.com and go to Subscription → Plans.
3. Wait a few seconds for Proton VPN to generate the WireGuard config file. Click Download to save the configuration file as a .conf file.
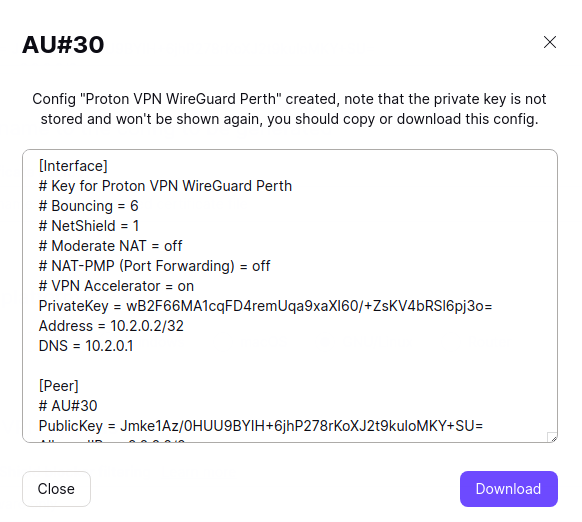
You can now use this file to configure any WireGuard client that conforms to the open-source WireGuard standard for use with Proton VPN.
Sign up now for a Proton VPN account to use WireGuard on third-party clients(new window)
Multiple WireGuard tunnels
If your WireGuard client or router supports the feature, you can deploy multiple WireGuard VPN tunnels simultaneously. This allows you to assign specific traffic (from an app or browser) to a specific tunnel. How to do this is beyond the scope of this support article, so you’ll need to consult your client or router’s documentation for further details.
To use our WireGuard configuration files with such a setup:
- Download two (or more) WireGuard configuration files, as described above.
- Open the second config file in a text editor and edit the following lines:
- Address = 10.3.0.2/32
- DNS = 10.3.0.1
Save the file and close your text editor when you’re done.
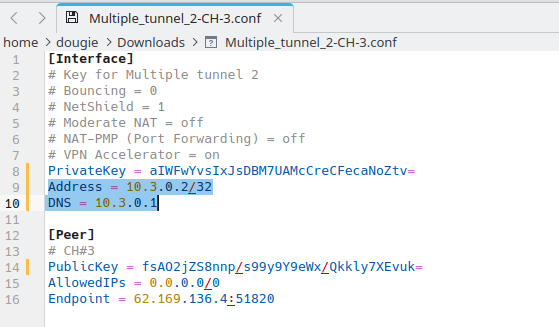
For each addition tunnel, simply increase the second number in the address by one. For example, for three tunnels, use:
- Address = 10.4.0.2/32
- DNS = 10.4.0.1
For four tunnels, use:
- Address = 10.5.0.2/32
- DNS = 10.5.0.1
How to use our WireGuard configuration files
You can use our WireGuard configuration files to manually configure any third party WireGuard client that accepts standard WireGuard configurations. The following guides (which mainly use the official WireGuard apps), can be used as examples: