How to manually configure WireGuard on Linux
- Reading
- 4 mins
- Category
- Linux
WireGuard® is a fast, lightweight, and secure VPN protocol.
You can manually configure WireGuard on Linux using third-party clients. In this article, we’ll show you how to do this using:
However, we strongly recommend using our official Linux GUI app or Linux CLI. These provide the easiest way to connect to our servers and allow you to benefit from many advanced features.
On our Linux GUI app, you can choose between the OpenVPN and WireGuard VPN protocols. Our Linux CLI always uses WireGuard.
Before you get started
Before you start, you’ll need to download a Proton VPN WireGuard configuration file.
- Sign in to account.protonvpn.com, go to Downloads → WireGuard configuration, and download a WireGuard configuration file.
- WireGuard can be picky about the length of .conf names, so please ensure the the downloaded .conf file name is under 15 characters. You may need to rename the default suggested name to achieve this.
- All our current WireGuard configurations support IPv6 connections. If you’re using an older config file, please download a new one.
Learn how to download a WireGuard configuration file from Proton VPN
NetworkManager
NetworkManager is installed by default on most Linux distributions and desktop environments, and is a more convenient way to manage your WireGuard connections than wg-quick.
There are two ways use NetworkManager with WireGuard:
Using a GUI
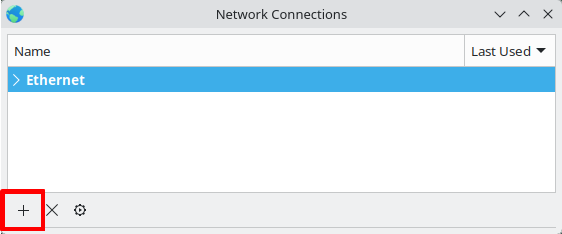
1. Open a terminal and run nm-connection-editor. If the command doesn’t exist, install the nm-connection-editor package using your system’s package manager and try again.
2. Click the plus button (+).
3. Select Import a saved VPN configuration from the dropdown menu and click Create…
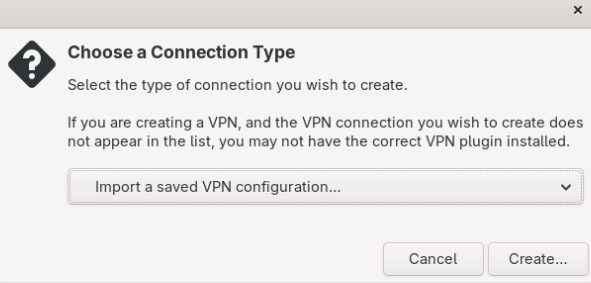
4. Locate the WireGuard .conf file you downloaded and click Open.
5. Click Save.
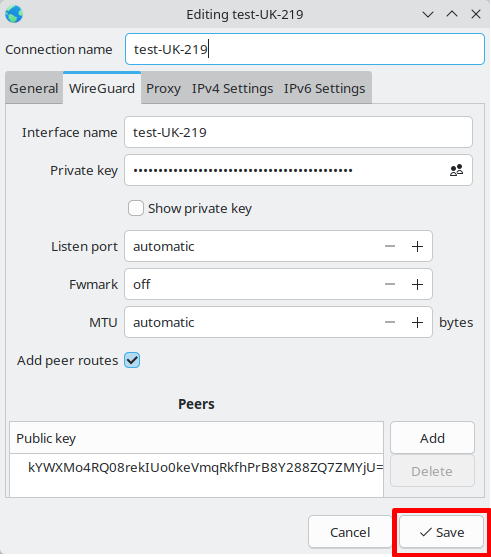
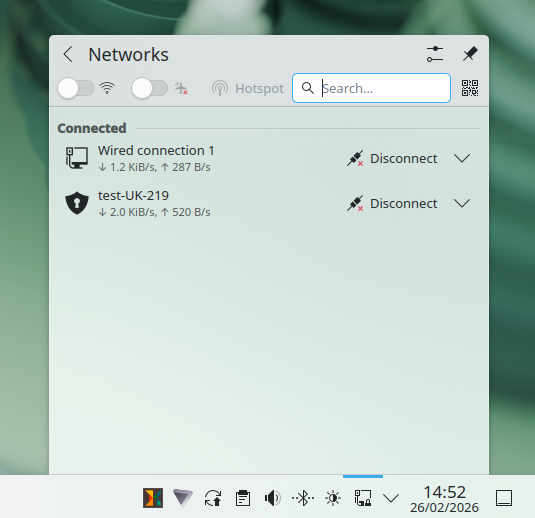
You can now manage your WireGuard connection directly from your desktop environment’s Network Manager GUI implementation.
To make edits to your connection in the future, run nm-connection-editor and click the Edit button.

If you’re on a desktop environment that doesn’t offer a NetworkManager GUI implementation, you can use the nm-applet tray GUI app for a simple way to manage your connections. Alternatively, you can use NetworkManager via the command line. Any WireGuard configs you imported via nm-connection-editor will be available in the terminal, and vice versa.
Using a CLI
Open a terminal and run:
nmcli conn import type wireguard file [filename]
The filename should be the WireGuard .conf file you downloaded. For example:
nmcli conn import type wireguard file proton-238.conf
Running this command automatically connects to the Proton VPN server. To connect again, run:
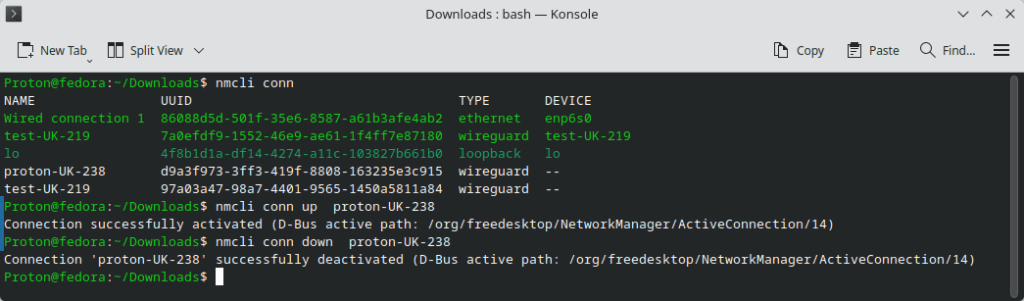
nmcli conn up [connection]
For example:
nmcli conn up proton-UK-238
To disconnect, run:
nmcli conn down [connection]
For example:
nmcli conn down test-UK-238
You can list available connections using the nmcli conn command.
wg-quick
wg-quick is the official WireGuard VPN CLI tool for Linux. It’s particularly useful if you’re running a minimal Linux distribution without NetworkManager installed.
1. Install(new window) wg-quick(new window) for your distro.
2. Move the configuration file you downloaded to the /etc/wireguard/ directory.
3. In a terminal window, enter:
sudo wg-quick up [the name of the configuration file, excluding the .conf suffix]
For example, if your configuration file is named swiss1-CH-5.conf, enter:
sudo wg-quick up swiss1-CH-5

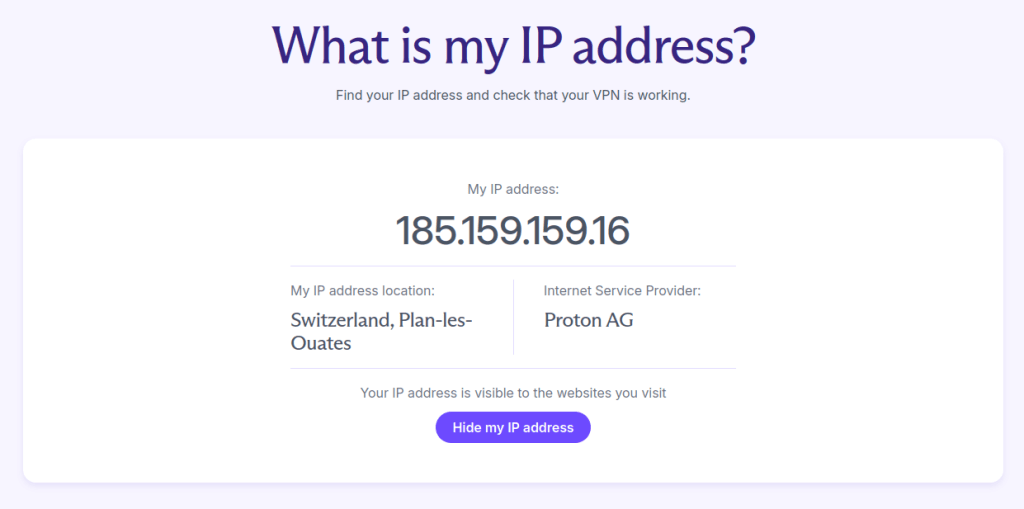
Your privacy is now protected by Proton VPN! To verify that the connection is running, enter:
sudo wg
You can also visit our free secure IP scanner to confirm that everything is working correctly.
To end the VPN session, enter:
sudo wg-quick down [the name of the configuration file, excluding the .conf suffix]
For example:
sudo wg-quick down swiss1-CH-5