


P2P (peer-to-peer) servers
- Reading
- 5 mins
- Category
- Get started
Proton VPN’s P2P servers support peer-to-peer file sharing. This allows you to torrent while hiding your real IP address from people sharing the same files. Learn more about torrenting
| Plans | Platforms |
| All paid Proton VPN plans. Get Plus | Windows, macOS, Android, Linux |
Note: P2P servers are also available on our iPhone and iPad apps. However, torrent client apps are not currently allowed on the iOS App Store.
In this article
How P2P works
Proton VPN’s P2P servers are specially configured to support peer-to-peer traffic, including BitTorrent connections.
When you connect to a P2P server, your torrent passes through the VPN server. Other people downloading and sharing the same files see the VPN server’s IP address instead of your real IP address.
P2P servers are marked with the ⇄ icon in Proton VPN apps.
Connect to a P2P server
Windows and Android
1. Open Proton VPN.
2. Go to Countries and select the P2P tab.
3. Connect to a country, city, or server from the list.
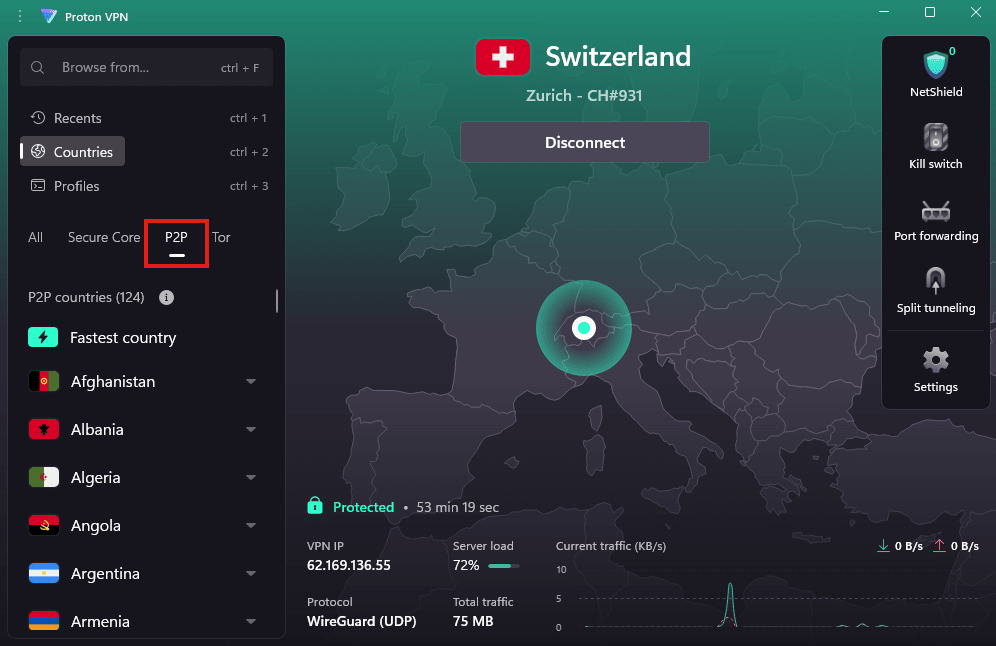
You are now connected to a P2P server and can torrent safely.
macOS and Linux
1. Open Proton VPN and go to Countries.
2. Connect to any country, city, or server marked with the P2P icon ( ⇄).

You are now connected to a P2P server and can torrent safely.
Bind torrent traffic to Proton VPN
Some BitTorrent apps (like qBittorrent and Vuze) let you bind torrent traffic to Proton VPN so it only works while connected to the VPN. Binding stops torrent traffic from being sent or received outside the VPN connection.
It only works if the correct connection is selected in the torrent client settings. Selecting your regular internet connection instead of Proton VPN can expose your real IP address while torrenting, even when kill switch is enabled.
How to bind your BitTorrent client to Proton VPN
The instructions below use qBittorrent as an example torrent client, but binding works with any BitTorrent client that supports Network interface settings.
Note: qBittorrent uses a setting called Network interface to control which connection torrent traffic uses. By default, this is set to Any interface, which means qBittorrent is not restricted to Proton VPN. To prevent IP leaks, select the Proton VPN interface in the Network interface settings.
Windows
1. Open Proton VPN and connect to any server.
2. Note the VPN protocol.

3. Open qBittorrent, go to Tools → Options… → Advanced → Network interface.
4. Select:
- ProtonVPN TUN if you are using OpenVPN.
- ProtonVPN if you are using WireGuard® or Stealth.
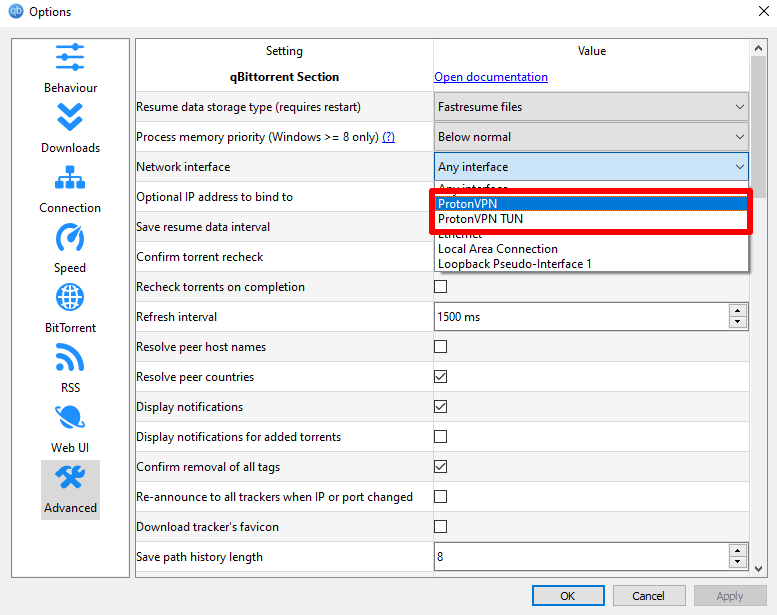
5. Click OK.
Note: If you change VPN protocols, you will also need to update the Network interface setting in qBittorrent.
macOS
1. Disconnect Proton VPN.
2. Open Terminal and enter:
ifconfig
Leave this Terminal window open.
3. Open Proton VPN and connect to any server.
4. Open a new Terminal window and enter:
ifconfig
5. Compare the output from Terminal before and after connecting to Proton VPN. Look for a new interface that only appears while connected to Proton VPN. This is the Proton VPN interface.
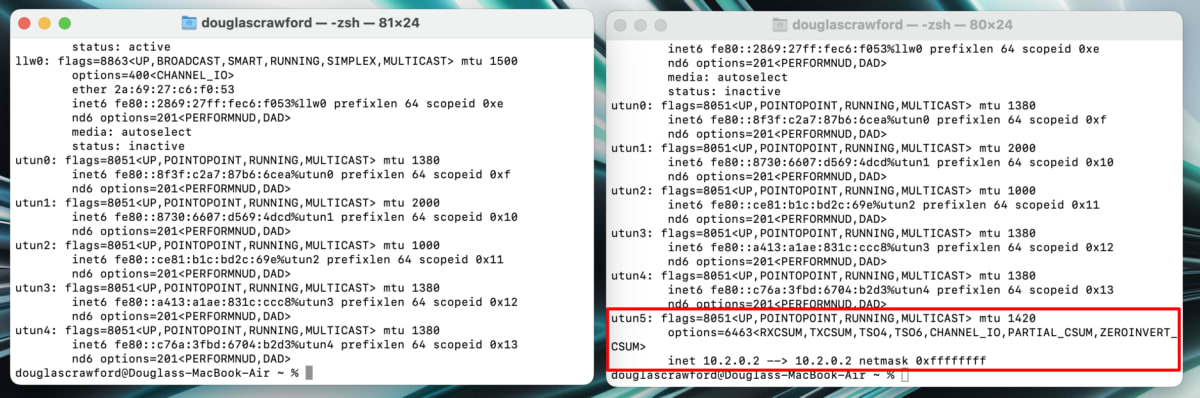
In the example above, the VPN interface is called utun5.
6. Open qBittorrent, go to the menu bar → qBittorrent → Preferences → Advanced → Network interface
7. In the dropdown menu, select the interface identified in step 5.
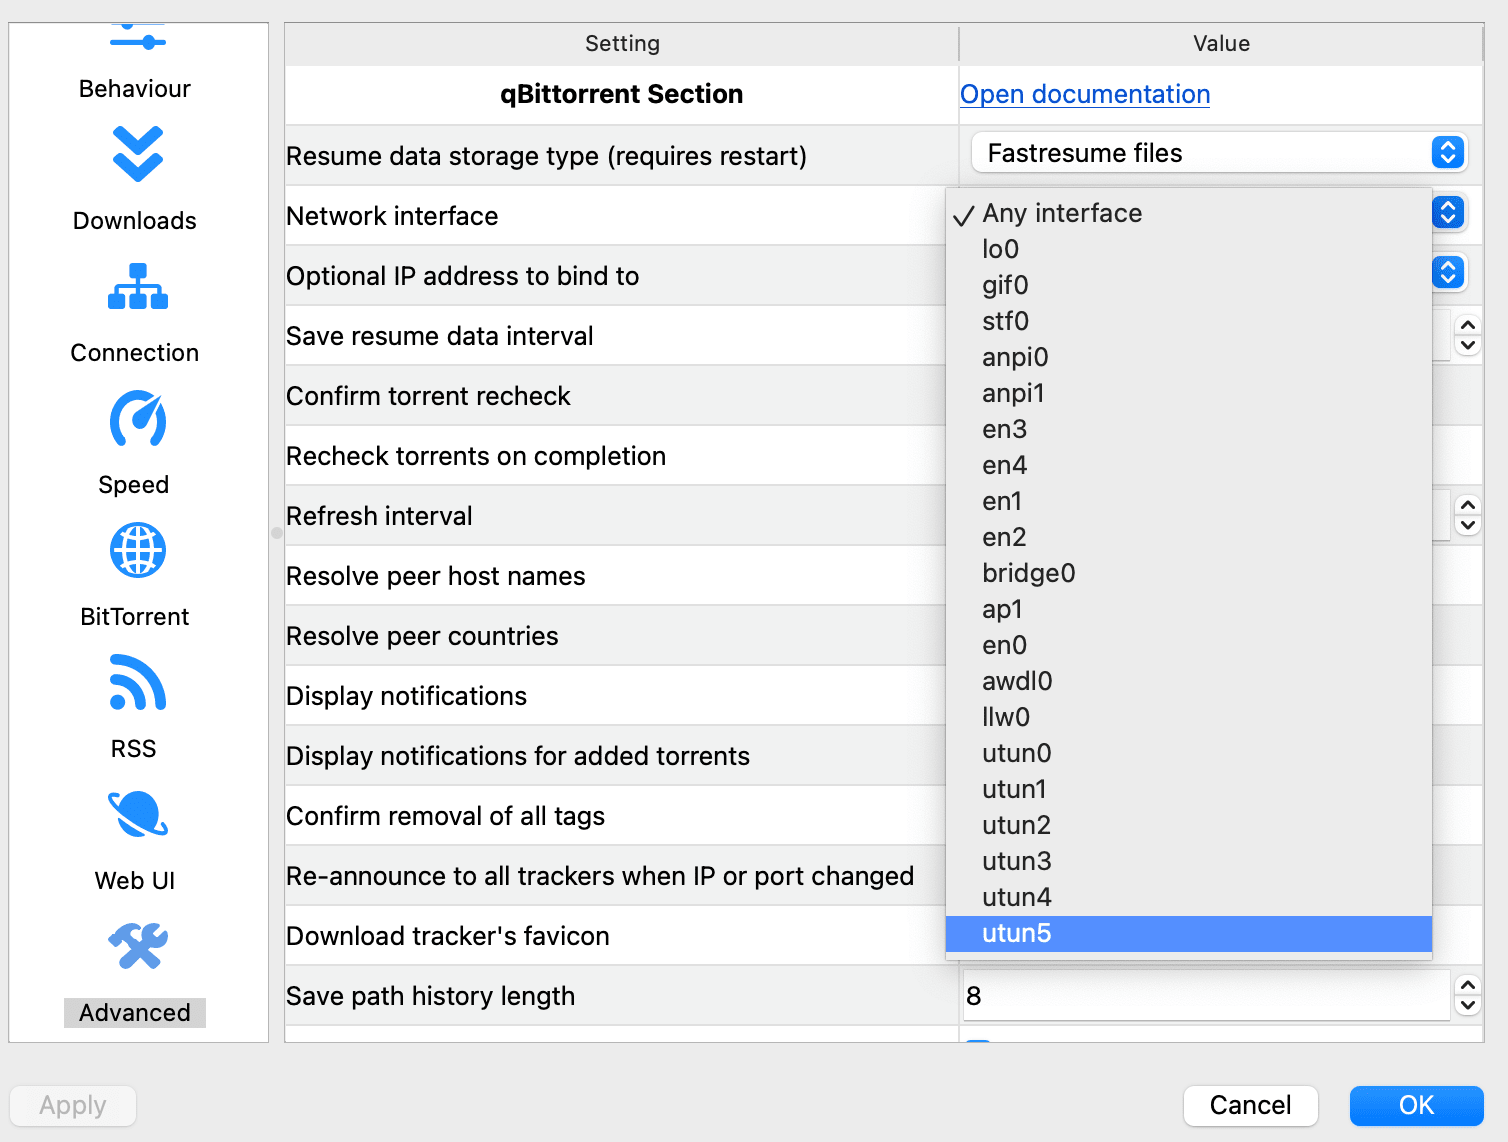
8. Click OK.
Note that if you change VPN protocols, you will also need to change the Network interface settings again in qBittorrent.
Linux
1. Connect to Proton VPN.
2. Open qBittorrent, go to Tools → Preferences → Advanced → Network interface
3. Select:
- tun0 if you are using OpenVPN.
- proton0 if you are using WireGuard®.
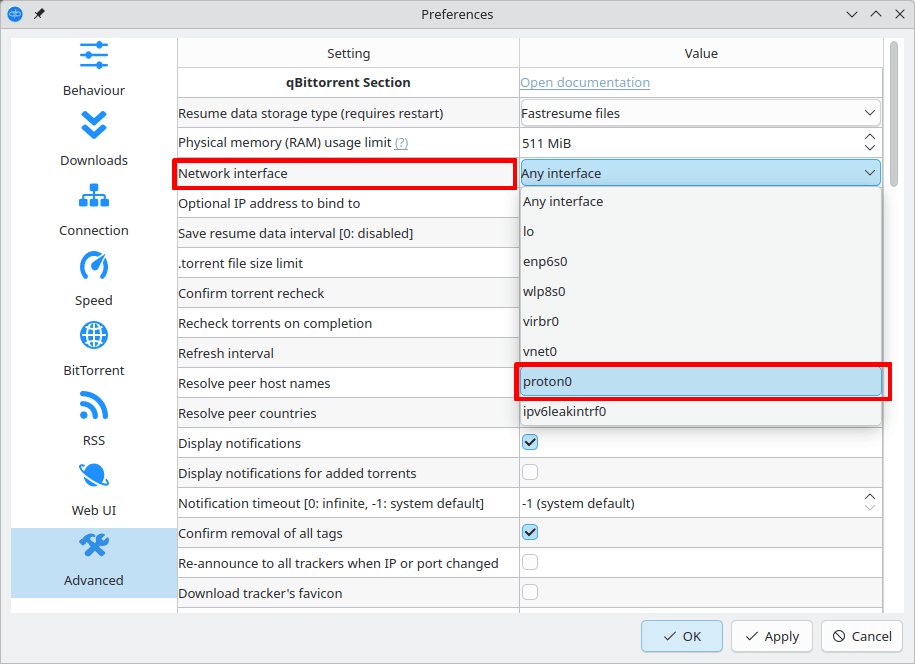
4. Click OK.
Note: If you change VPN protocols, you will also need to update the Network interface setting in qBittorrent.