How to set up SSO for Proton VPN using Google
- Reading
- 0 mins
- Category
- Get started
Our Proton VPN for Business plans support single sign-on (SSO) as an early access (beta) feature. In this article, we look at how to set up SSO on Proton VPN for Business using Google as your identity provider (IdP).
How to set up SSO for Proton VPN using Google
Proton VPN currently supports SSO using Security Assertion Markup Language(new window) (SAML) 2.0, an XML(new window)-based open standard for transferring data that verifies your identity between an IdP and SaaS applications.
Before you start, you’ll need the following:
- A Proton VPN for Business account with administrator privileges
- A Google Workspace(new window) admin account.
Once you have a Google Account, you’ll need to configure it for Proton VPN. You can then configure SAML on your Proton VPN for Business account.
Here’s what we’ll cover next:
- How to configure Proton VPN on Google
- How to configure SAML SSO on your Proton VPN for Business account
- How to add SSO users to Google
- How to use SSO to sign in to Proton VPN
- How to manage SSO for Proton VPN
How to configure Proton VPN on Google
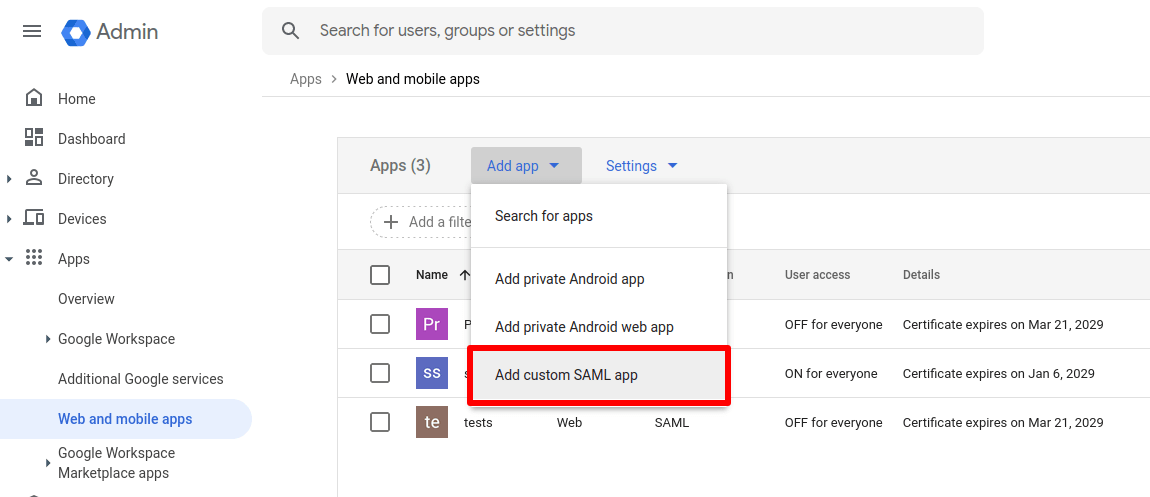
1. Log in to your Google Account(new window) and go to Apps → Web and mobile apps → Add app → Add custom SAML app.
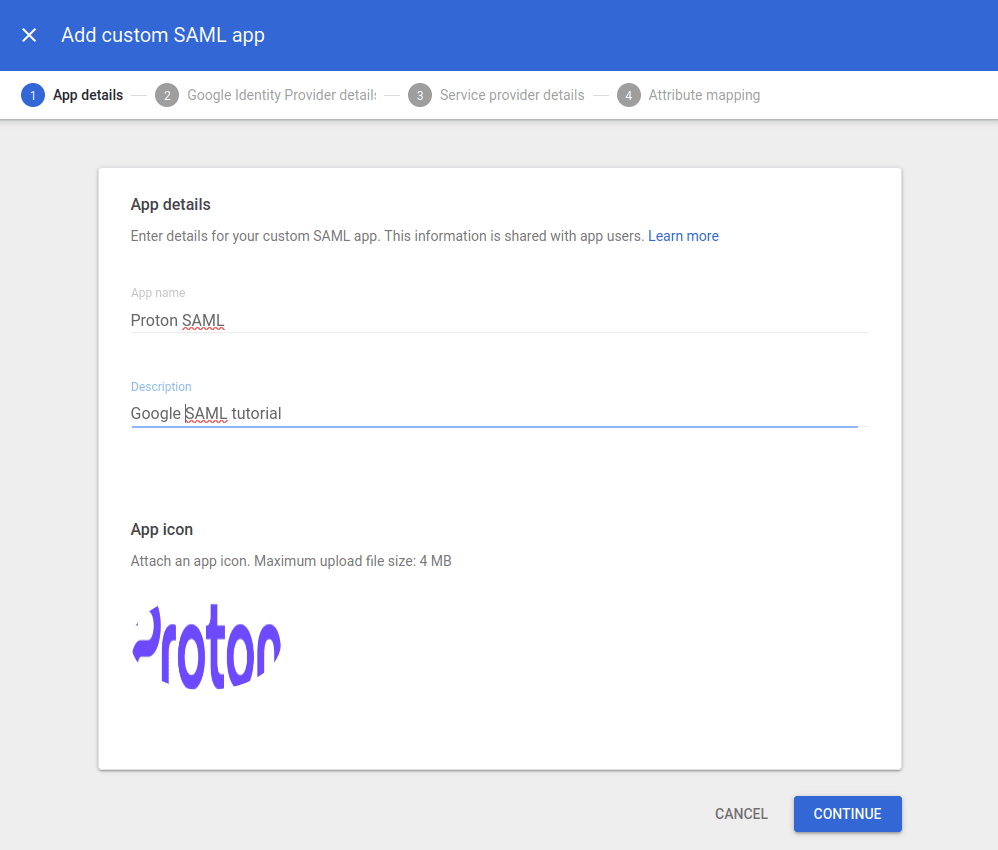
2. Give your app a name, a description (optional), and upload an app icon for it (also optional). Click Continue when you’re ready.
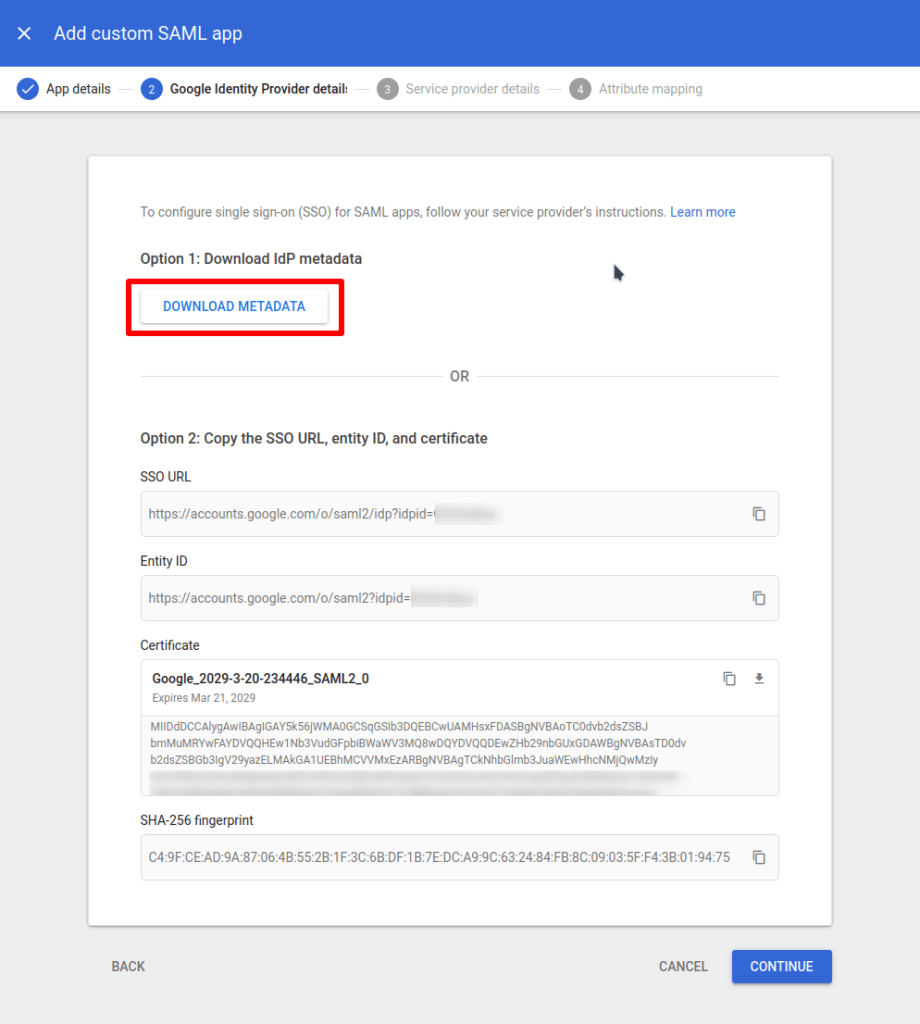
3. Click Download metadata. This will download an XML file that you’ll upload to your Proton Account later in the setup process (see step 5 under How to configure SAML SSO on your Proton VPN for Business account).
Click Continue when you’re ready.
4. Enter the following information:
- ACS URL: https://sso.proton.me/auth/saml(new window)
- Audience URI (SP Entity ID): https://sso.proton.me/sp(new window)
- Signed response: selected
- Name ID format: EMAIL
Click Continue when you’re ready.

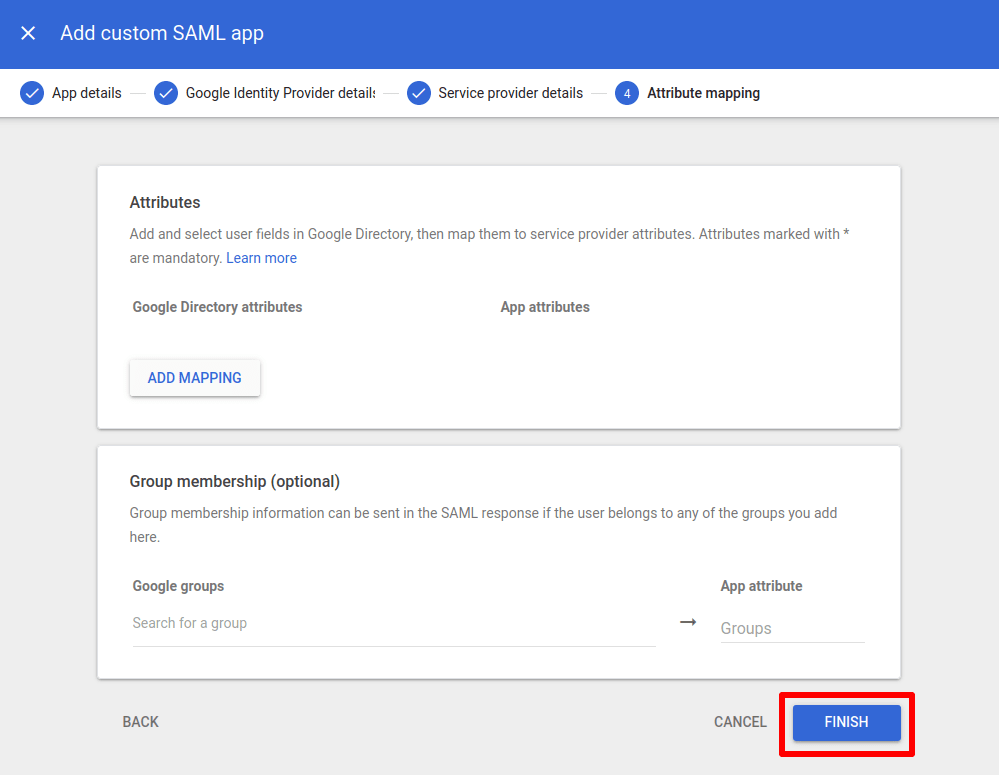
5. On the Attribute mapping screen, you can configure attributes and group membership options (both optional). If you’re unsure about these, just click Finish.
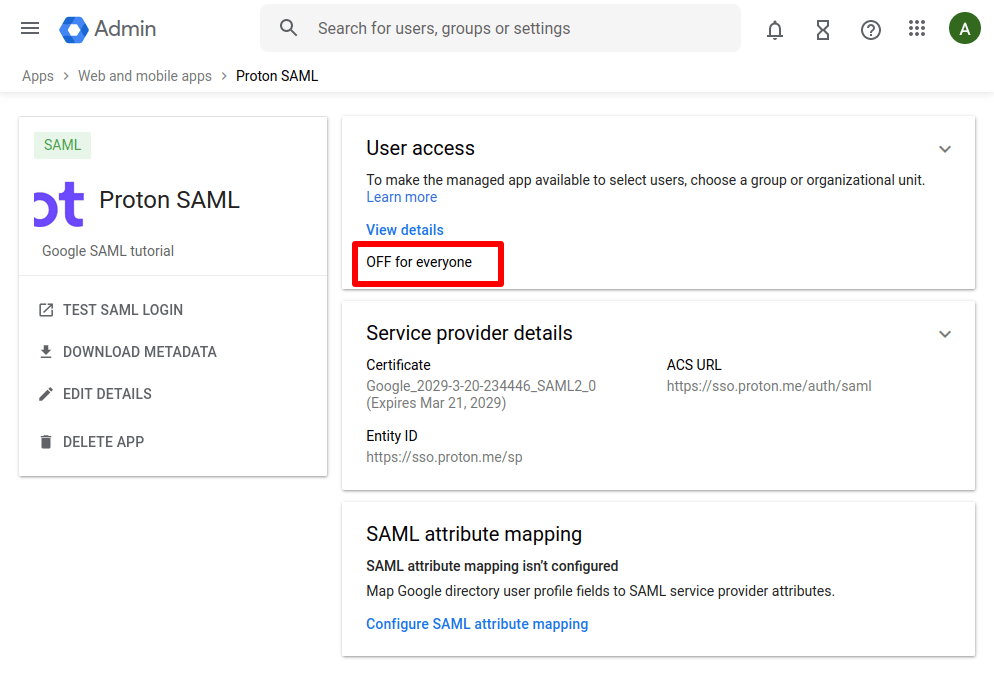
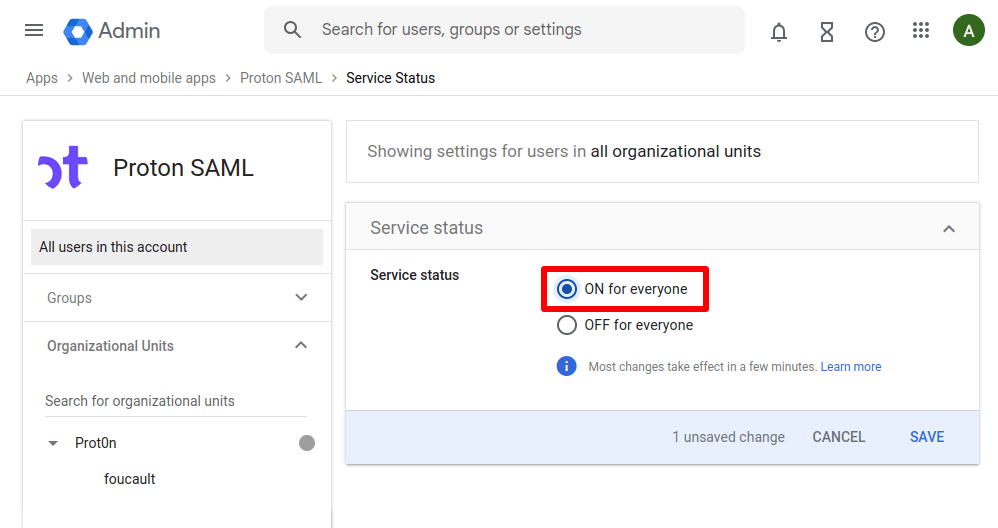
6. You’ve now created a SAML integration for Proton VPN. However, to use it, you need to turn it ON for everyone. To do this, click OFF for everyone…
Then select ON for everyone and click SAVE.
(To turn your app on at a later time, go to Apps → Web and mobile apps → click on the app.)
How to configure SAML SSO on your Proton VPN for Business account
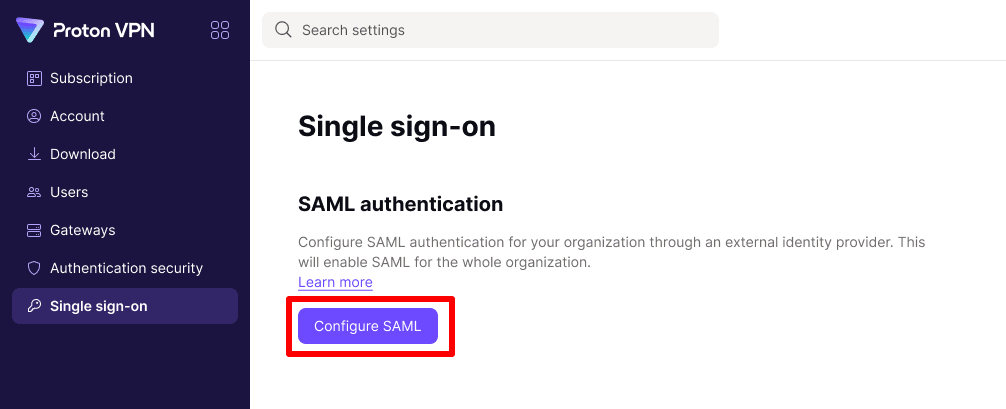
1. Log in to your Proton VPN for Business administrator account at account.protonvpn.com and go to ⚙ → Single sign-on → SAML authentication → Configure SAML.
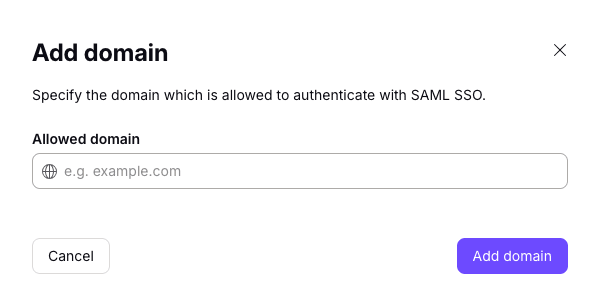
2. Add your organization’s domain name and click Add domain.
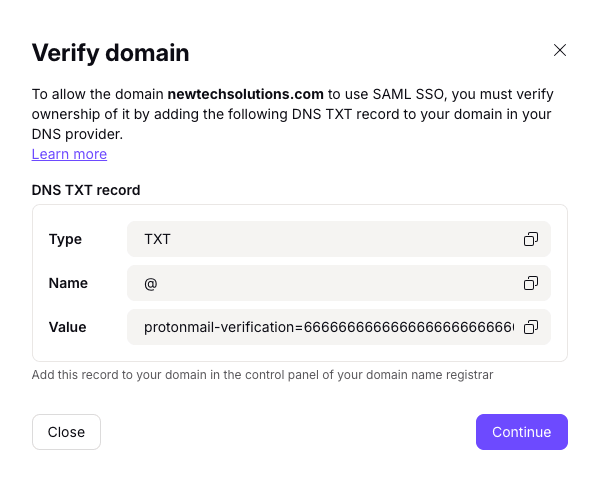
3. Verify the domain for your identity provider. To do this, log in to your domain provider’s web portal and enter the DNS TXT record(new window) displayed on this screen.
Back at account.protonvpn.com, click Continue once you’ve done this.
4. A screen will show you the endpoints needed by Google. However, we’ve already entered these (see step 4 of Configure Proton VPN on Google), so just click Continue.
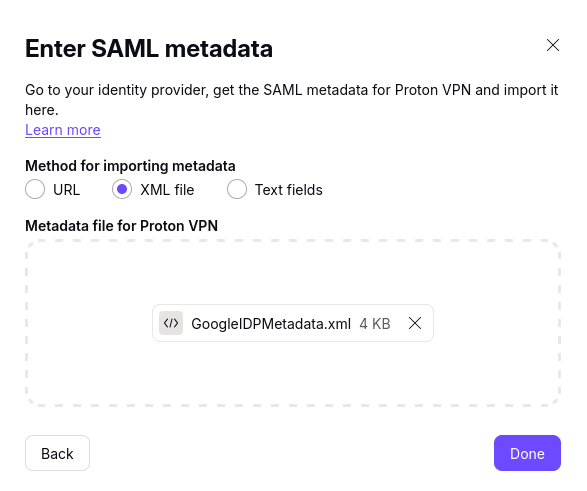
5. Import the metadata file you downloaded from Google in step 3 of Configure Proton VPN on Google. To do this, select XML and either drag the XML file to the field provided or click Select file and locate the file using your system’s default file manager.
Click Done when you’re ready.
SSO using Google should now be configured on your Proton VPN for Business account.

How to add SSO users in Google
Before your users can sign in to our organization using SSO, you’ll need to add them to Google.
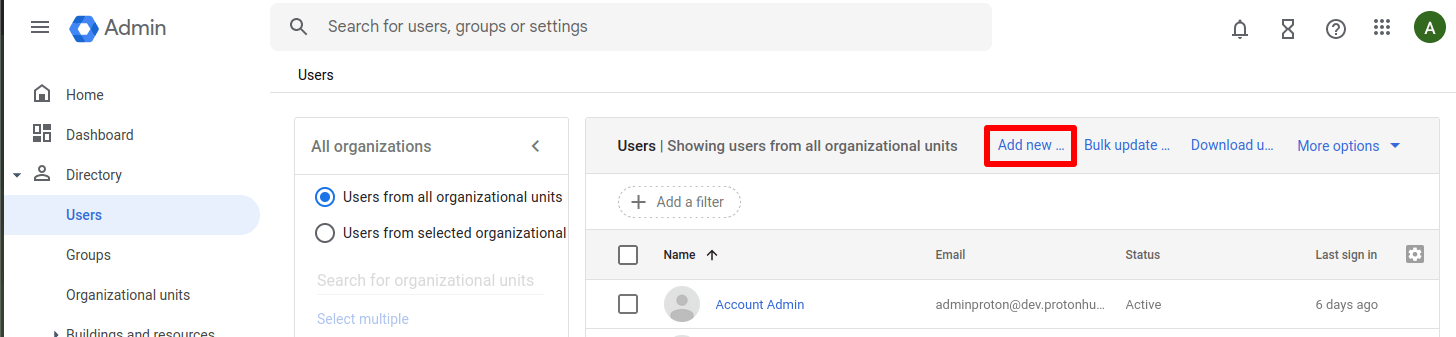
1. Log in to your Google account(new window) and go to Directory → Users → Add new…
2. Fill in their details. The username and primary email address must use your organization’s domain. Click Add new user when you’re done.

3. You’ve prompted to automatically generate a password or create one yourself. Whichever method you choose, make a note of it and share it with your team members.
How to use SSO to sign in to Proton VPN
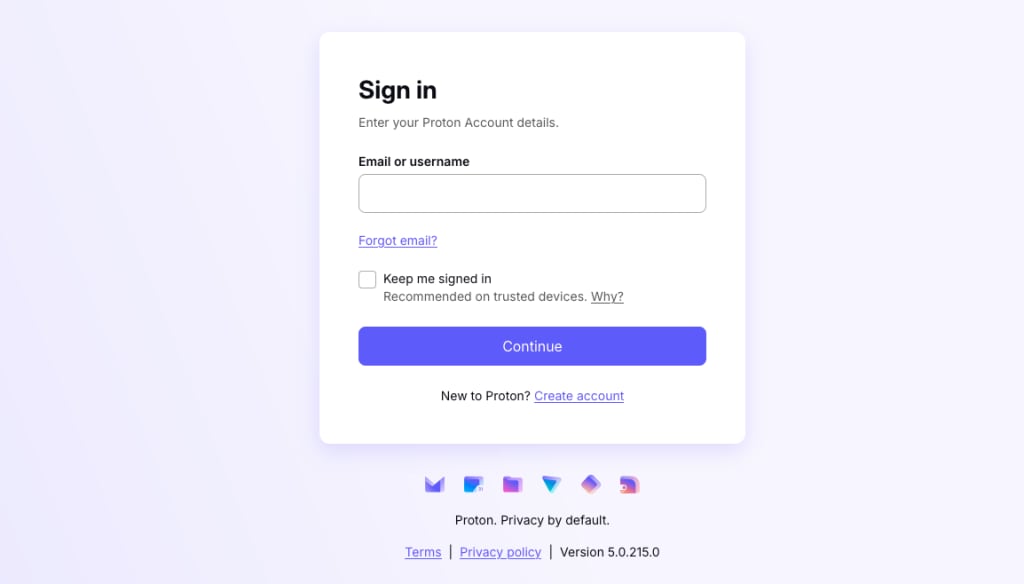
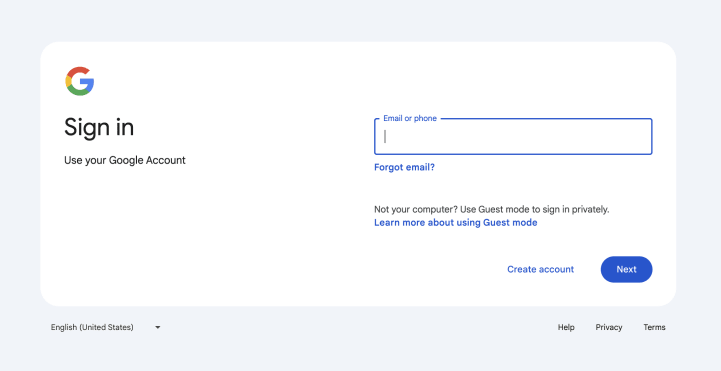
1. As a user with a new SSO account configured on Google Workspace, go to account.proton.me/vpn . Enter your email address (as configured on Google Workspace) and click Continue.
2. We’ll detect that you’re using a Google SSO password and automatically direct you to the Google sign-in page . Enter your Google SSO username and password (which will be supplied by your manager, or see steps 9 and 10 in the How to add SSO users to Google section above), and click Sign in.
How to manage SSO for Proton VPN
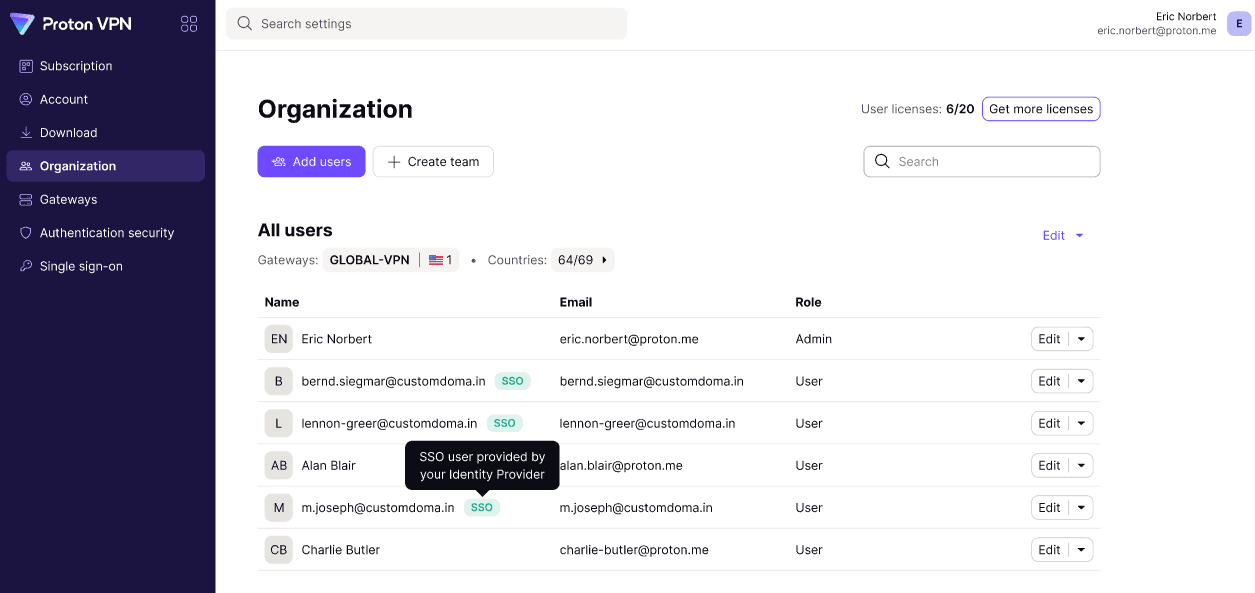
Your organization’s users can now log in to Proton VPN apps using the username and password they created (see above). To view which users can do this, log in to your Proton VPN for Business administrator account at account.protonvpn.com and go to Organization → All users.
Note: SSO users will only appear here after they have signed in at least once.
To manage access to your Proton VPN organization, log in to your identity provider.
You can manage individual users using the dropdown menu in the Edit column of the user you wish to manage SSO access for.
To turn off SSO for your whole organization, go to Single sign-on → Remove single sign-on → Stop using single sign-on.
Please note that doing this deletes all configurations and users associated with your domain. We therefore strongly recommend against turning off SSO for your whole organization.
