How to configure Proton VPN on pfSense using WireGuard®
- Reading
- 8 mins
- Category
- Routers
In this guide, we show you how to set up Proton VPN on pfSense 2.7.x using the WireGuard® VPN protocol. This allows your router to protect any device connected to it with a Proton VPN connection.
You can also configure Proton VPN on pfSense 2.7.x using the OpenVPN protocol, but we recommend using WireGuard.
1. Create a WireGuard configuration file
Sign in to Proton VPN using your Proton Account username and password at account.protonvpn.com, go to Downloads → WireGuard configuration, and download a WireGuard configuration file. Be sure to select Platform: Router.
Learn how to download a WireGuard configuration file from Proton VPN
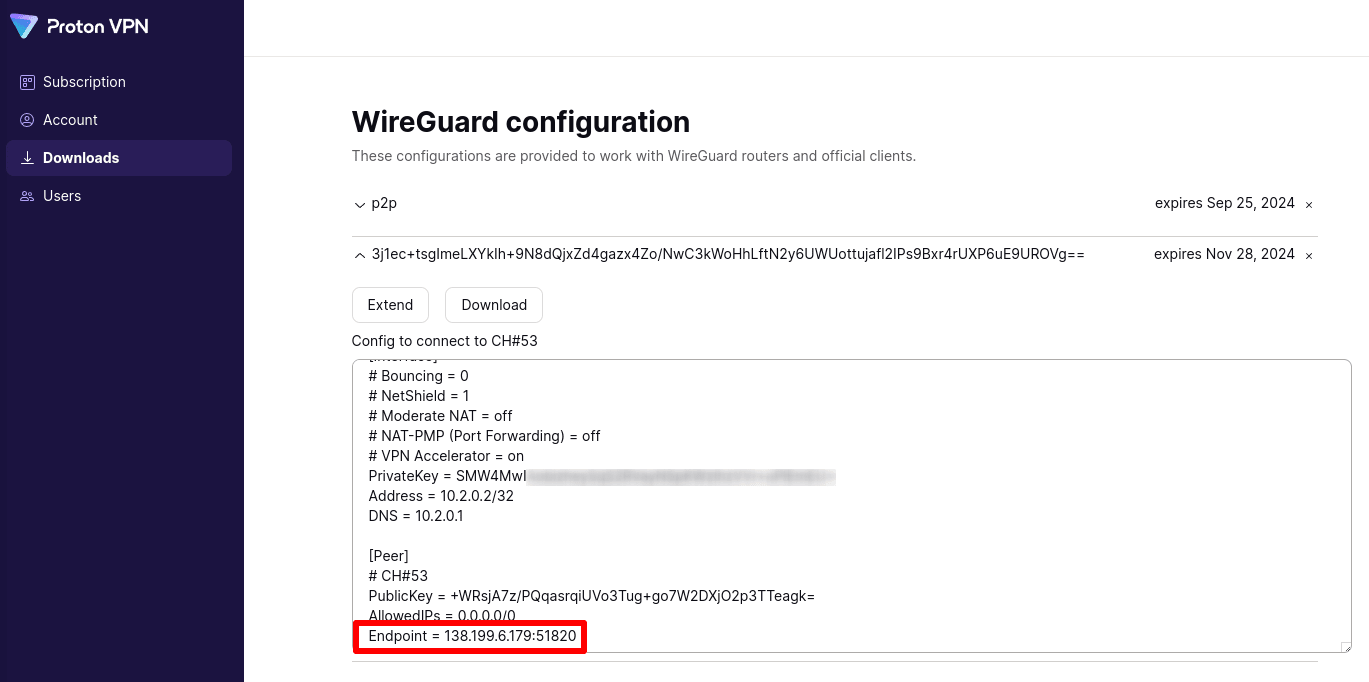
To configure pfSense, you’ll need the private key from this config file. To find it, go to Downloads → WireGuard configuration and select the WireGuard key you just created. Look for the line that says PrivateKey =.

You’ll also need the Endpoint = IP address.
2. Install the WireGuard package on pfSense
Enter 192.168.1.1 into your browser’s URL bar to open the pfSense frontend. Sign in and go to System → Package Manager → Available Packages tab. Locate the WireGuard package and click Install.
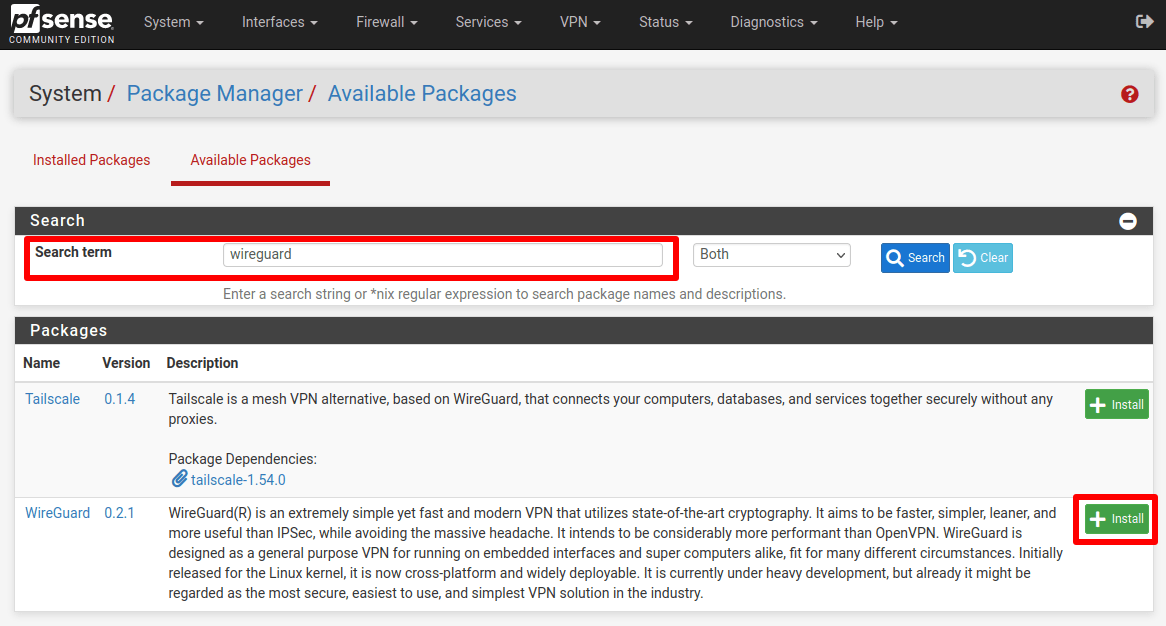
To verify that WireGuard is successfully installed, go to System → Package Manager → Installed packages.
3. Create a new WireGuard tunnel
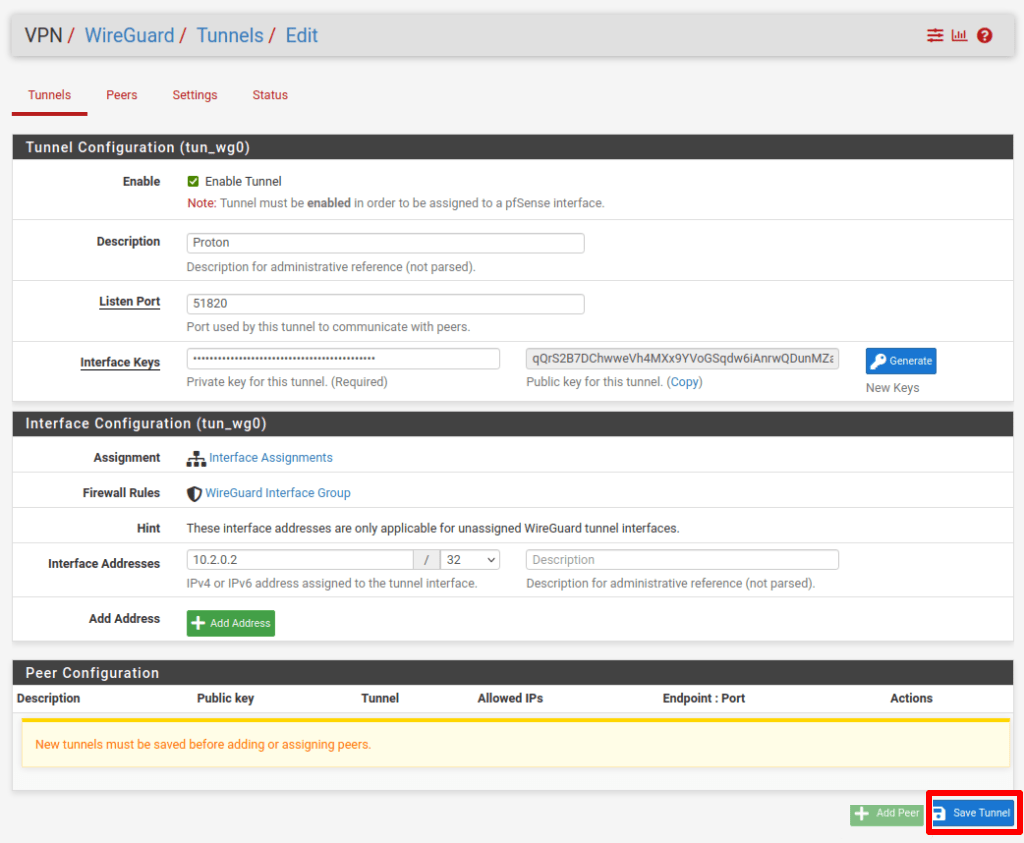
Still in pfSense, go to VPN → WireGuard → Tunnels and create a new tunnel with the following settings.
Tunnel configuration:
- Description: Choose a suitable description
- Listen port: 51820
- Interface Keys: Private key from your configuration file (see step 1)
- Public key: This will be automatically generated
Interface configuration:
- Interface Addresses: 10.2.0.2/32
Click Save Tunnel when you’re done.
4. Add a peer
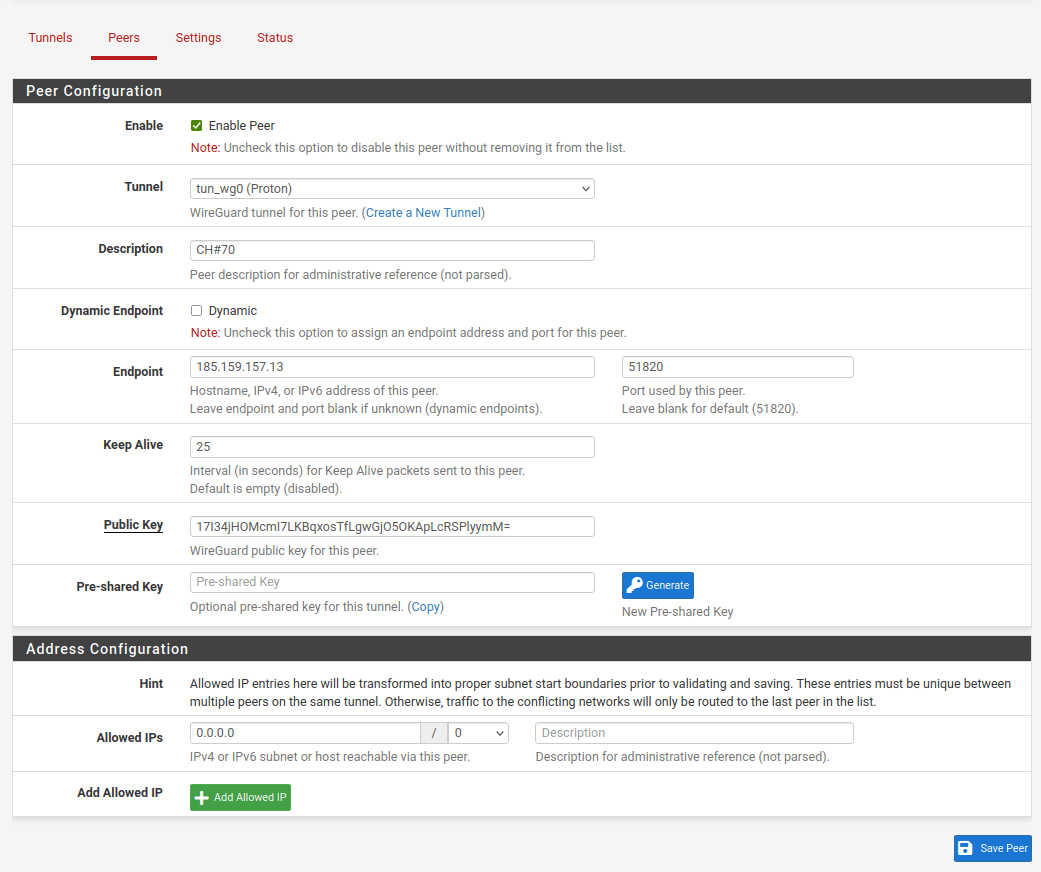
Still on the Tunnels tab, click Add Peer (see above), which will take you to the Peers tab. Configure the following settings.
Peer Configuration:
- Tunnel: the tunnel created in the previous step
- Description: choose a descriptive name, for example, the server name
- Dynamic Endpoint: uncheck
- Endpoint: endpoint IP address from your downloaded WireGuard configuration
- Port: 51820
- Keep Alive: 25
- Public Key: public key from your downloaded WireGuard configuration file (see step 1)
Address Configuration:
- Allowed IPs: 0.0.0.0 / 0
Click Save Peer when you’re done.
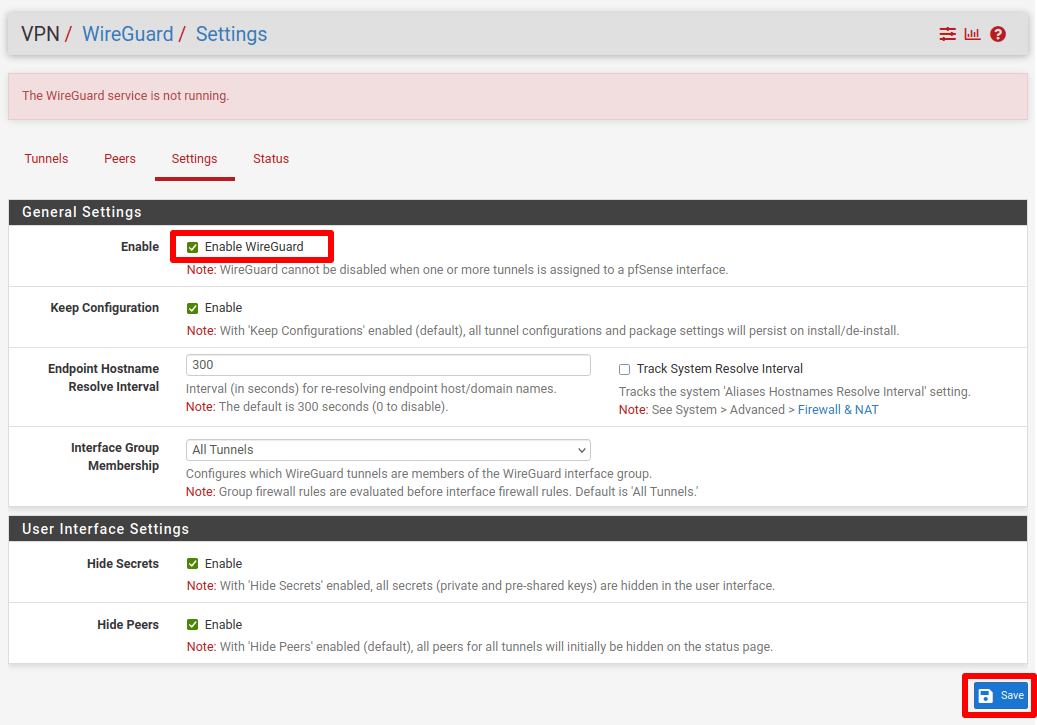
5. Go to the Settings tab, check Enable WireGuard, then click Save and Apply Changes.
5. Create a WireGuard interface
The VPN client is now running, but no traffic is being routed through it. To route all your network traffic through the secure Proton VPN tunnel, you’ll need to configure the Interfaces and Firewall rules.
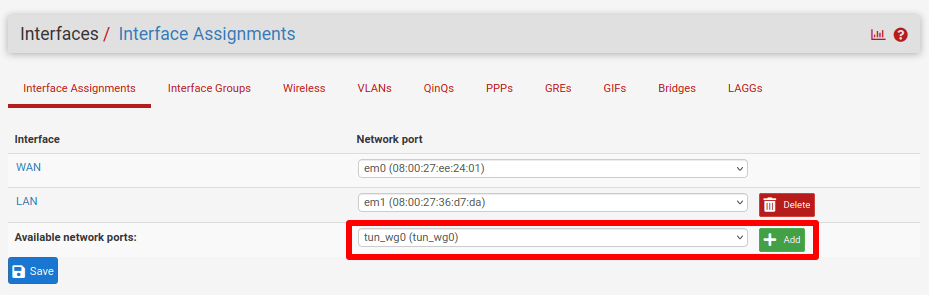
Go to Interfaces → Interface Assignments → Available network ports and select tun_wg0 → Add.
This will create an interface named OPTx (where x depends on how many physical interfaces your router has). Click on the newly created one to configure it.
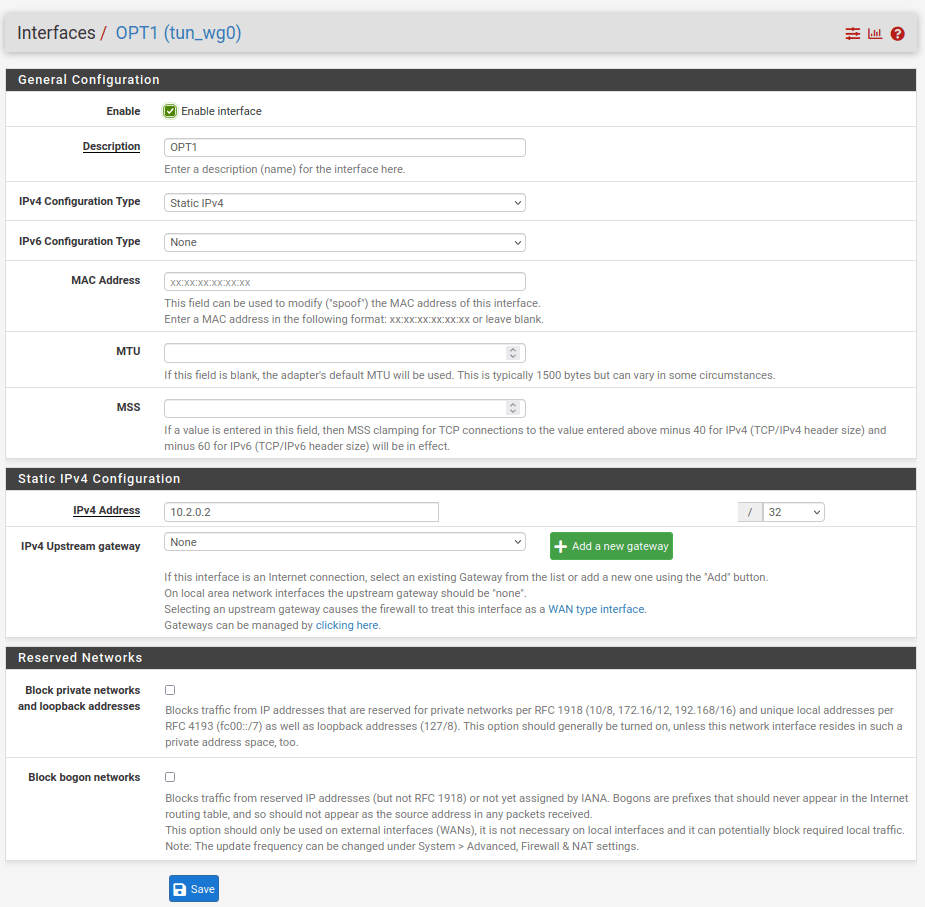
Enter the following configuration settings·
General Configuration:
- Enable: checked
- IPv4 configuration type: Static IPv4
Static IPv4 configuration:
- IPv4 address: 10.2.0.2 / 32
Click Save and Apply.
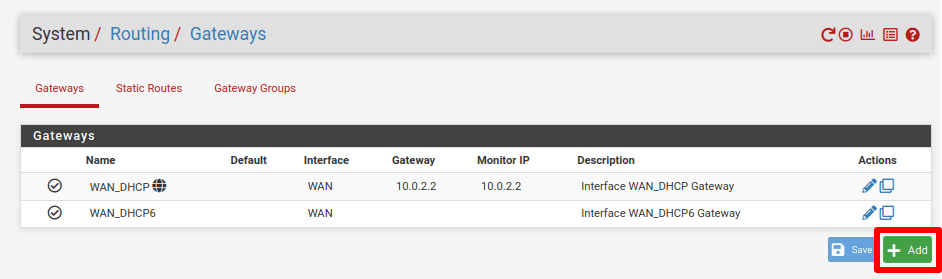
6. Add a new gateway
Go to System → Routing → Gateways and click Add to add a new gateway.
Enter the following configuration settings:
- Interface: OPT1 (or name of the interface from the previous step)
- Address Family: ipv4
- Name: descriptive name
- Gateway: 10.2.0.1
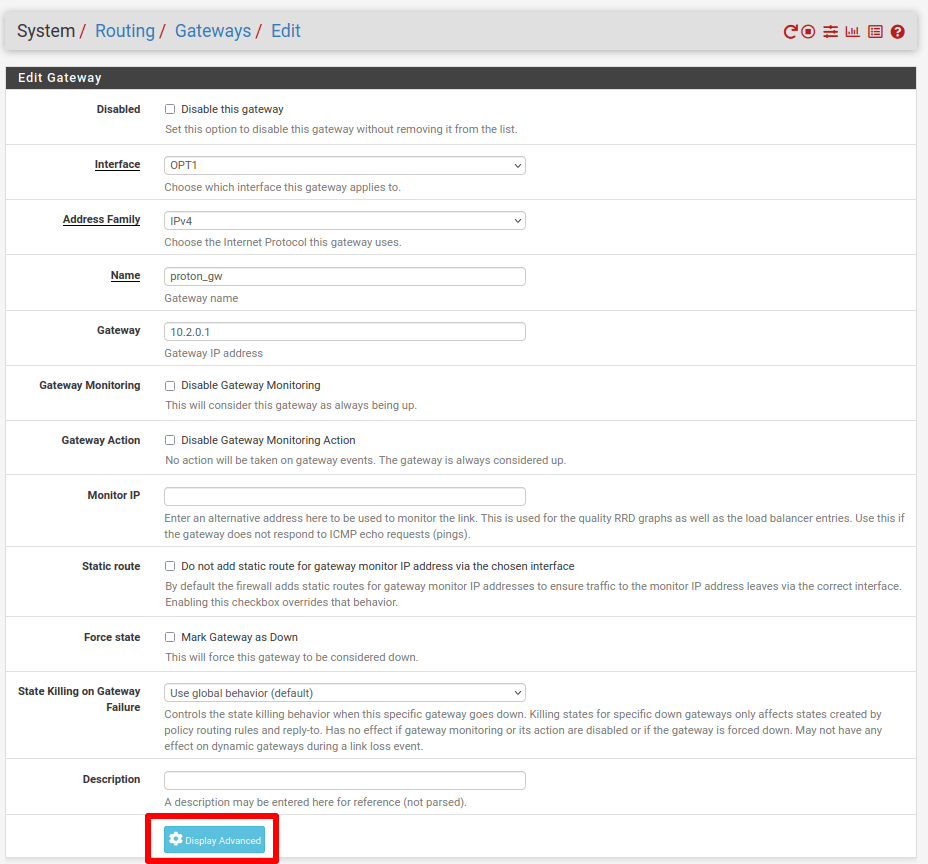
Click Display Advanced and check Use non-local gateway → Use non-local gateway through interface specific route. Click Save and Apply Changes.

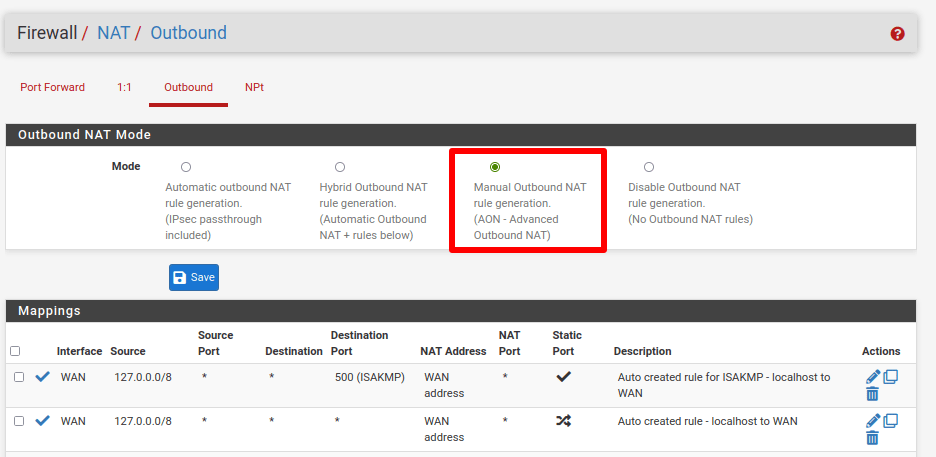
7. Configure firewall rules
We use firewall rules to route all traffic through the Proton VPN interface we set up in Step 5. Go to Firewall → NAT → Outbound and select Manual Outbound NAT rule generation. Then click Save and Apply Changes.
Now click the ✓ icon next to the last two rules to disable them.
- Auto created rule for ISAKMP – OPT1 to WAN
- Auto created rule OPT1 to WAN

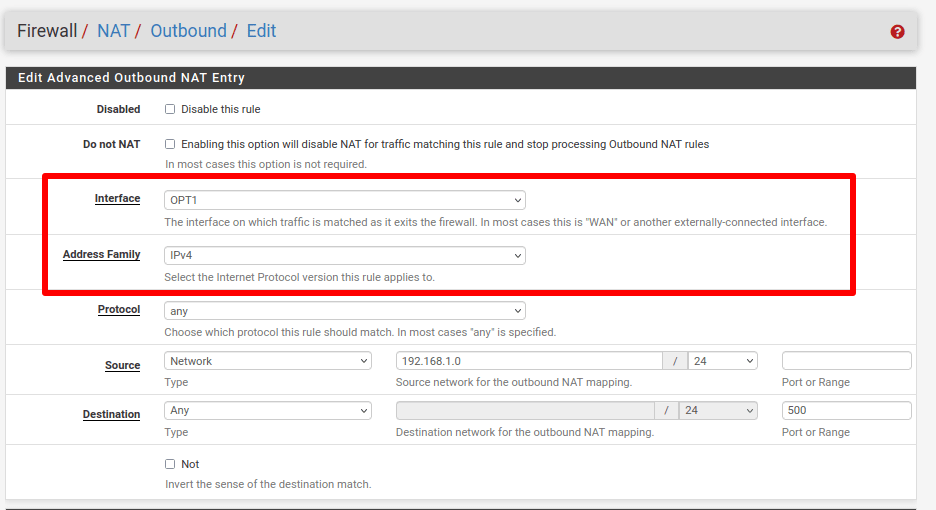
Click the Edit (pencil) icon next to the following two rules:
- Auto created rule – LAN to WAN
- Auto created rule for ISAKMP – LAN to WAN
In both cases, change the Interface to VPN interface (OPT1) and the Address family to IPv4. When you’re done, click Save and Apply Changes.
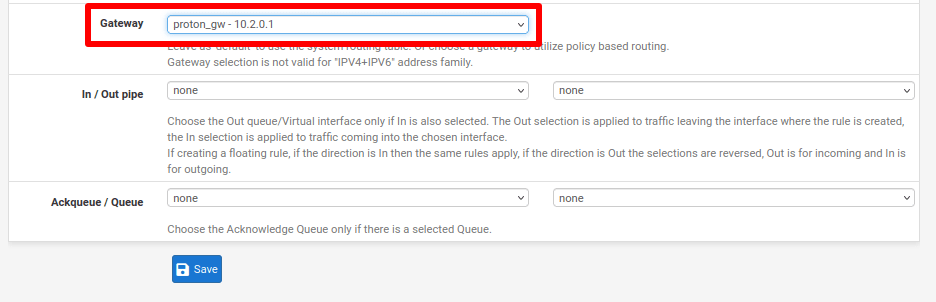
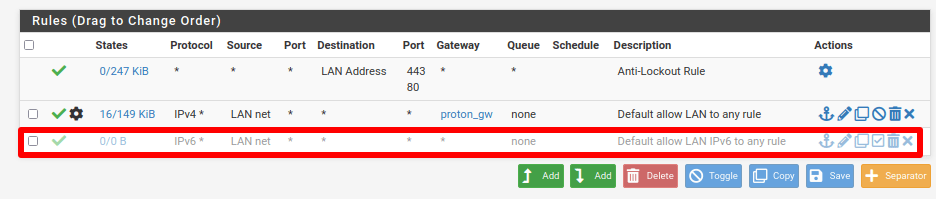
Go to Firewall → Rules → LAN → Default allow LAN to any rule → Edit (pencil icon).
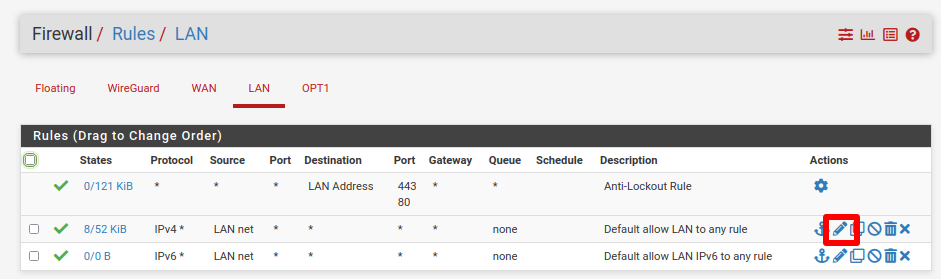
Click Display advanced → Gateway and select the gateway we created in step 6. Click Save.
Click the ✓ icon next to Default allow LAN IPv6 to any rule to disable it, and then click Save and Apply Changes.
8. Configure DNS Settings
All internet traffic passing through the pfSense firewall will now be routed through a Proton VPN server. However, DNS requests are not. To fix this, we need to change the DNS settings in pfSense.
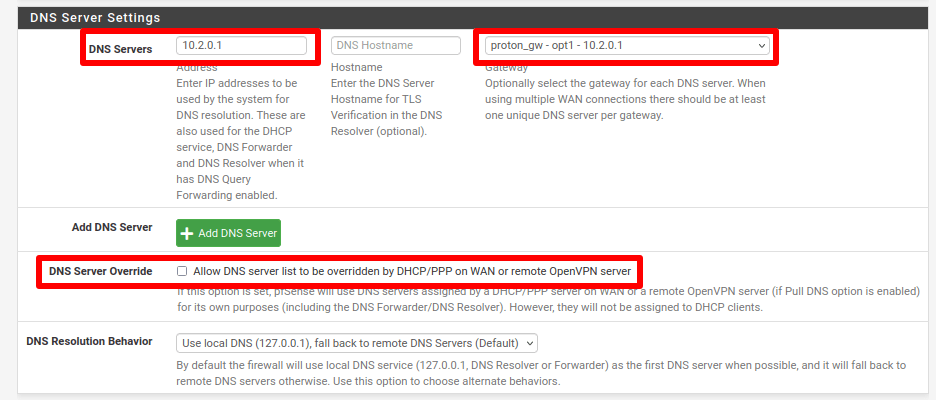
In pfSense, go to System → General setup → DNS Server Settings and configure the following settings:
- DNS Servers: 10.2.0.1
- Gateway: the name of the gateway we configured in step 6.
- DNS Server Override: unchecked
Click Save when you’re done.
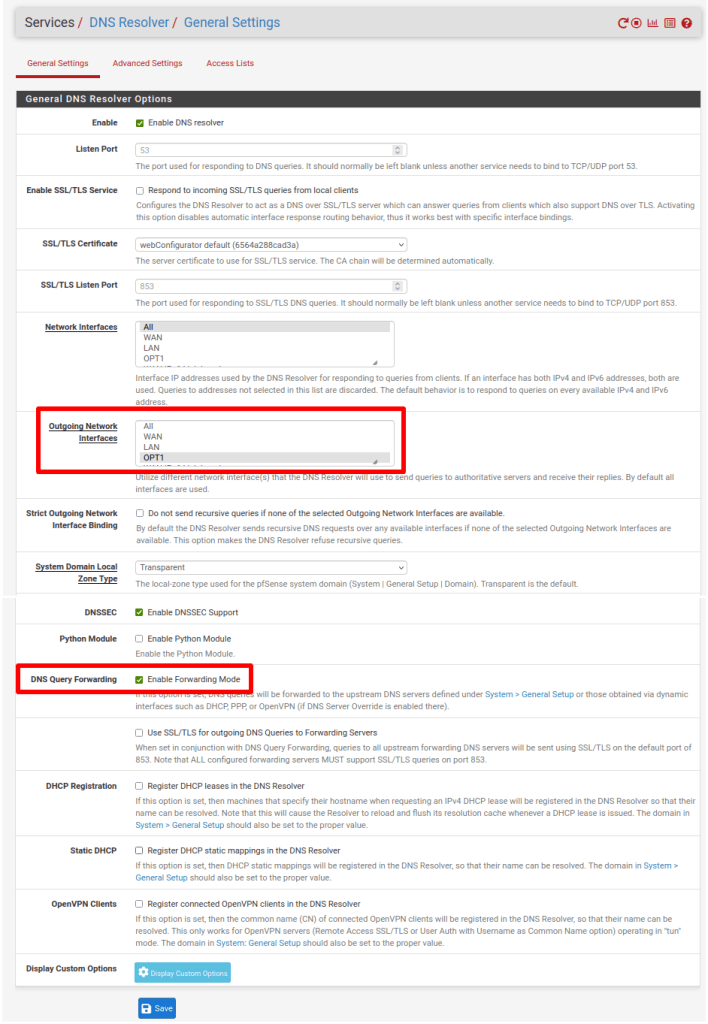
Now go to Services → DNS Resolver → General Settings and change the following:
- Outgoing Network Interfaces: OPT1 (the WireGuard interface we’ve created)
- DNS Query Forwarding: check Enable Forwarding mode
Click Save and Apply Changes when you’re done.
Your setup is now complete. All traffic from your network is now securely routed through the Proton VPN server you chose. You can test this by visiting our free secure IP scanner(new window) from any device on your network.