How to set up OpenVPN on macOS using Tunnelblick
- Reading
- 4 mins
- Category
- macOS
We offer an official Proton VPN for macOS app. If you are running macOS 10.12+, we strongly recommend using our app, which features:
- Kill switch
- WireGuard®, WireGuard TCP, IKEv2, and Stealth VPN protocols
- Smart protocol
- DNS leak protection
- NetShield Ad-blocker
- Moderate NAT
- VPN Accelerator
If you use an earlier version of macOS, or you simply prefer to use Tunnelblick, read on…
Tunnelblick is a free, open-source generic VPN app for macOS that allows you to connect to our network via the OpenVPN protocol.
Tunnelblick is a free, open-source VPN app for macOS that allows you to connect to our network via the OpenVPN protocol. Note that you can also manually configure the more modern WireGuard VPN protocol on your Mac.
Learn how to manually configure WireGuard on macOS
Step 1: Download OpenVPN configuration files
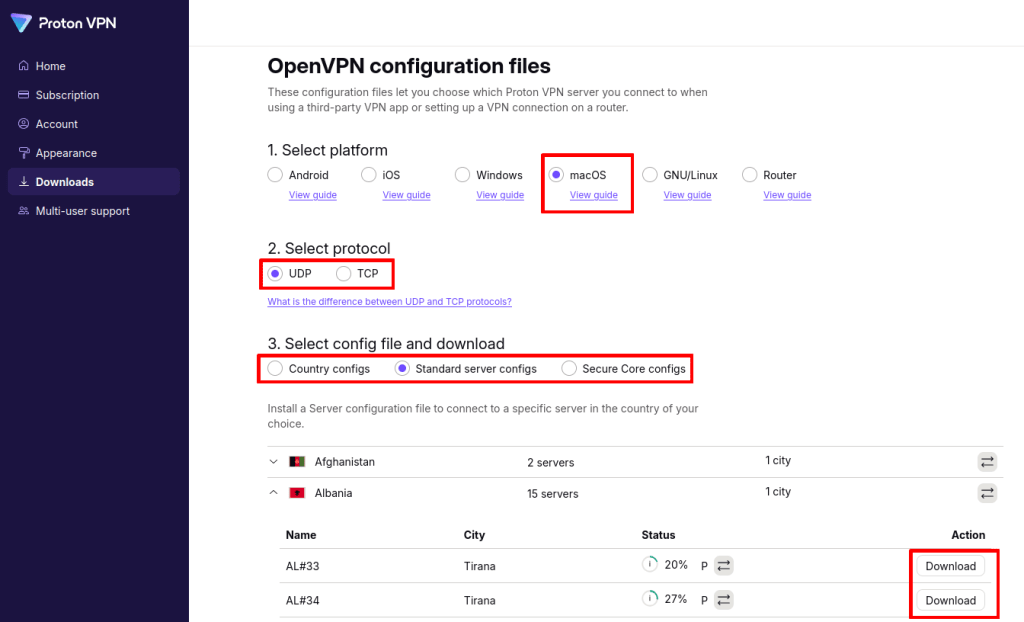
Sign into your Proton VPN account at account.protonvpn.com, go to Downloads → OpenVPN configuration files and:
- Select platform: The correct platform for your device (this is important, as otherwise you may be vulnerable to DNS leaks).
- Select protocol: UDP (recommended) or TCP if you experience slow VPN speeds (this utilizes port 443).
- Select config file and download: choose whether to download a configuration file for a whole country, an individual server, or for a Secure Core server.
- Select a country or server → Download.
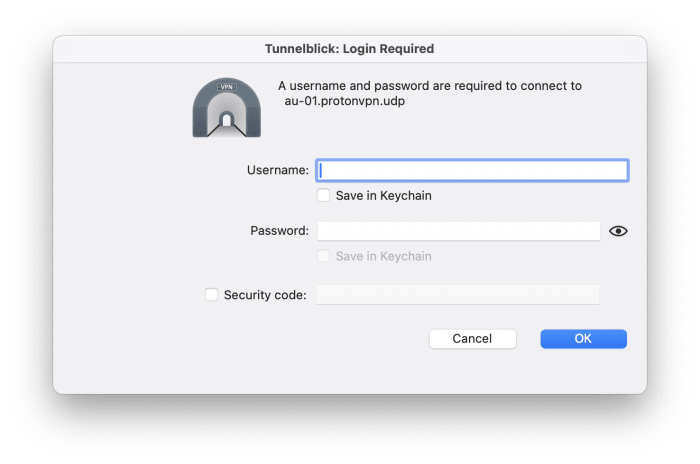
Step 2: Find your OpenVPN login credentials
These differ from your regular Proton account username and password. To find them, go to Account → OpenVPN username.

Step 3: Configure Tunnelblick
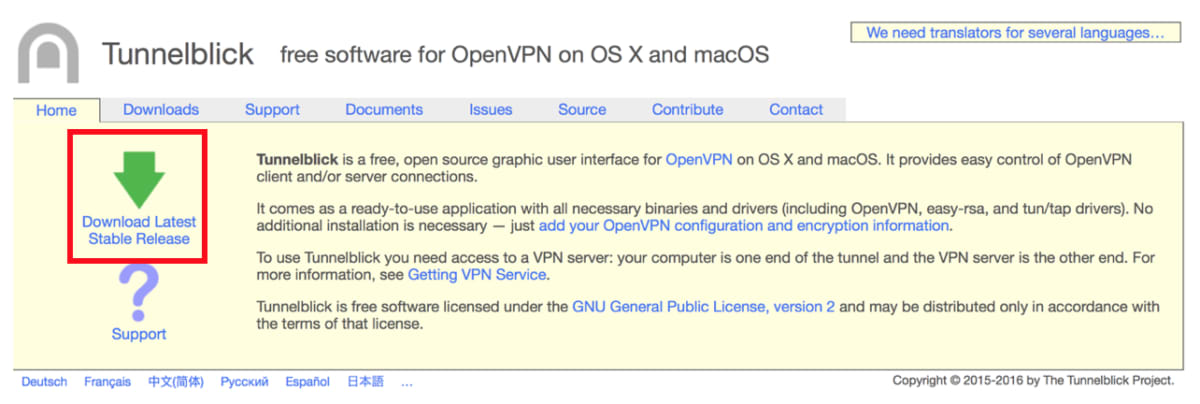
1. Download(new window) and install Tunnelblick (select Download Latest Stable Release, double-click the downloaded DMG file, and follow the prompts).
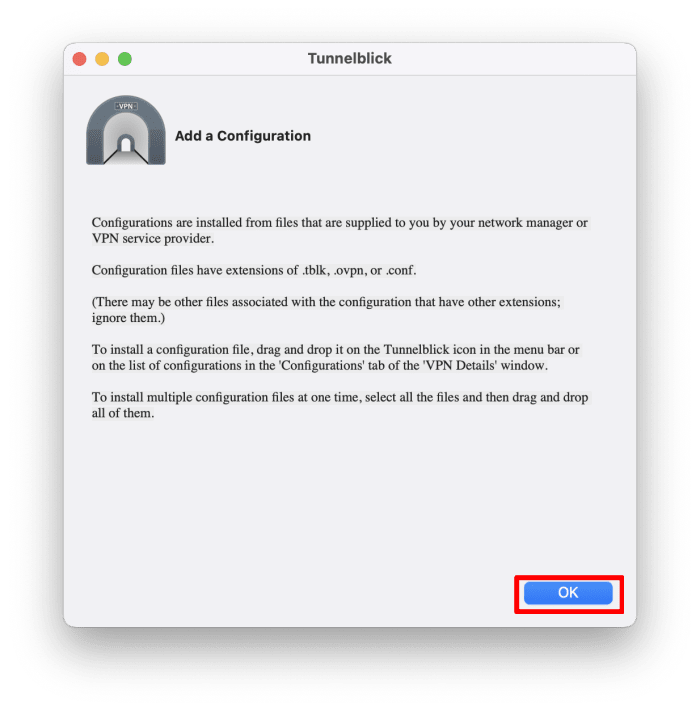
2. Open Tunnelblick and select the I have configuration files button on the welcome screen.

- Feel free to read through the Add a configuration screen, and click OK when you’re done.
- You’ll now see a Tunnelblick icon in your menu bar’s notification area. Open Finder and drag-and-drop the .ovpn configuration file you downloaded in step 1 onto this icon.

- Enter your OpenVPN username and password (these differ from your regular Proton account username and password. See step 2 for more details). If you plan to use this configuration regularly, it may be convenient to save these login details in your Keychain(new window). Click OK when you’re done.
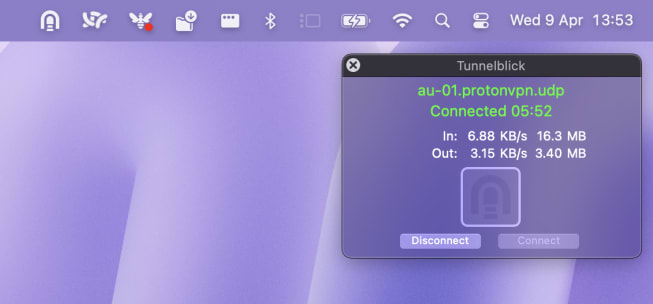
- Hover your mouse pointer over the Tunnelblick notification icon to bring up the connection widget, and click Connect. You can also click on the Tunnelblick notification icon → Connect [.ovpn file name].
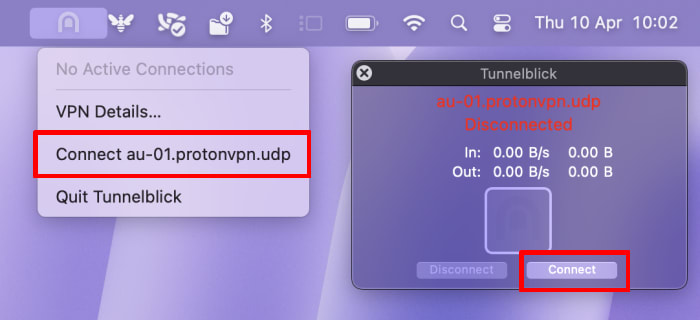
- Your connection is now protected by Proton VPN.