


如何在 iOS 上搭配 OpenVPN Connect 使用 Proton VPN
- 閱讀
- 1 分鐘
- 類別
- iOS
Our app for iOS and iPadOS allows you to choose between the WireGuard®, WireGuard TCP, and Stealth VPN protocols (Stealth is based on WireGuard). If enabled, Smart Protocol will choose the best option for you.
我們強烈建議在你的 iPhone 或 iPad 上使用我們的 iOS/iPad 應用程式。 它提供了連線至我們伺服器最簡單的方法,並能讓你體驗 Proton VPN 的許多進階功能。例如:
- 緊急終止開關
- WireGuard、WireGuard TCP 和 Stealth VPN 協定
- Smart Protocol
- DNS 外洩防護(新視窗)
- NetShield Ad-blocker
- Moderate NAT
- VPN Accelerator
- iOS 小工具
取得適用於 iPhone 和 iPad 的 Proton VPN(新視窗)
在 Proton VPN,我們建議使用 WireGuard 而非 OpenVPN,但你也可以使用 OpenVPN Connect 應用程式在 iPhone 或 iPad 上手動設定 OpenVPN。在本文中,我們將向你展示操作方法。
如何在 iOS 和 iPadOS 上手動設定 OpenVPN
要在 iPhone 或 iPad 上手動設定 OpenVPN:
- 找出你的 OpenVPN 登入憑證
- 將所需的 OpenVPN 組態設定檔下載至你的裝置
- 使用已下載的組態檔案設定 OpenVPN Connect
找出你的 OpenVPN 登入憑證
Your OpenVPN username and password are different to your Proton VPN account username or password. To find them, log in to account.protonvpn.com and go to ≡(if on an iPhone) → Account→ Username→ OpenVPN username.
If you would like to use our NetShield DNS filtering feature, append the suffix +f1 to your username to block malware, or +f2 to block malware, ads, and trackers (for example, 123456789+f2).
下載所需的 OpenVPN 組態設定檔
On your iPhone or iPad, log in to account.protonvpn.com and go to ≡(if on an iPhone) → Downloads→ OpenVPN configuration files. Then:
1. 選擇平台(選擇 iOS)
2. 選擇通訊協定。在 OpenVPN UDP 或 OpenVPN TCP 之間進行選擇。UDP 速度較快且在大多數情況下都推薦使用,而 TCP 則更可靠,並可以繞過某些審查措施。
3. Select config file and download. Select the type of config file you wish to download. The list of available files will dynamically change based on the type you select. Tap the Action→ Download button next to the specific config file you want.
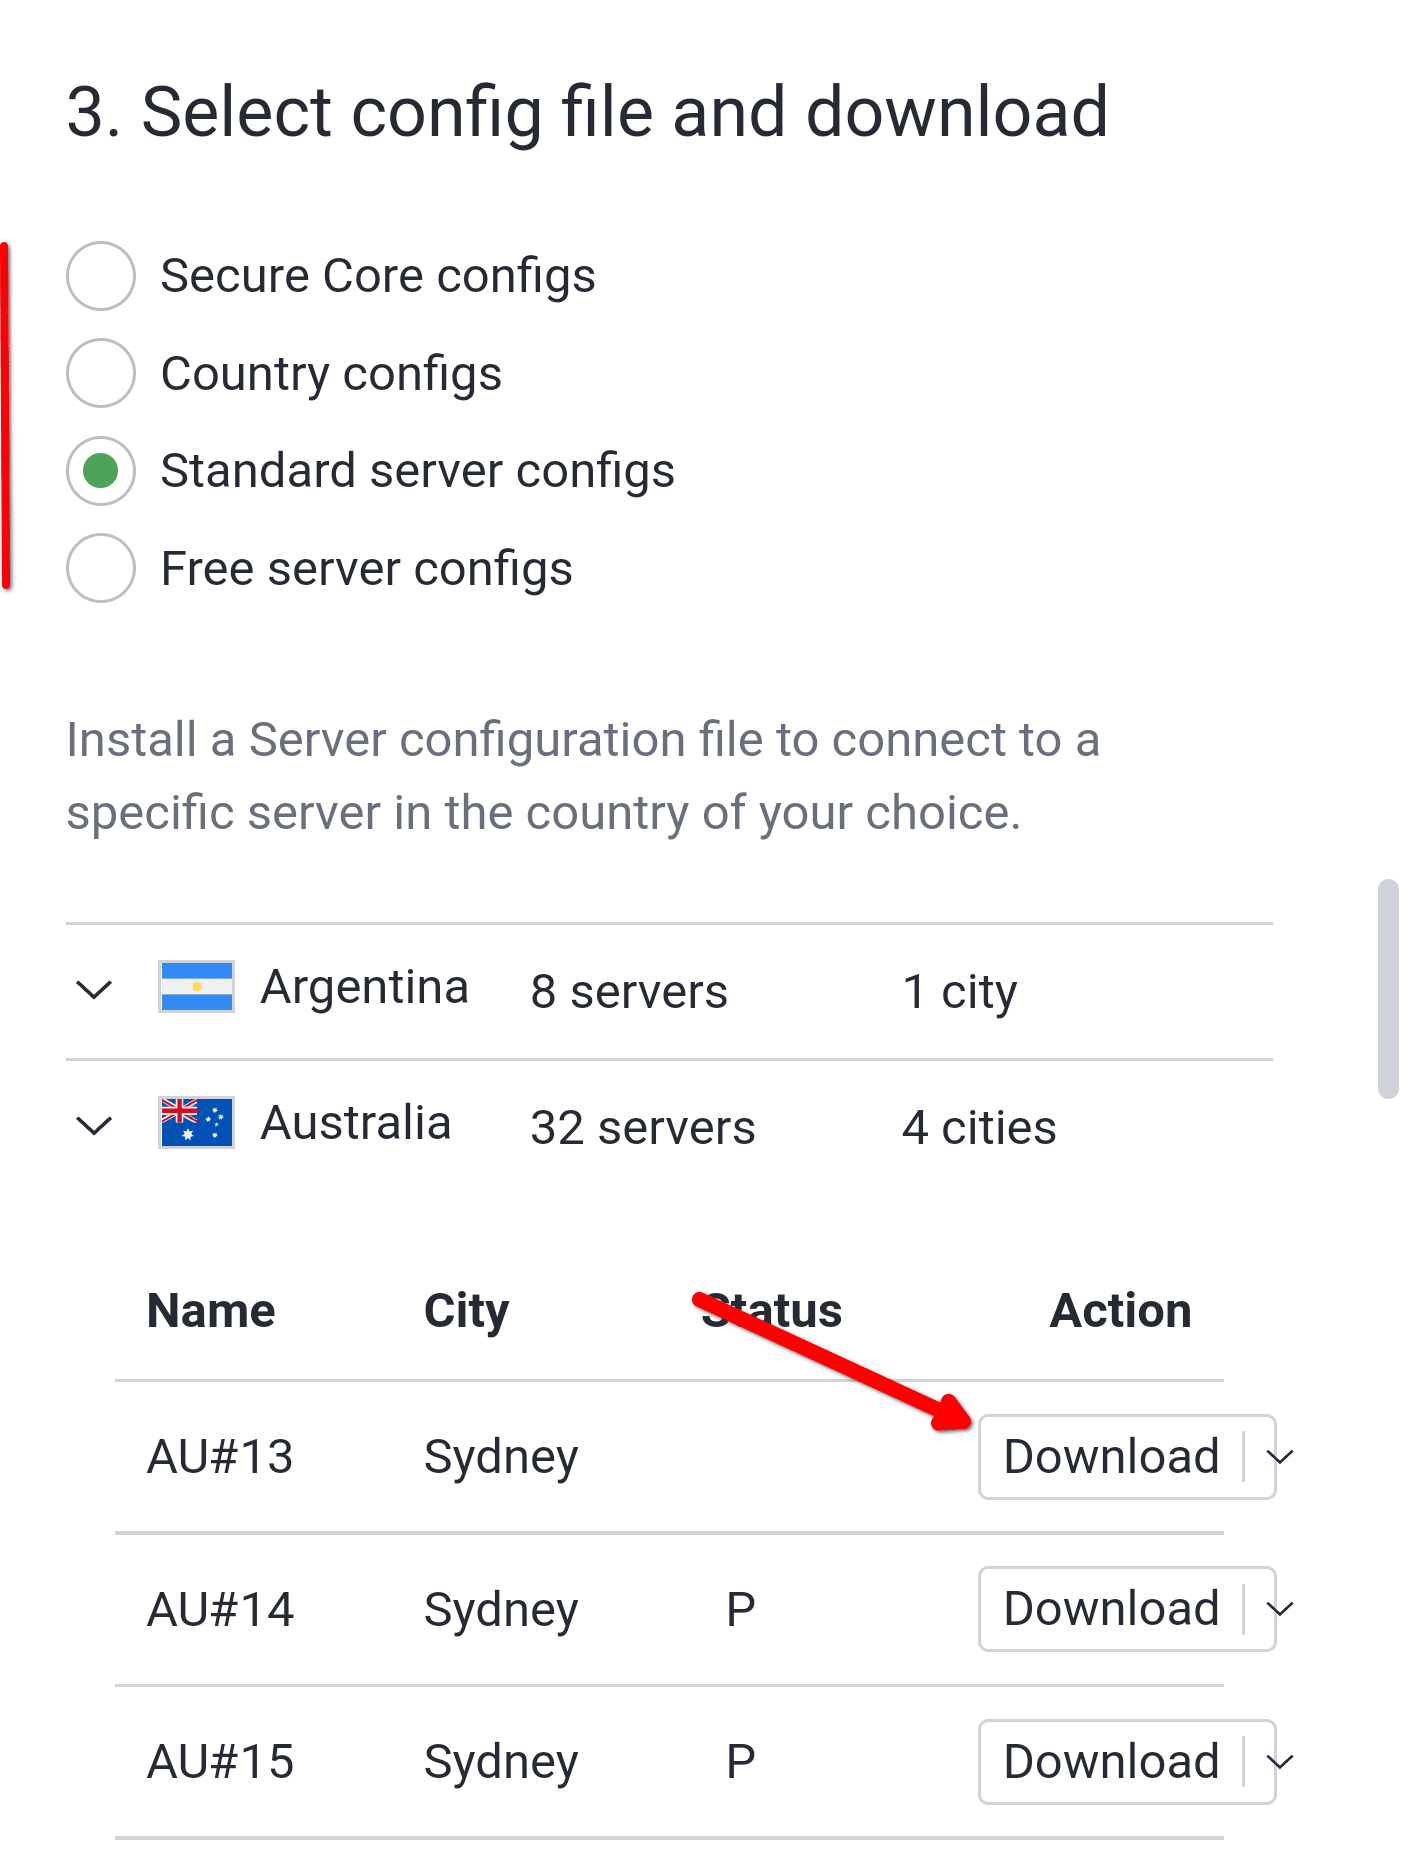
- Secure Core — 我們特殊的 Secure Core VPN 伺服器。選擇你的連線將路由經過的出境位置和 Secure Core 伺服器(經由)。
- 國家 — 將自動為你連線至所選國家的伺服器。
- 標準伺服器 — 指定個別伺服器,按國家排序。在狀態欄位中,進階伺服器標有 P、P2P 伺服器標有雙箭頭圖示,而 Tor 伺服器則標有洋蔥圖示。
- 免費伺服器 — 適用於我們 Free plan 使用者的伺服器。
使用 OpenVPN Connect 設定 Proton VPN
1. 從 App Store 下載 OpenVPN Connect(新視窗)。
2. 開啟 iOS 的 檔案 應用程式 → 下載 資料夾,選取你剛下載的 .ovpn 組態檔案,然後將其 共享 至 OpenVPN 應用程式。
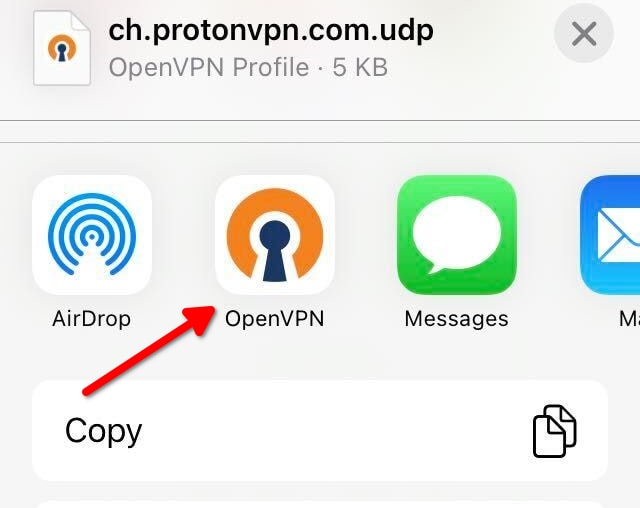
3. OpenVPN Connect 將會開啟,並告知你可匯入新的 OpenVPN 個人檔案。輕點 加入 以進行匯入。
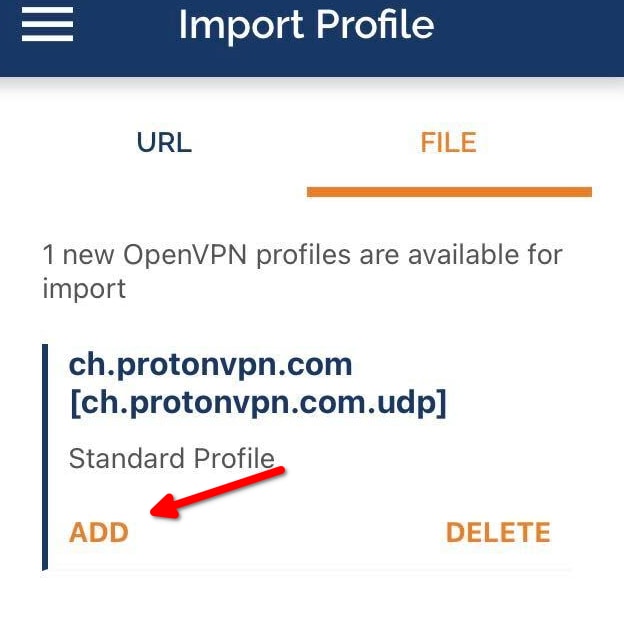
4. 填寫已匯入個人檔案的詳細資料:
- 個人檔案名稱 — 你可以維持不變,或重新命名為更易懂的名稱(例如 Proton VPN Switzerland)
- 使用者名稱 — 你的 OpenVPN 使用者名稱(非 你的帳號使用者名稱 — 請見上方說明)
- 儲存密碼 — 你的 OpenVPN 密碼(非 你的帳號密碼)。Proton VPN 的 OpenVPN 密碼非常安全(意即非常長),因此我們建議你勾選此選項並輸入你的密碼,以便你每次都能輕鬆登入。
- 匯入後連線 — 如同字面上的意思(至少理論上如此)
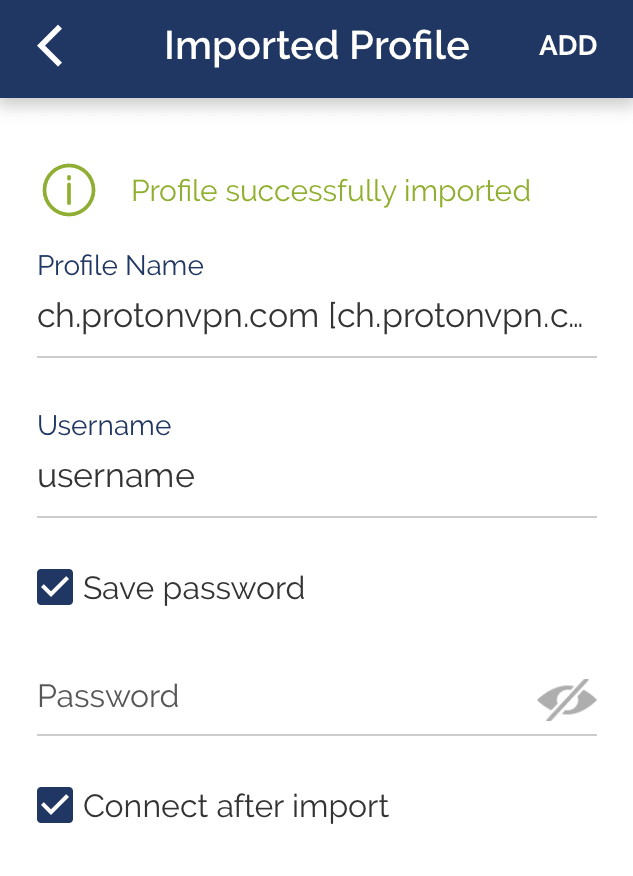
完成後輕點 加入,允許 OpenVPN 加入 VPN 組態,並使用生物辨識技術確認你的身分。
5. 如果應用程式在匯入後(或在任何其他時間)未自動連線,請切換你剛匯入的個人檔案至開啟,並在收到提示時輕點 是 以允許 OpenVPN 啟用 VPN 連線。你只需要執行此操作一次。
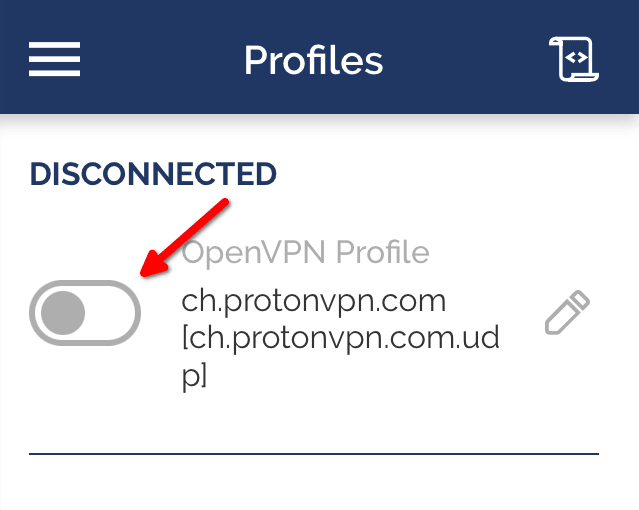
若要中斷 Proton VPN 連線,請選取您目前使用的連線並將開關切換為關閉。
相關文章