


How to set up Proton VPN on a FreshTomato router using OpenVPN
You can set up Proton VPN on your router, which will protect every device that connects to the internet through that router. In this guide, we take a step-by-step look at how to set up Proton VPN on a FreshTomato(new window) router using the OpenVPN protocol.
Note that FreshTomato is the only version of the Tomato community-developed custom firmware for routers that is still actively supported. If you’re using an older version of Tomato, we recommend you upgrade to FreshTomato.
We also have guides for setting up Proton VPN on a wide selection of other popular routers.
Learn how to install Proton VPN on different routers
Before starting, you’ll need the following:
- A computer that’s connected to your LAN network so that you can access your FreshTomato router’s web interface. To do this, enter the address provided by your router’s manufacturer into your browser’s URL bar. This is usually 192.168.1.1.
- Your OpenVPN username and password. These are different from your regular Proton VPN username and password. To find them, sign in to account.protonvpn.com and go to Account → OpenVPN / IKEv2 username.
How to set up Proton VPN on a FreshTomato router
1. Create an OpenVPN configuration file
Sign in to Proton VPN using your Proton Account username and password at account.protonvpn.com, go to Downloads → OpenVPN configuration files, and download an OpenVPN configuration file. Be sure to Select Platform: Router.
Learn how to download an OpenVPN configuration file from Proton VPN
To configure FreshTomato, you’ll need the IP address and port number of the VPN server. These can be found on the first remote line listed in the certificate. The first number is the IP address, and the second number is the port number. In the example below, the IP address is 185.159.157.6, and the port number is 51820

You’ll also need the OpenVPN Static key. This starts with —–BEGIN OpenVPN Static key V1—- and ends with —–END OpenVPN Static key V1—–.
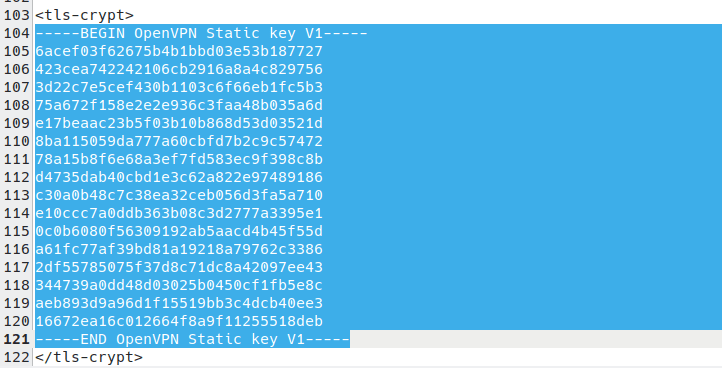
And finally, you’ll need the TLS certificate(new window) from this config file. To find it, open the downloaded OpenVPN config file in a text editor and look for the text that starts with —–BEGIN CERTIFICATE—- and ends with –—-END CERTIFICATE—–.

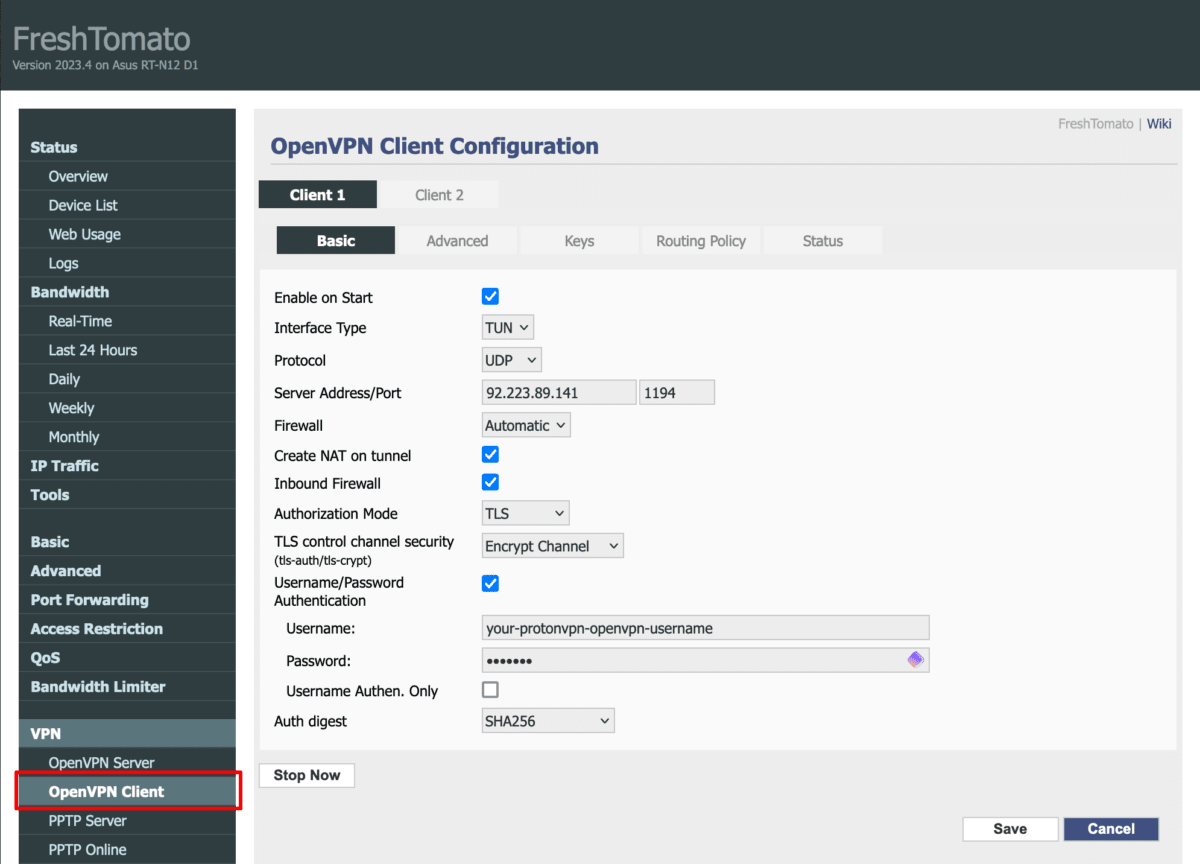
1. Configure basic OpenVPN settings
Open your FreshTomato router’s web interface in a browser window and go to VPN → VPN Tunneling → OpenVPN Client → Basic tab and configure the following settings:
(If more than one OpenVPN client is supported on your device, you can select which one to configure.)
- Enable on Start: checked
- Interface Type: TUN
- Protocol: UDP
- Server Address/Port: Enter the IP address and port number of the VPN server. These can be found on the first remote line listed in the certificate (see Step 1 for more details)
- Firewall: Automatic
- Create NAT on tunnel: checked
- Inbound Firewall: checked
- Authorization Mode: TLS
- TLS control channel security (tls-auth/tls-crypt): Encrypt channel Username/Password Authentication: checked
- Username: Your OpenVPN username
- Password: Your OpenVPN password.
Remember: Your OpenVPN username and password are different from your regular Proton VPN username and password.
- Username Authen. Only: –
- Auth digest: SHA256
To enable additional features, add the following suffixes to your OpenVPN username.
- NetShield Ad-blocker: +f1
- NetShield Ad-blocker advanced (also blocks malware and trackers): +f2
2. Configure advanced OpenVPN settings
Go to the Advanced tab and configure the following settings:
- Poll interval: 0
- Redirect internet traffic: No
- Accept DNS configuration: Exclusive
- Data ciphers: AES-256-GCM
- Compression: Disabled
- TLS Renegotiation Time: 0
- Connection retry: -1
- Verify Certificate (remote-cert-tls server): checked
- Verify Server Certificate Name (verify-x509-name): No
- Custom configuration: add the following lines to the text field:
remote-random
nobind
tun-mtu 1500
mssfix 0
persist-key
persist-tun
Note: These configurations settings replace those shown in the screenshot below.

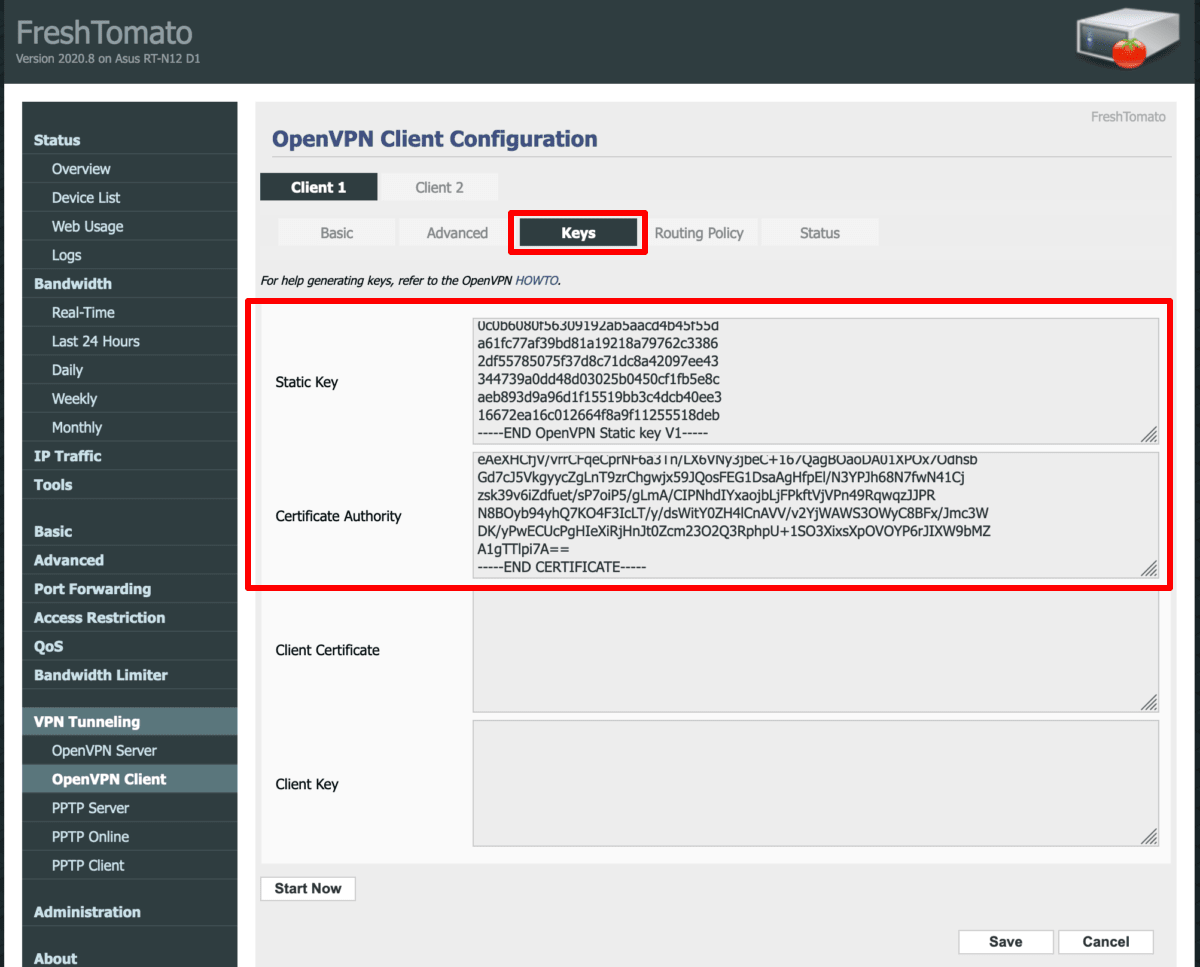
3. Configure OpenVPN key settings
Select the Keys tab and configure the following settings:
- Static key: Paste in the OpenVPN Static key from the OpenVPN configuration file (see Step 1)
- Certificate Authority: Paste in the TLS certificate from your OpenVPN config file (see Step 1)
Click Save when you’re done.
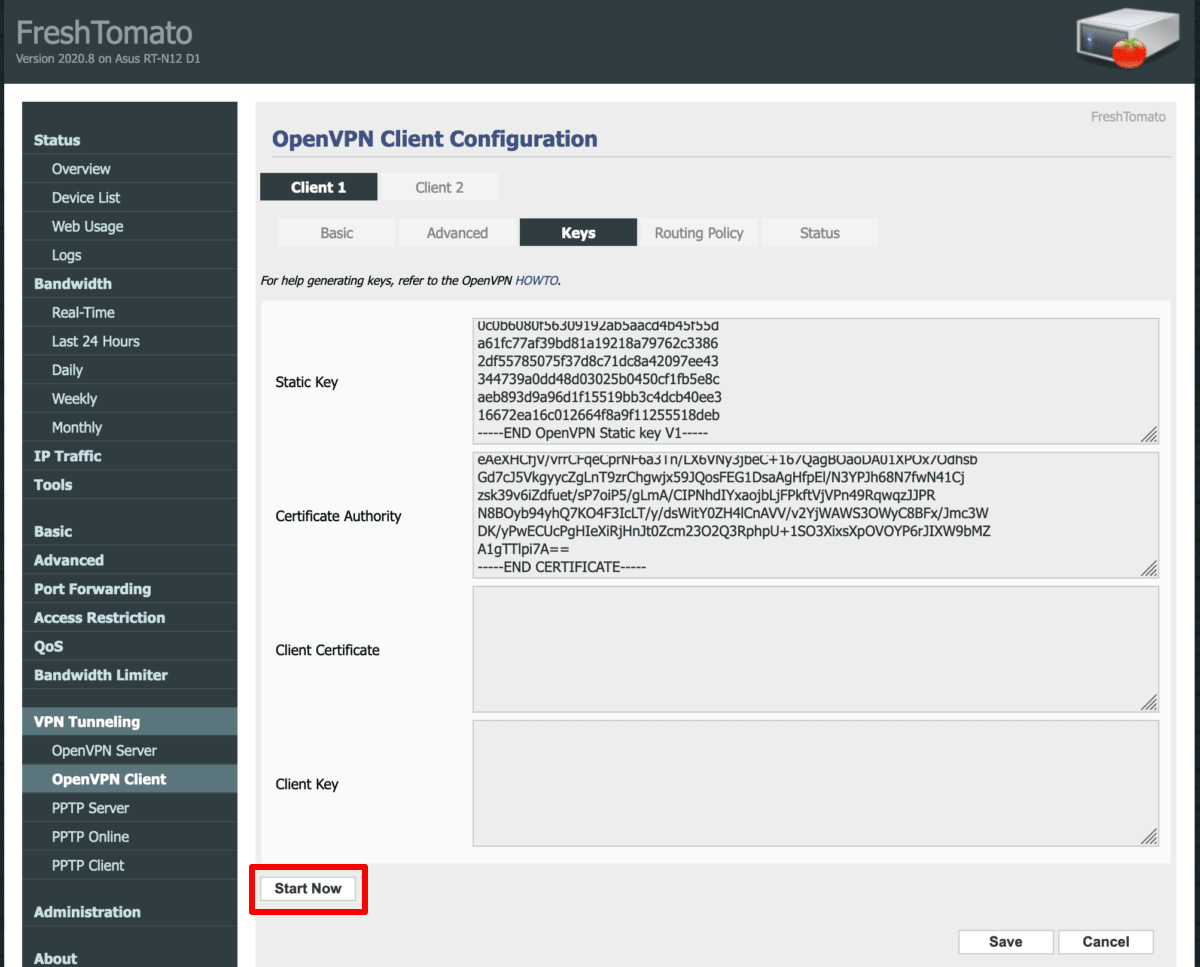
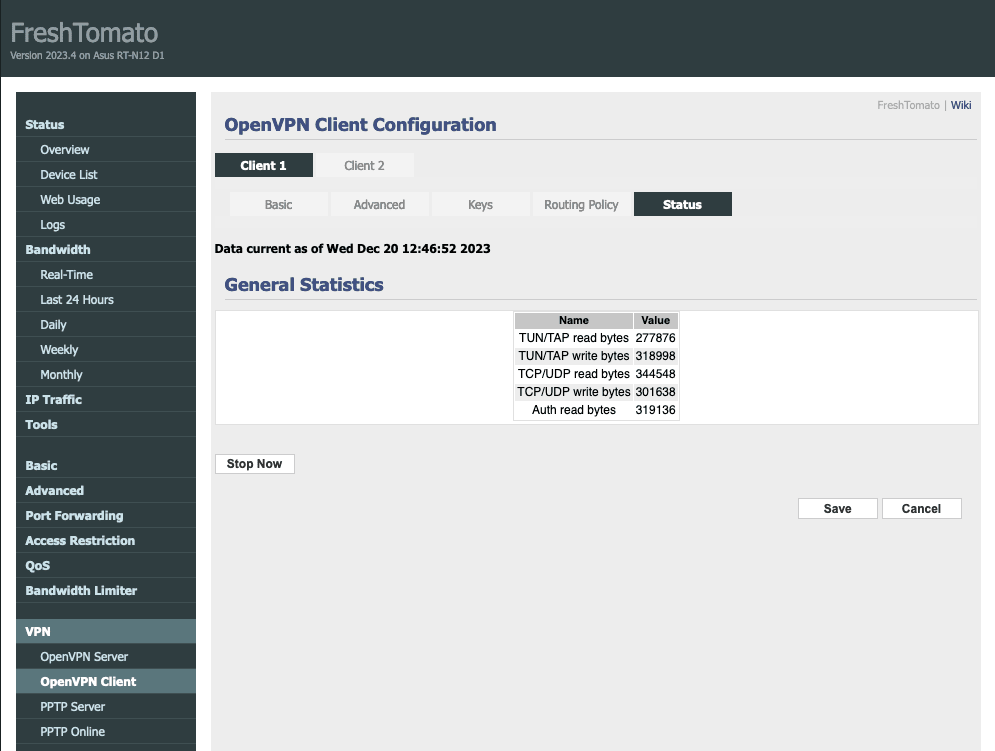
4. Start the VPN connection
To start the VPN connection you just created, click the Start Now button on any of the OpenVPN Client Configuration tabs.
To check that you’ve connected successfully, visit the Status tab. You can also test if the VPN is working by visiting our free secure IP scanner from any device on your network.
Note: if you are starting from a fresh FreshTomato installation or following a hard reset of your router, the connection may fail because the router doesn’t have the correct time set up. Restarting the router usually fixes the issue by updating the date and time from the internet, which allows the VPN connection to be successfully established.
How to set up a kill switch on your FreshTomato router
A kill switch on your router is a security feature that prevents devices connected to the router from connecting to the internet if the VPN connection fails for any reason.
Learn more about kill switches
To configure a kill switch on your FreshTomato router, go to Administration → Scripts → Firewall.
To create a kill switch where every device connected to your router will lose its internet connection if the VPN connection fails, enter the following lines:
WAN_IF=`nvram get wan_iface`
iptables -I FORWARD -i br0 -o $WAN_IF -j REJECT --reject-with icmp-host-prohibited
iptables -I FORWARD -i br0 -p tcp -o $WAN_IF -j REJECT --reject-with tcp-reset
iptables -I FORWARD -i br0 -p udp -o $WAN_IF -j REJECT --reject-with udp-reset
To create a kill switch where only devices that are connected to your router with specified IP addresses lose their internet connection if the VPN connection fails, enter the following lines:
WAN_IF=`nvram get wan_iface`
iptables -I FORWARD -i br0 -s `ip address` -o $WAN_IF -j REJECT --reject-with icmp-host-prohibited
iptables -I FORWARD -i br0 -s `ip address` -p tcp -o $WAN_IF -j REJECT --reject-with tcp-reset
iptables -I FORWARD -i br0 -s `ip address` -p udp -o $WAN_IF -j REJECT --reject-with udp-reset
Click Save when you’re done.
