How to set up SSO for Proton VPN using Microsoft
- Reading
- 0 mins
- Category
- Proton VPN for Business
Our Proton VPN for Business plans support single sign-on (SSO) as an early access (beta) feature. In this article, you will learn how to set up SSO on Proton VPN for Business using Microsoft as your identity provider (IdP).
How to set up SSO for Proton VPN using Microsoft
Proton VPN currently supports SSO using Security Assertion Markup Language(new window) (SAML) 2.0, an XML(new window)-based open standard for transferring data that verifies your identity between an IdP and SaaS applications.
Before you start, you’ll need the following:
- A Proton VPN for Business account with administrator privileges
- A Microsoft Entra(new window) account.
Once you have a Microsoft account, you’ll need to configure it for Proton VPN. You can then configure SAML on your Proton VPN for Business account. In this support article, we’ll explore:
- How to configure Proton VPN on Microsoft
- How to configure SAML SSO on your Proton VPN for Business account
- How to add SSO users in Microsoft
- How to use SSO to sign in to Proton VPN using SSO
- How to manage SSO for Proton VPN
- Troubleshooting
How to configure Proton VPN on Microsoft
1. Sign in to the Microsoft Entra admin center(new window), using a Cloud Application Administrator(new window) account or better, and go to Applications → Enterprise applications.
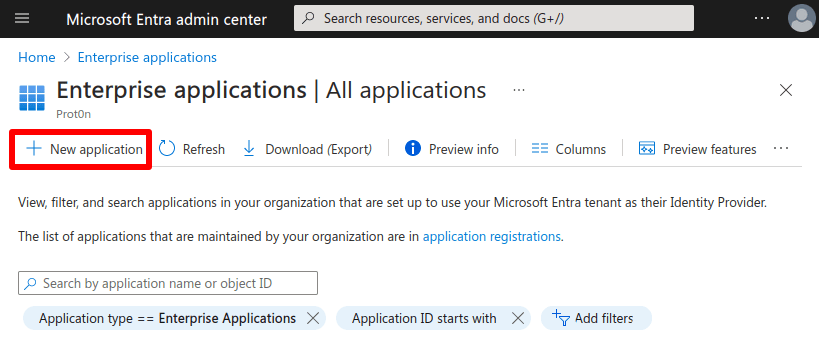
2. Click Create your own application.
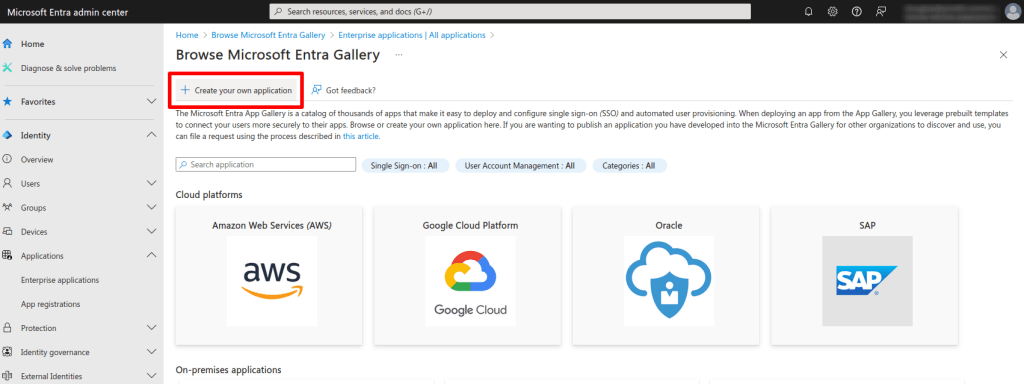
3. Give your app a name, select Integrate any other application you didn’t find in the gallery (Non-gallery), and click Create.

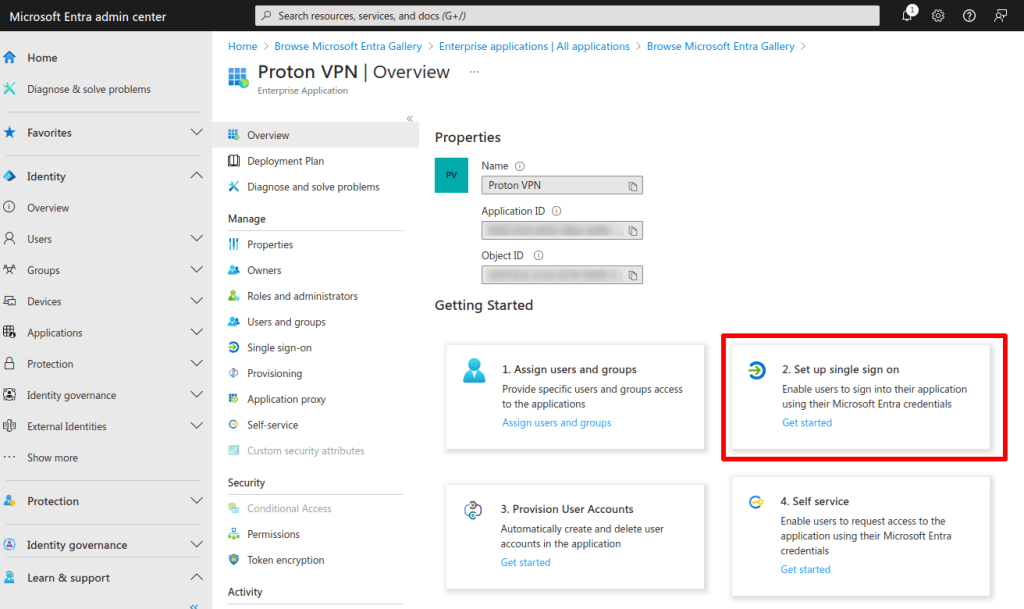
4. In the application overview tab, click 2. Set up single sign on.
5. Go to 1. Basic SAML Configuration → ✎ Edit.
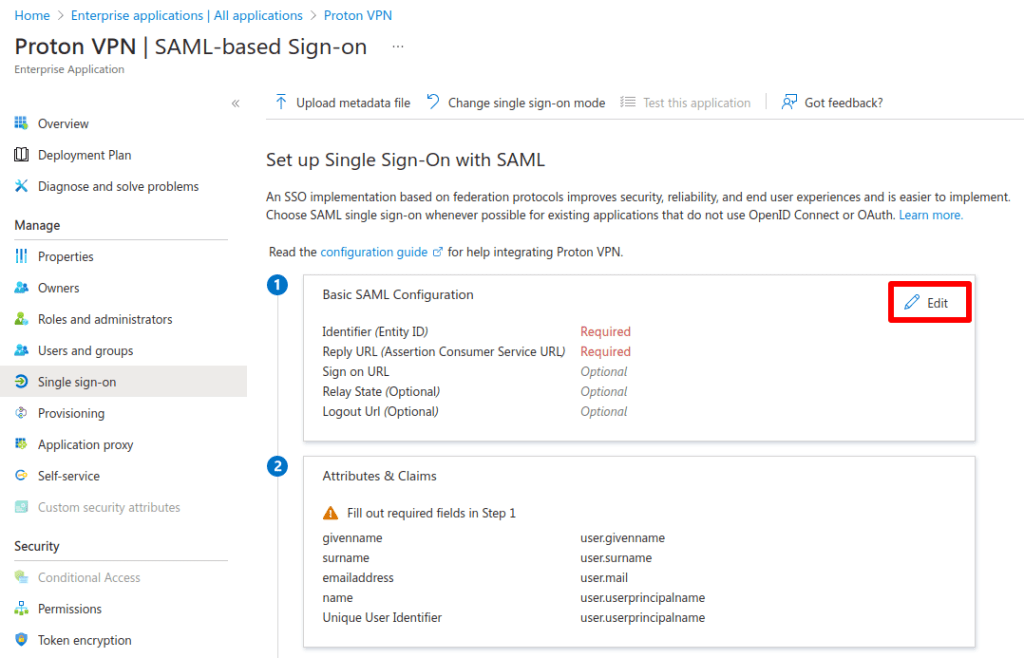
6. Go to:
- Identifier (Entity ID) → Add Identifier and enter: https://sso.proton.me/sp(new window)
- Reply URL (Assertion Consumer Service URL) → Add reply URL and enter: https://sso.proton.me/auth/saml(new window)
Click Save when you’re done, followed by X to close the Basic SAML Configuration dialog.

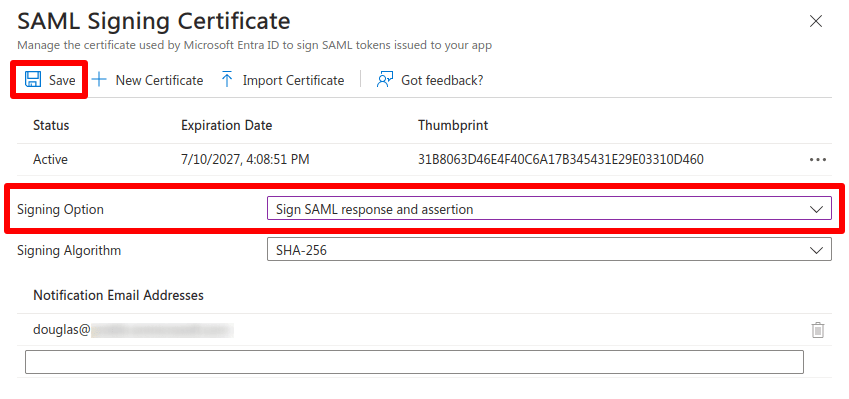
7. Go to 3. SAML Certificates → ✎ Edit.

8. Go to Signing Option and select Sign SAML response and assertion from the dropdown menu.
Click Save when you’re done, followed by X to close the SAML Certificate dialog.
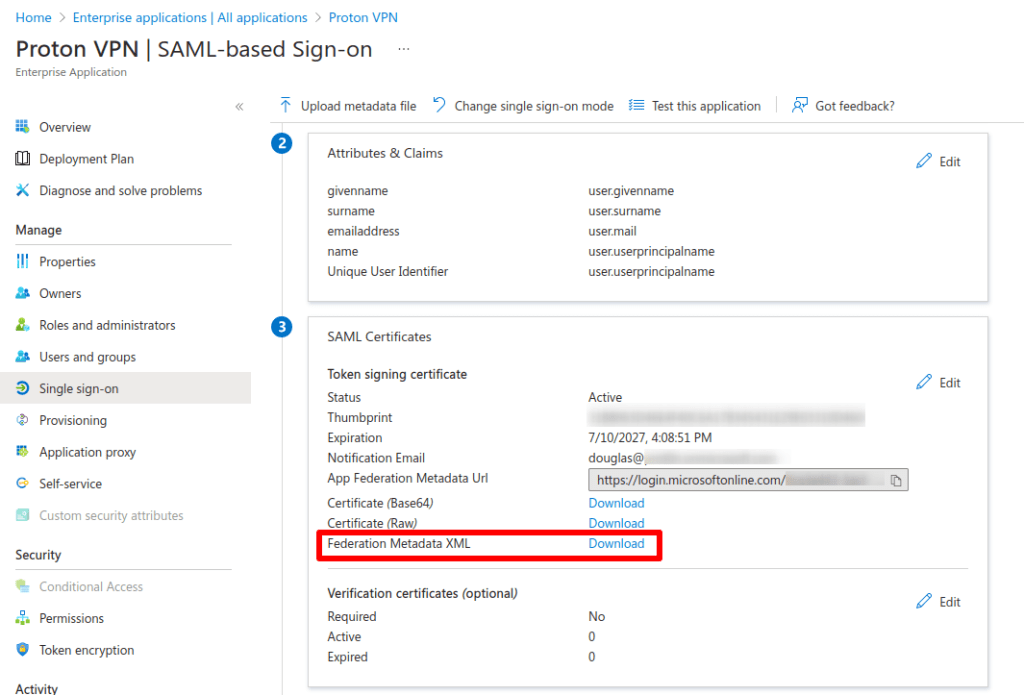
9. Go to 3. SAML Certificates → Federation Metadata XML → Download to download an XML configuration file for your application. You’ll need this file to set up SAML SSO on your Proton VPN for Business account (see below).
How to configure SAML SSO on your Proton VPN for Business account
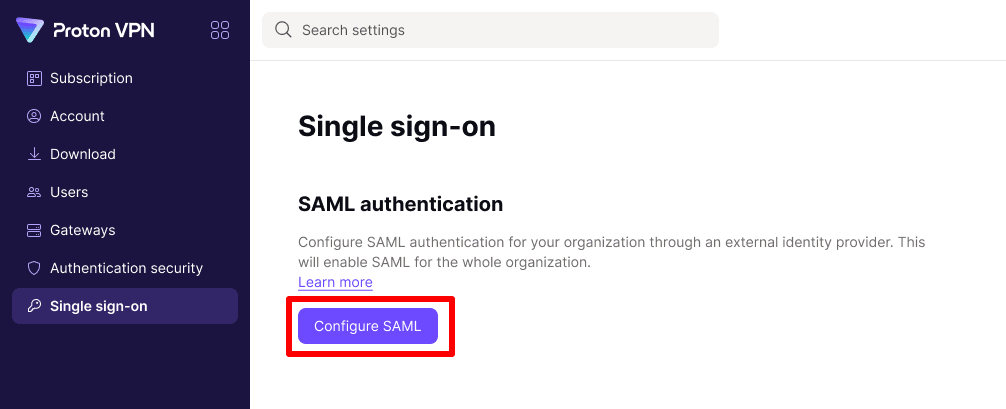
1. Log in to your Proton VPN for Business administrator account at account.protonvpn.com and go to ⚙ → Single sign-on → SAML authentication → Configure SAML.
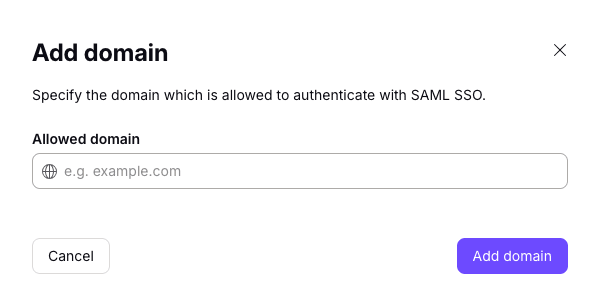
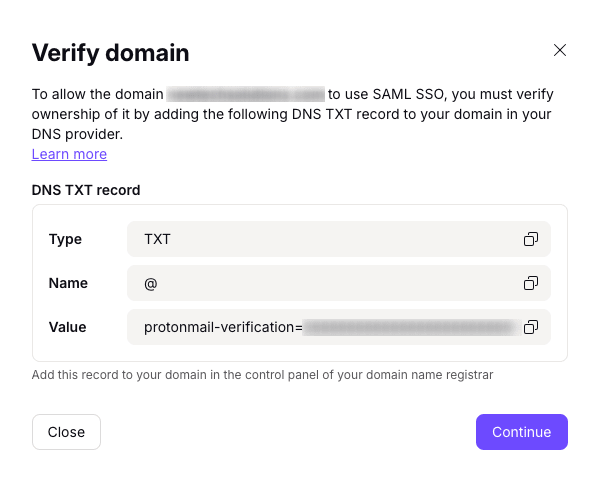
2. Add your organization’s domain name and click Add domain.
3. Verify the domain for your identity provider. To do this, log in to your domain provider’s web portal and enter the DNS TXT record(new window) displayed on this screen.
Back at account.protonvpn.com, click Continue.
4. A screen will show you the endpoints needed by Microsoft. However, we’ve already entered these (see step 4 of Configure Proton VPN on Google), so just click Continue.
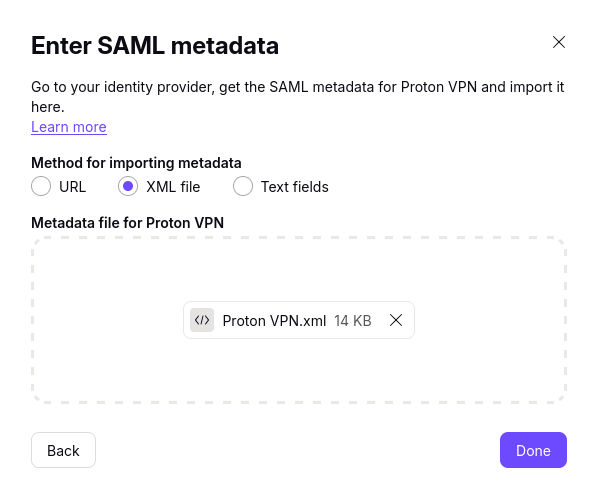
5. Import the metadata file you downloaded from Microsoft in step 9 of Configure Proton VPN on Microsoft. To do this, select XML file and either drag the XML file to the field provided or click Select file and locate the file using your system’s default file manager.
Click Done when you’re ready.
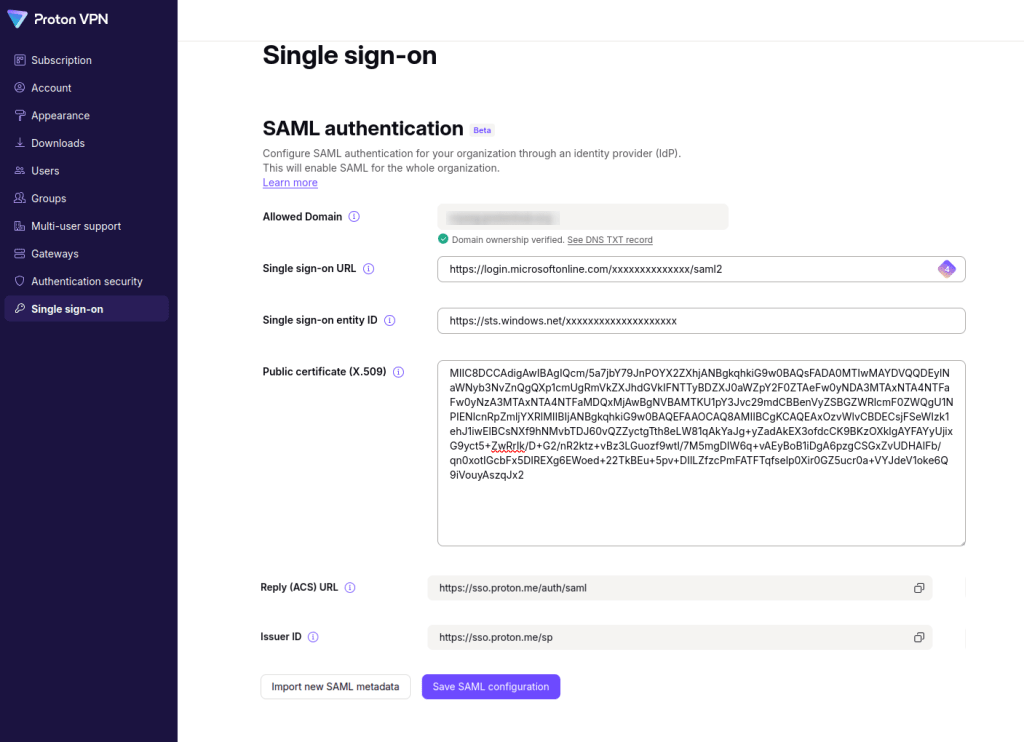
SSO using Microsoft should now be configured on your Proton VPN for Business account. Click See details for an overview of your SSO settings.
How to add SSO users in Microsoft
Before your users can sign in to your organization using SSO, you’ll need to add them in Microsoft.
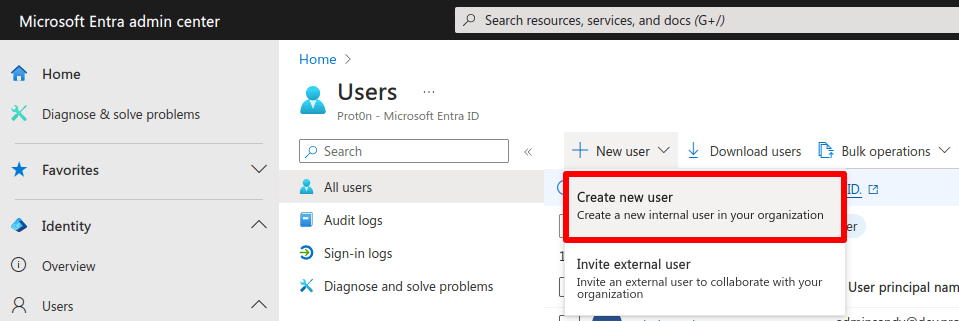
1. Sign in to the Microsoft Entra admin center(new window), using a Cloud Application Administrator(new window) account or better, and go to Users → All users tab → + New user → Create new user.
2. Fill in your new user’s details. Be sure to make a note of their password, as the user will need this to sign in to Proton VPN using SSO. Go to Review + create → Create when you’re done. Repeat this process as many times as your wish to add all relevant members of your team.

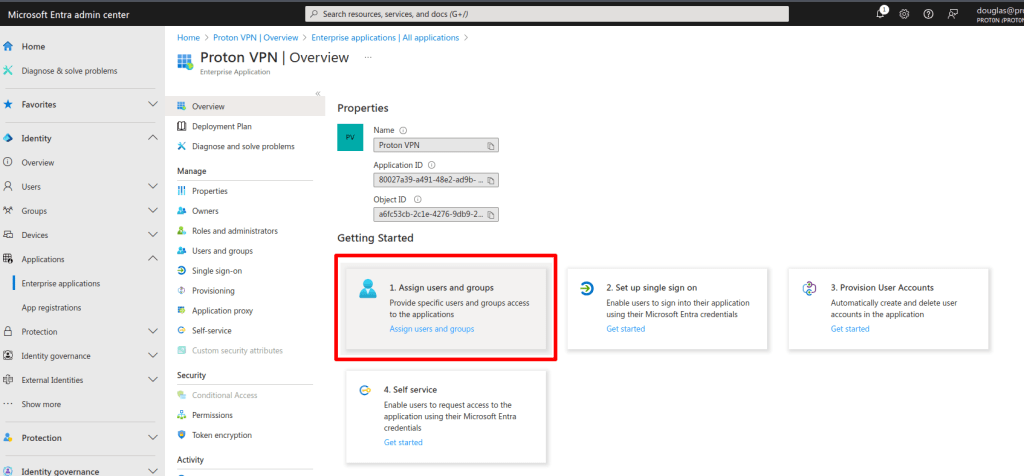
3. Go to Applications → All applications tab → select your application → Overview tab → Getting started → 1. Assign users and groups.
4. Click + Add user/group.
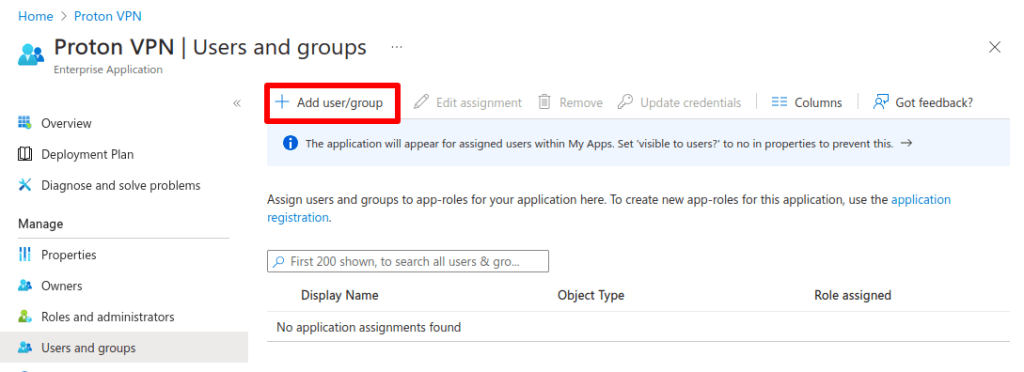
5. If you’ve already set up groups, select a group. If not, click Users and groups → None Selected.

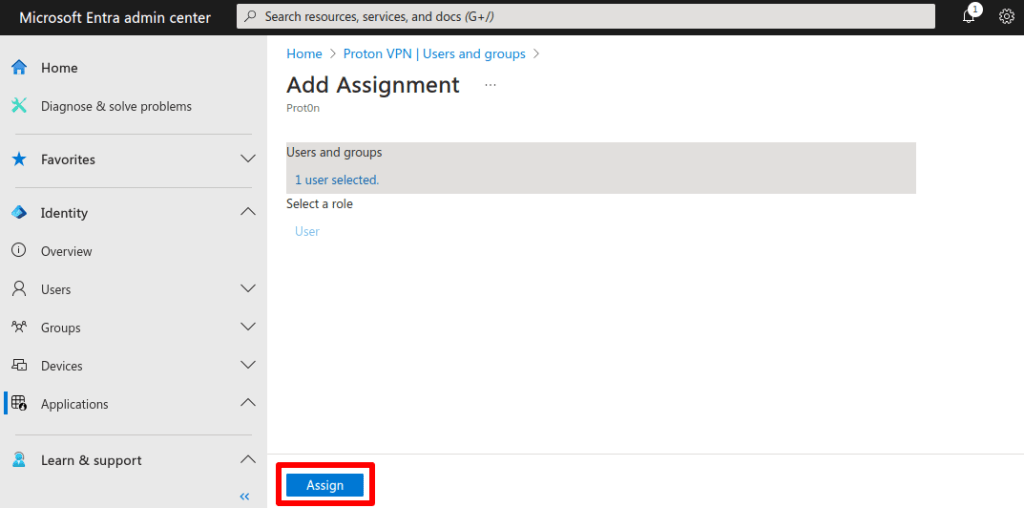
6. Select users you’ve added to Microsoft that you’d like to assign to your SSO app. Click Select when you’re done.

7. Click Assign to add the selected users to your app.
Your assigned users can now use SSO to sign into Proton VPN.

How to use SSO to sign in to Proton VPN using SSO
1. As a user with a new SSO account configured on Microsoft, go to account.proton.me/vpn . Enter your email address (as configured on Microsoft) and click Continue.
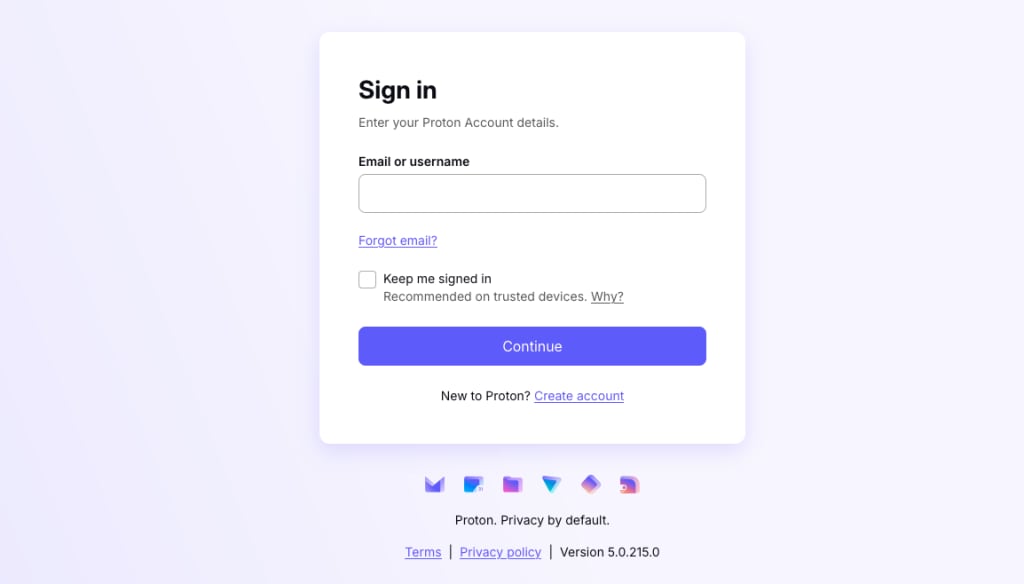
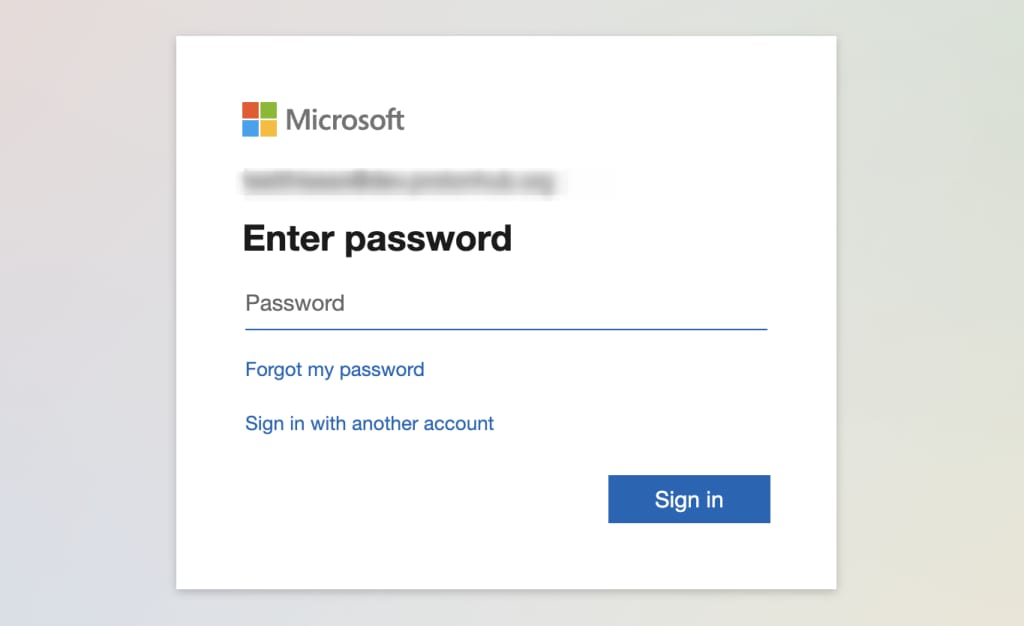
2. We’ll detect that you’re using a Microsoft SSO password and automatically direct you to the Microsoft sign-in page . Enter your Microsoft SSO password (this will be supplied by your manager, or see step 2 in the “How to add SSO users in Microsoft” section above), and click Sign in.
How to manage SSO for Proton VPN
Your organization’s users can now log in to Proton VPN apps using the username and password they created (see above).
To view which users can do this, log in to your Proton VPN for Business administrator account at account.protonvpn.com and go to Organization → All users. (Note: SSO users will only appear here once they have signed in at least once.)
To manage access to your Proton VPN organization, log in to your identity provider.
You can manage individual users using the dropdown menu in the Edit column of the user you wish to manage SSO access for.

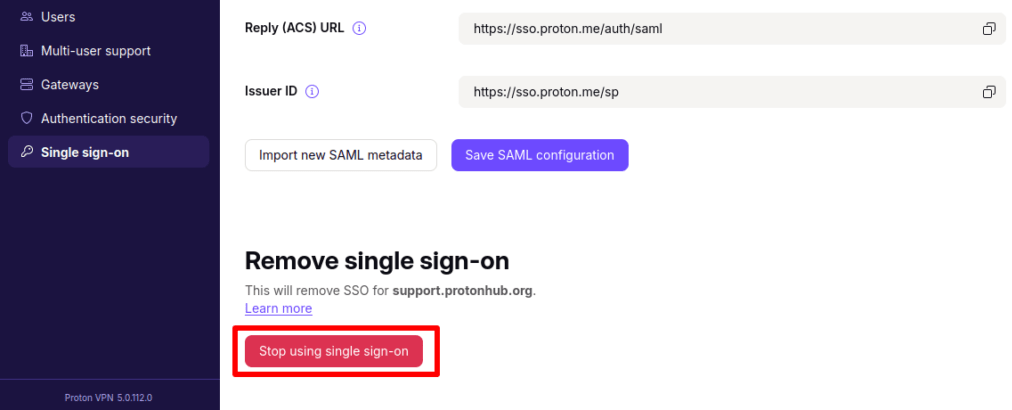
To turn off SSO for your whole organization, go to Single sign-on → Remove single sign-on → Stop using single sign-on.
Please note that doing this deletes all configurations and users associated with your domain. We therefore strongly recommend against turning off SSO for your whole organization.
Troubleshooting
In case you see the following message, there are steps you can take to resolve the issue:
There is an error in the single sign-on configuration, please contact your organization administrator.
- Confirm that the certificate you uploaded on the Proton VPN SAML configuration page matches the one provided by the Microsoft IdP.
- Confirm that the Single sign-on entity ID on the Proton VPN SAML configuration page is the same as the Issuer.