


How to set up your Ubiquiti Dream Machine for Proton VPN using OpenVPN
This community-contributed guide shows you how to set up a Ubiquiti UniFi Dream Machine (UDM) router to connect to Proton VPN using the OpenVPN VPN protocol.
We hope you find it useful, but the Proton VPN team has not had an opportunity to test it and cannot provide support for Ubiquiti Dream Machine routers.
We also have guides for setting up Proton VPN on a wide selection of other popular routers.
Learn how to install Proton VPN on different routers
Before starting, you’ll need the following:
- A computer that’s connected to your router so that you can access your Dream Machine’s web interface. To do this, enter 192.168.1.1 into your browser’s URL bar.
- Your OpenVPN username and password. These are different from your regular Proton VPN username and password. To find them, sign in to account.protonvpn.com and go to Account → OpenVPN / IKEv2 username.
How to set up Proton VPN on a UDM
1. Create an OpenVPN configuration file
Sign in to Proton VPN using your Proton Account username and password at account.protonvpn.com, go to Downloads → OpenVPN configuration files, and download an OpenVPN configuration file. Be sure to Select Platform: Router.
Learn how to download an OpenVPN configuration file from Proton VPN
2. Upload the OpenVPN config file
Open your Dream Machine’s web interface in a browser window. Go to Settings → VPN → VPN Client tab → Create New.
Under Configuration, select OpenVPN. Give your new connection an appropriate Name, then click Configuration File → Upload and locate the configuration file that you just downloaded.
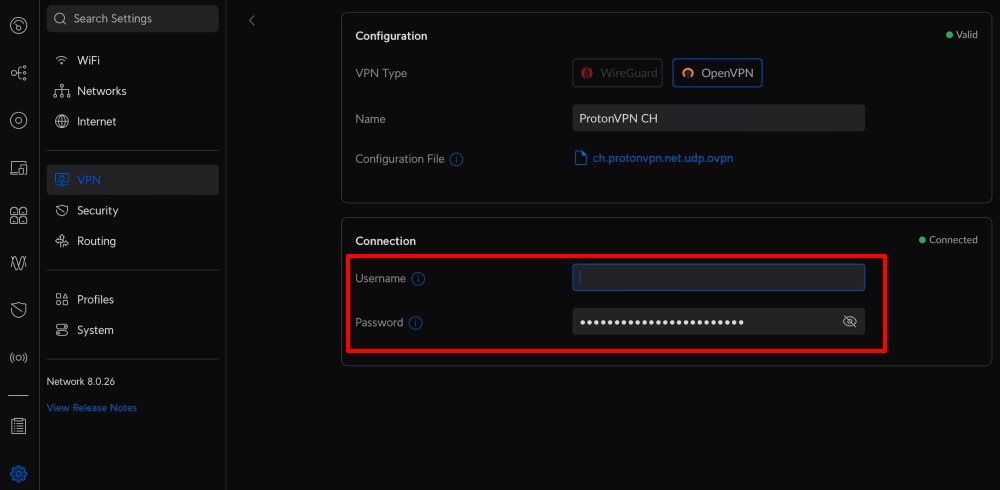
3. Enter your OpenVPN username and password
Go to Connection and enter your OpenVPN username and password.
Remember: These are different from your regular Proton VPN username and password.
Click Apply changes when you’re done.

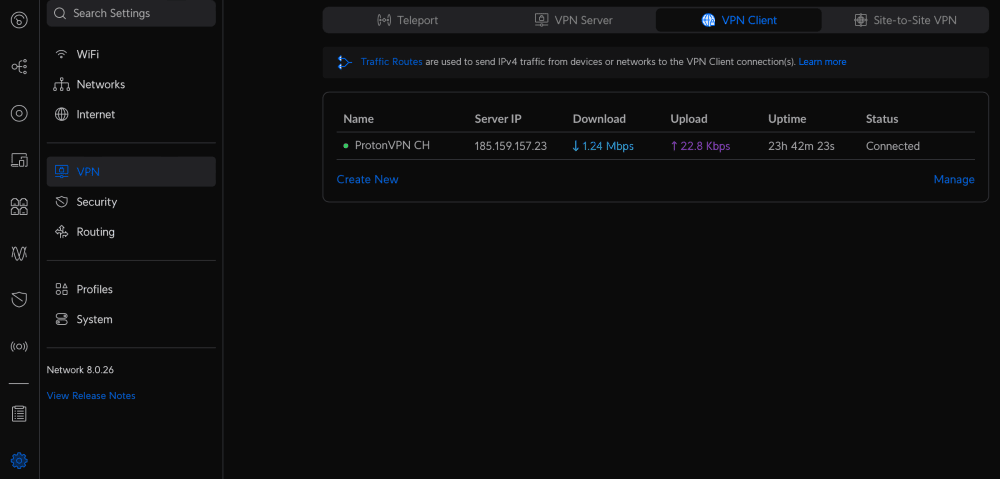
4. In the VPN client tab, you can now see your newly created VPN interface, which should be connected.
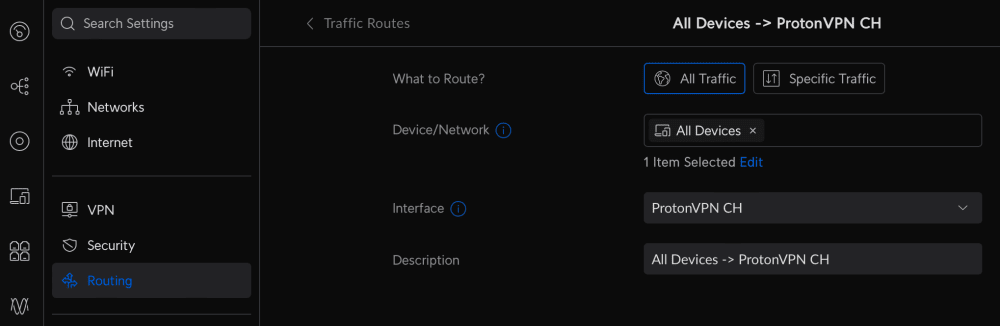
5. Although the VPN interface is now created and running, traffic from devices connected to the Dream Machine isn’t being routed through it. To route all traffic through the VPN interface, go to Routing → Traffic Routes tab → Create Entry and enter the following settings:
- What to route: All traffic
- Device/Network: Select All devices from the dropdown menu
- Interface: Select the VPN interface you just created from the dropdown menu
- Description: Enter a descriptive name for this traffic routing rule
Click Add entry when you’re done.
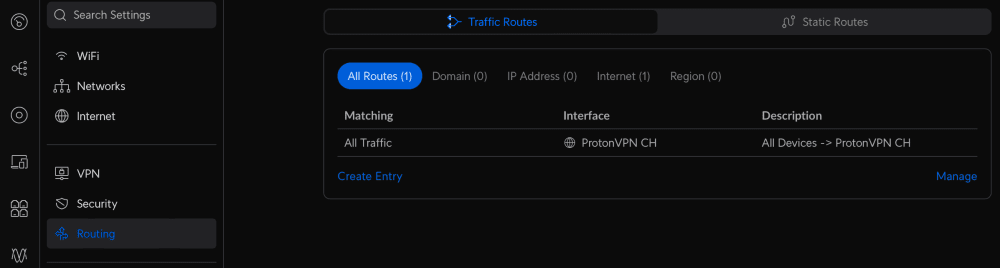
6. Back on the Routing → Traffic Routes tab, you can see the new route you’ve created.
You can also test if the VPN is working by visiting our free secure IP scanner(new window) from any device on your network.