How to connect to LAN devices by name on Windows
- Reading
- 2 mins
- Category
- Proton VPN Features
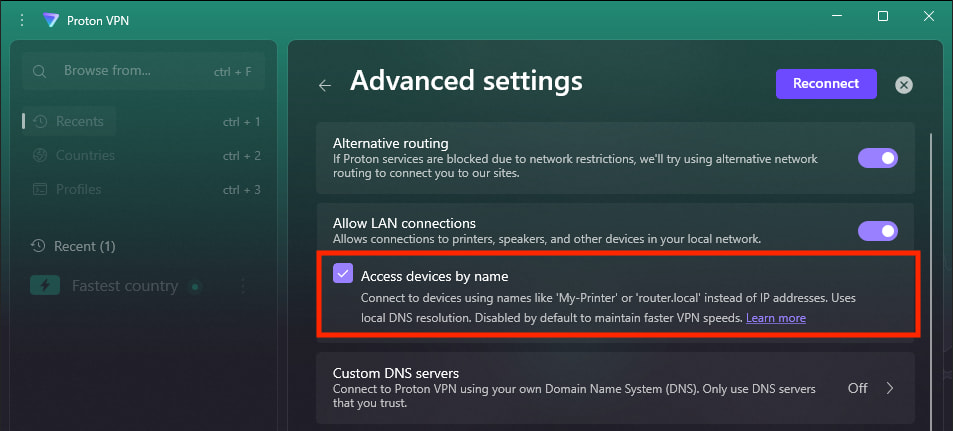
You can allow LAN connections in our Windows VPN app, which lets your Windows device access other devices on your local network (such as printers, routers, and smart TVs). To simplify this process, you can connect to these devices using their names (for example, My-printer or router.local) using our Access devices by name feature.
This lets you avoid looking up your devices’ IP addresses, but also may result in slower speeds.
How to connect to LAN devices by name
To use Access devices by name, sign in to the Proton VPN Windows app and go to Settings → Connection → Advanced settings → Allow LAN connections. Toggle the switch on (if it isn’t already) and select Access devices by name.
When you’re done, click Reconnect (if you’re already connected to a VPN server) or Apply.
It’s worth noting that some Windows devices don’t support our default local DNS handling settings. In this case, the Proton VPN app will use the standard Windows settings.
A note on how LAN addresses work
DNS (domain name system) translates human-friendly domain names to computer-friendly IP addresses.
Learn more about DNS and how it works
Windows supports multicast DNS (mDNS). This lets you connect to devices on your local network using names like My-printer or router.local instead of their IP addresses. Much like regular DNS, Windows automatically translates the human-friendly text name into an IP address that computers understand.
By default, all Proton VPN DNS requests are routed through the VPN tunnel — any external requests are blocked. This allows for the fastest VPN speeds, but it blocks all mDNS requests.
This means if you don’t turn on Access devices by name, you’ll only be able to connect to LAN devices using their IP addresses.