How to set up Proton VPN on an OpenWrt router using OpenVPN
- Reading
- 5 mins
- Category
- Routers
You can set up Proton VPN on your router, which will protect every device that connects to the internet using that router. In this guide, we take a step-by-step look at how to set up Proton VPN on an OpenWrt(new window) router using the OpenVPN VPN protocol.
Please note that we only support OpenWrt 22.03+. If you’re running an older version of OpenWrt, we recommend upgrading to the latest version of the firmware. Please also note this guide assumes your router is using “factory default” settings. If you’ve changed these, DNS leaks are possible.
We also have guides for setting up Proton VPN on a wide selection of other popular routers.
Before starting, you’ll need the following:
- A computer that’s connected to your LAN network so that you can access your OpenWrt router’s web interface(new window). To do this, enter 192.168.1.1 into your browser’s URL bar.
- Your OpenVPN username and password. These are different from your regular Proton VPN username and password. To find them, sign in to account.protonvpn.com and go to Account → OpenVPN username.
How to set up Proton VPN on an OpenWrt router
1. Download an OpenVPN configuration file
Sign in to Proton VPN using your Proton Account username and password at account.protonvpn.com, go to Downloads → OpenVPN configuration files, and download an OpenVPN configuration file. Be sure to Select Platform: Router.
Learn how to download an OpenVPN configuration file from Proton VPN
2. Install the required packages
Follow these official instructions(new window) to install the following packages for OpenWrt: openvpn-openssl(new window) and luci-app-openvpn(new window).
Once you’ve done this, turn your router off and then on again. The OpenWrt web interface will now have a new OpenVPN configuration page.
3. Upload and edit your OpenVPN config file
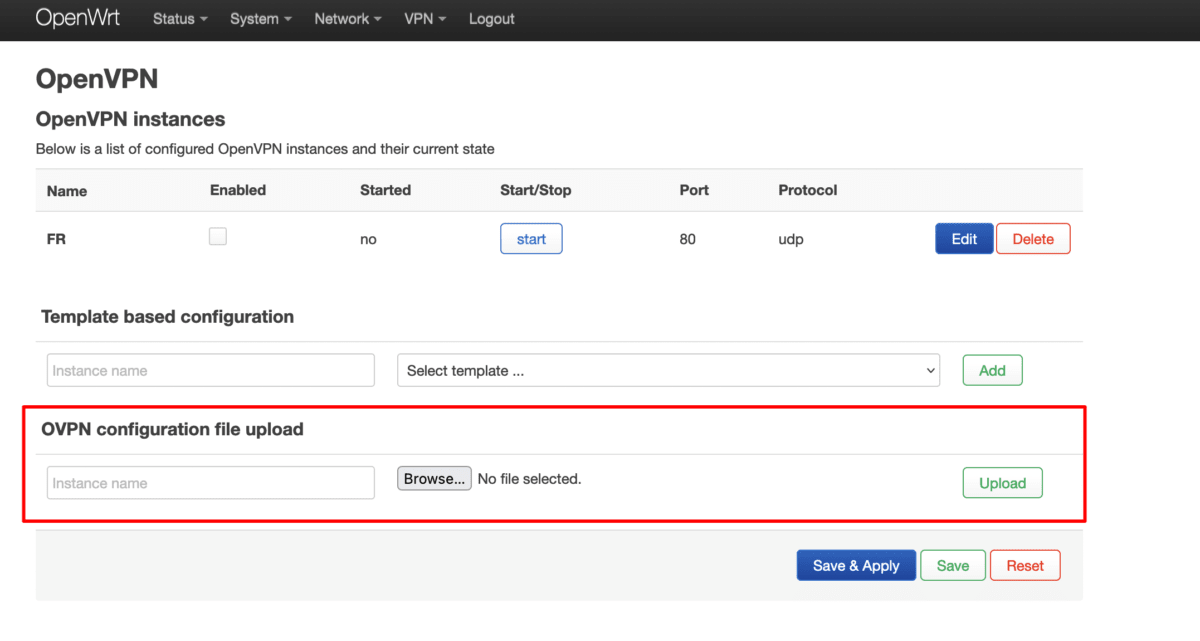
In the OpenWrt web interface, go to VPN → OpenVPN → OpenVPN configuration file upload → Browse… and select the OpenVPN configuration file you downloaded in step 1.
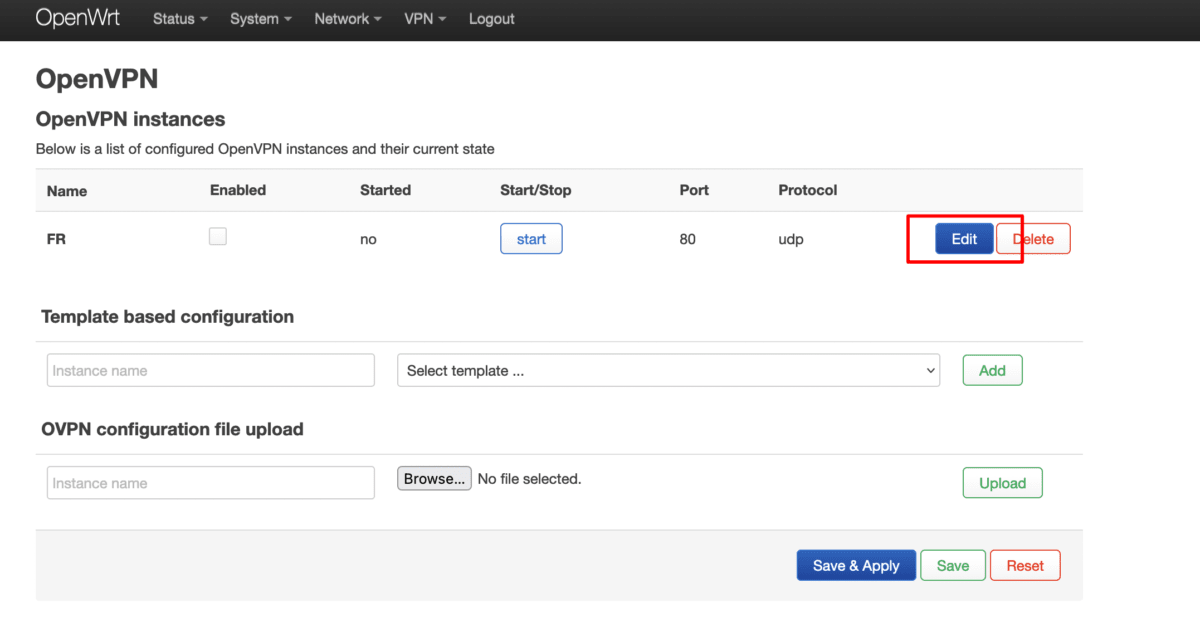
Now go to OpenVPN instances and click Edit next to the OpenVPN configuration file you just uploaded.
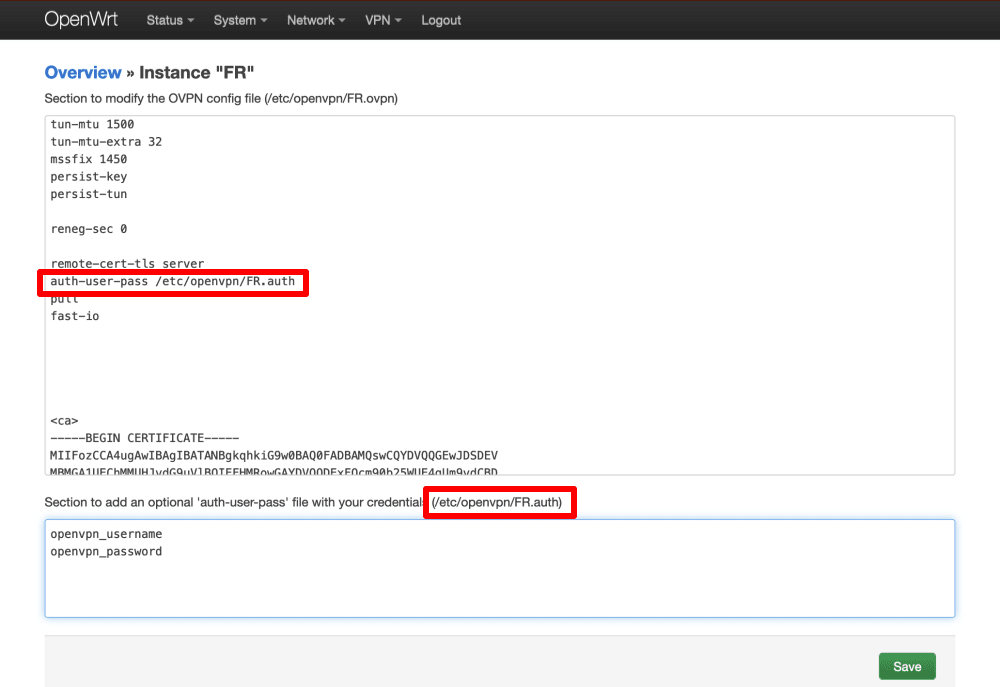
Look for the line beginning auth-user-pass and add the full path to the username/password .auth file. You can find this lower down on the page next to the heading Section to add an optional ‘auth-user-pass’ file with your credentials.
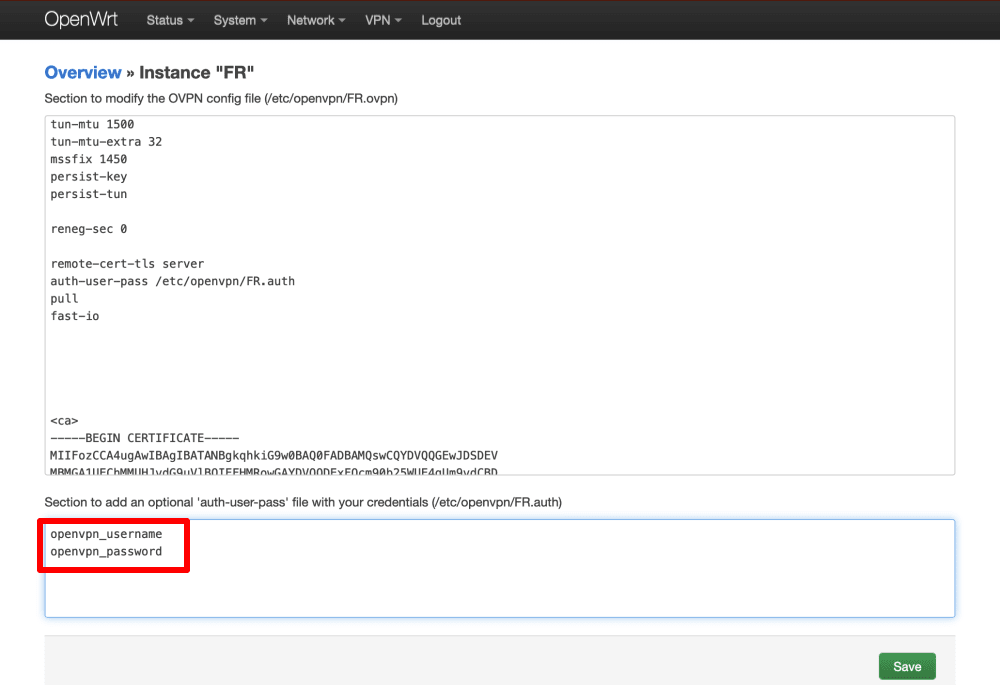
In the box under Section to add an optional ‘auth-user-pass’ file with your credentials, enter your OpenVPN username and password. Remember: These are different from your regular Proton VPN username and password.
Note: to use our NetShield DNS filtering feature, append the suffix +f1 to your username to block malware or +f2 to block malware, ads, and trackers (for example, 123456789+f2).
Click Save, then go to VPN → OpenVPN → Save & Apply.
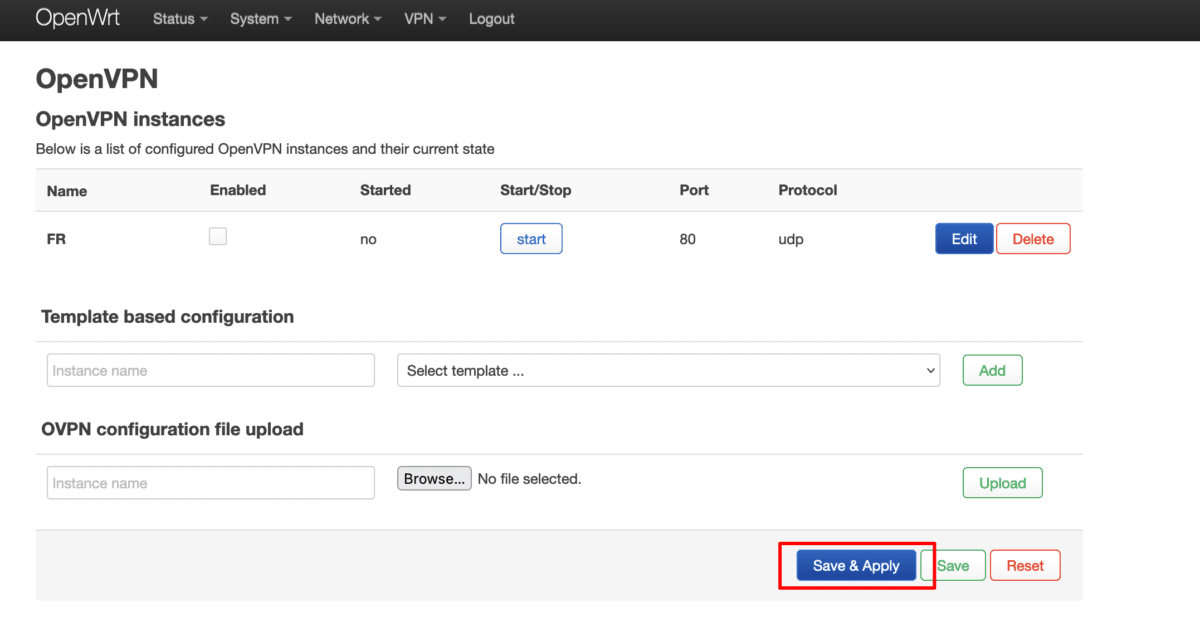
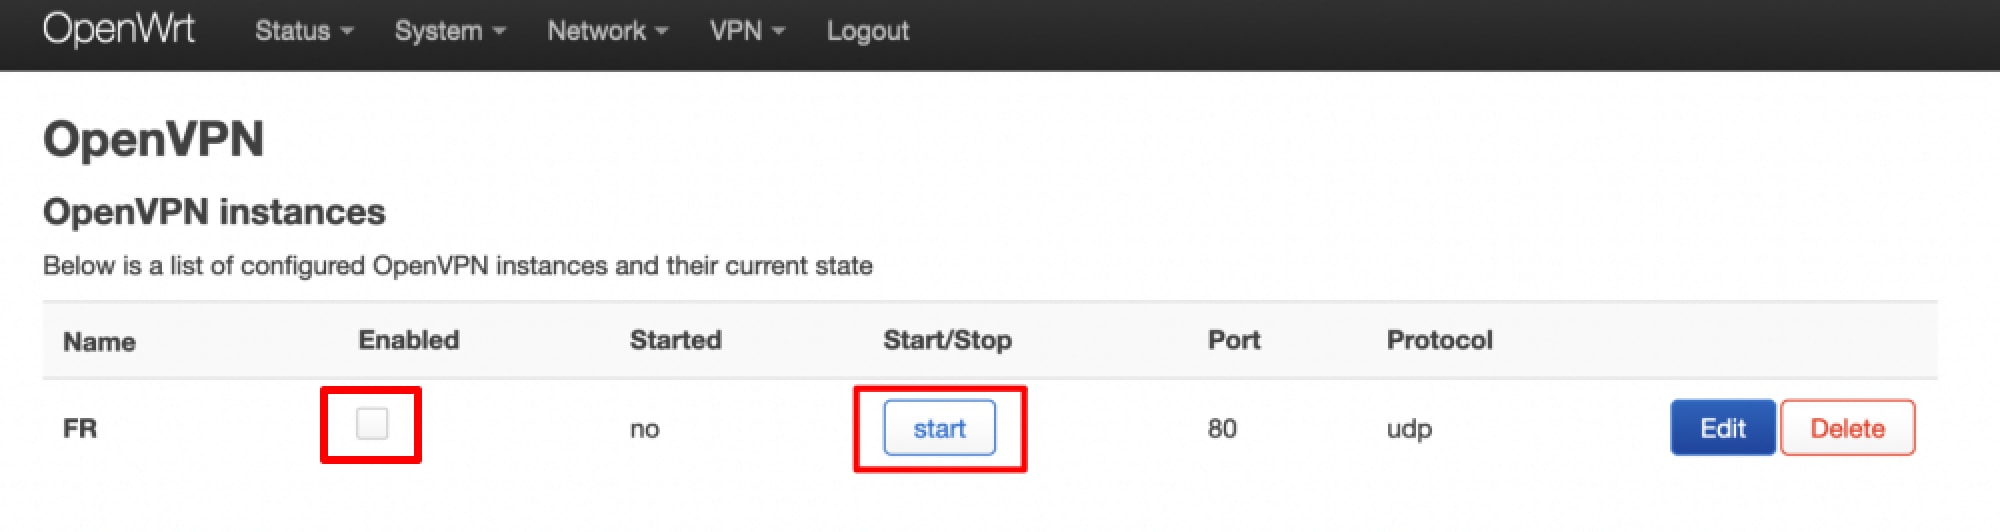
4. Start and enable the OpenVPN client
Go to OpenVPN instances → tick the Enabled checkbox → Start for the VPN interface you just created. The OpenVPN connection can take up to 10 seconds to start (and close).
Click Save & Apply when you’re done.
5. Configure firewall rules
The VPN is now set up, and your router can use it. However, devices that connect to the router won’t be able to access the internet. To fix this, we need to configure some firewall rules. Go to Network → Firewall → Zones → Zones ⇒ Forwardings → wan (red zone) → Edit.

Go to the Advanced Settings tab → Covered devices and select Ethernet Adapter “tun(x)” from the dropdown menu (this will probably be tun0 if you only have a single VPN interface running).
Click Save, then click Save & Apply.

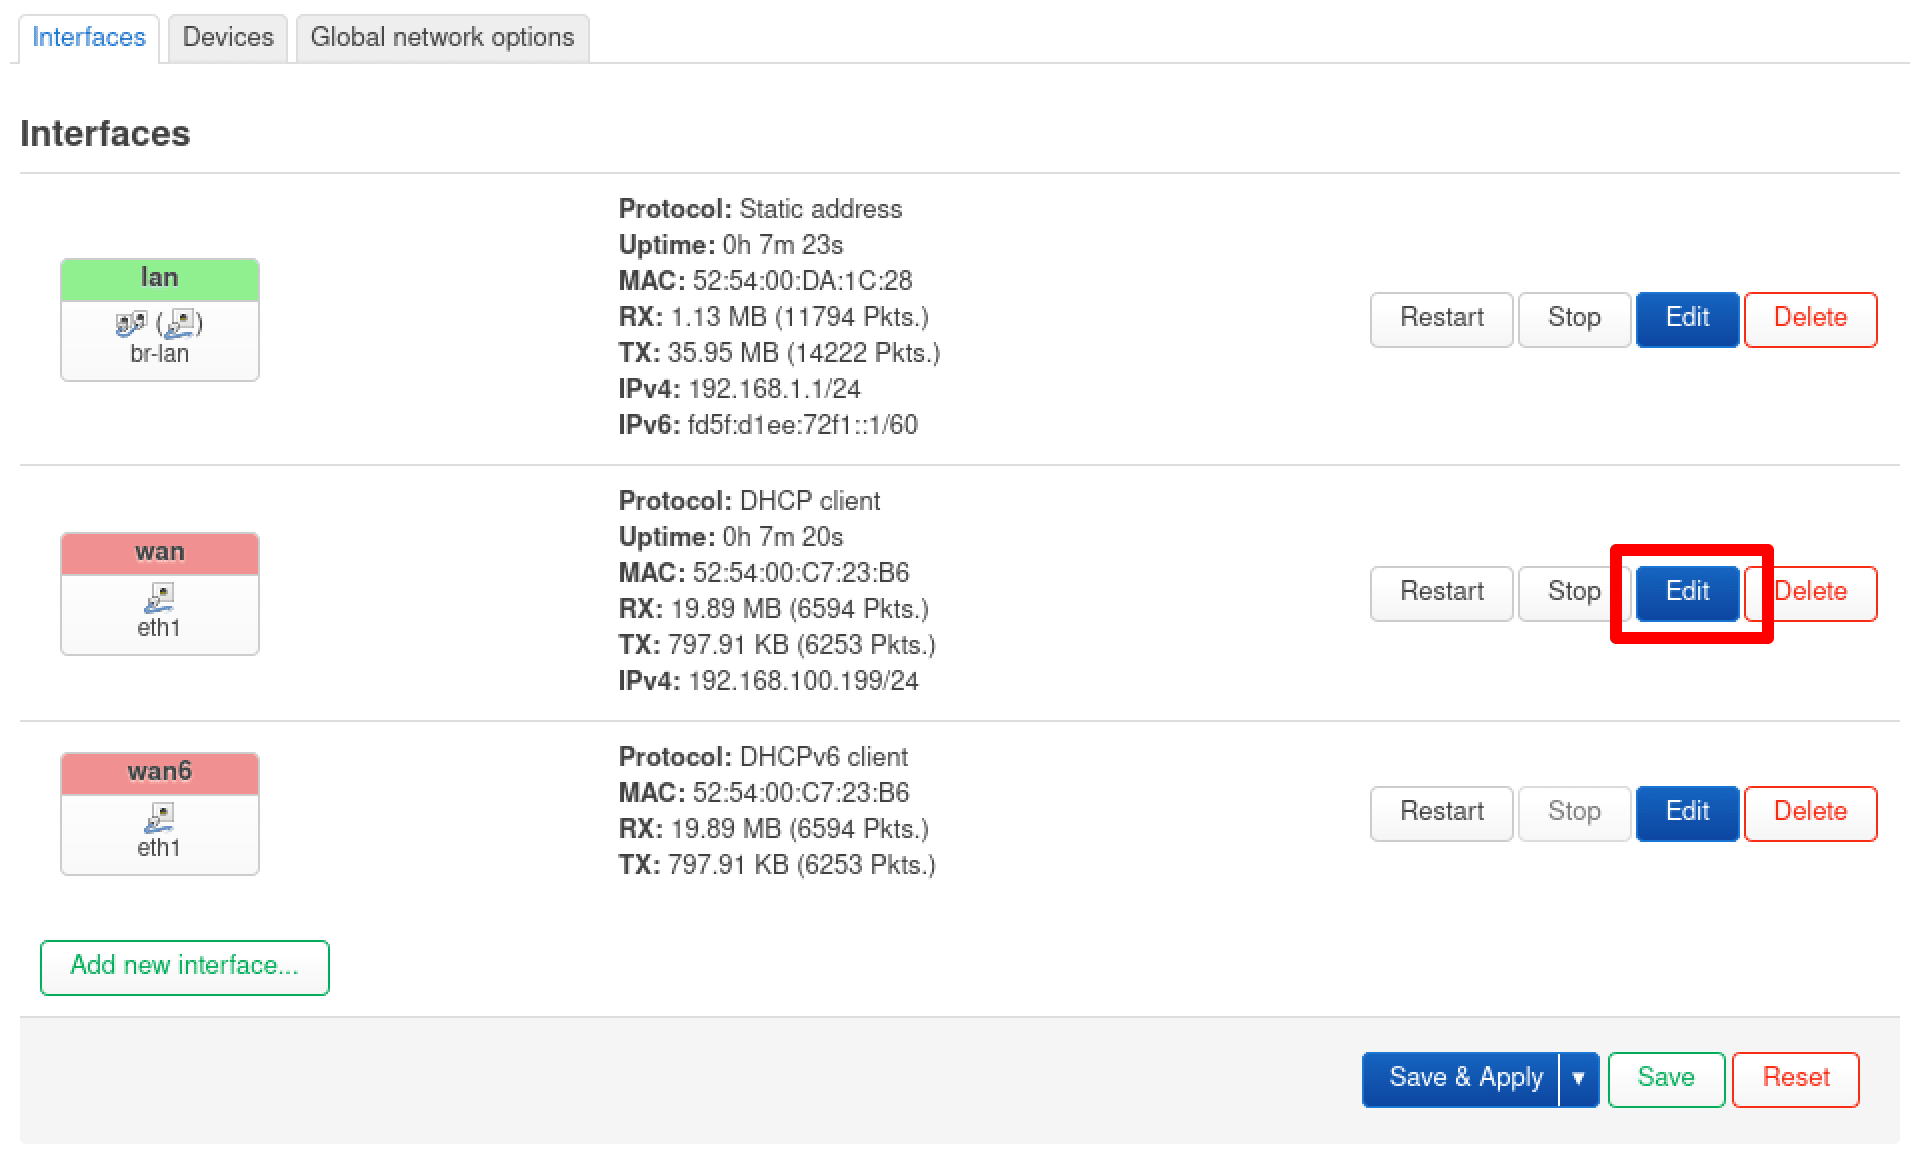
6. Configure DNS settings
Go to Network → Interfaces wan → Edit.
Go to the Advanced Settings tab and configure the following settings:
- Use DNS servers advertised by peers: Unchecked
- Use custom DNS servers: 10.2.0.1
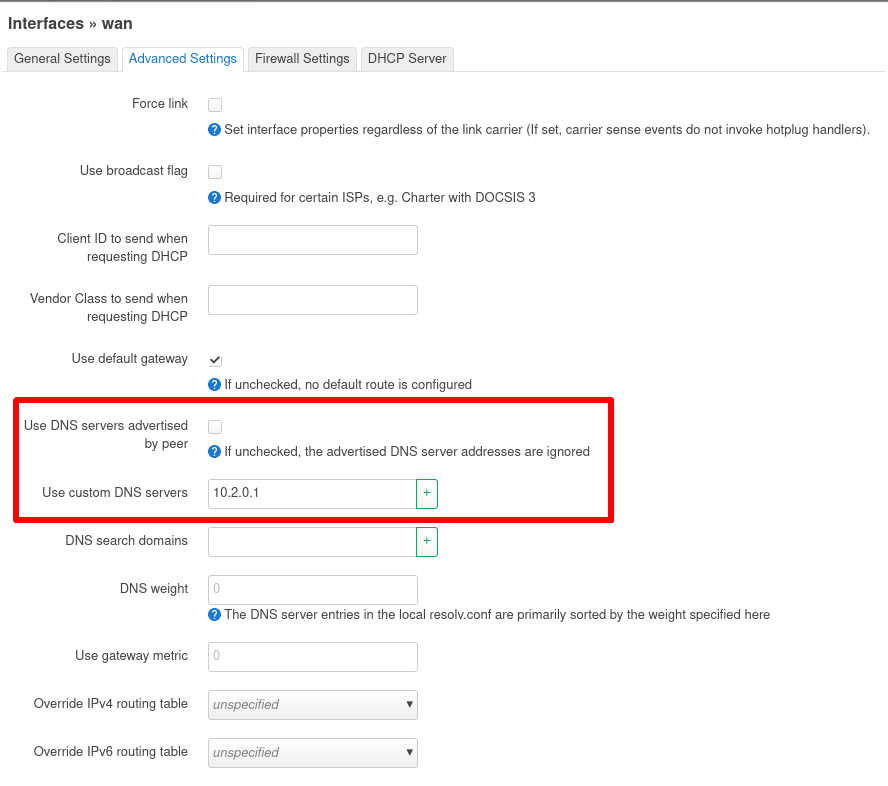
Click on Save, then Save & Apply.
7. Run a test
Establish a VPN connection. To verify the VPN is working, visit our free secure IP scanner(new window) from any device on your network. To ensure there are no DNS leaks, go to dnsleaktest.com(new window).