


How to set up Proton VPN on Synology DSM
This article provides instructions for setting up Proton VPN on a Synology NAS device running the DiskStation Manager (DSM) operating system. It also includes an optional guide for sharing the Synology’s VPN connection with other devices on your LAN network.
Prerequisites
- Synology DSM 7+ up and running.
- A computer on the LAN network to access the Synology frontend.
- Any router OpenVPN configuration file. The configuration files can be downloaded in the Downloads category on your account.
Step one: add VPN connection
In this step we are going to create the VPN connection and bring it up:
- Go to Control panel → Network → Network Interface
- Click on Create → Create VPN profile

- Select OpenVPN (via importing a .ovpn file) and click on Next
- Enter the following:
- Profile name: a descriptive name for your connection (e.g. Proton VPN_DE10_UDP)
- Username: Your Proton VPN OpenVPN Username
- Password: Your Proton VPN OpenVPN Password
- Import .ovpn file: browse your local hard drive for the file you downloaded from your account page
Note 1: To find your OpenVPN username and password, go to your Proton Account. These are not the same as your regular Proton Account username and password.
Note 2: to use our NetShield DNS filtering feature, append the suffix +f1 to your Username to block malware, or +f2 to block malware, ads, and trackers (for example 123456789+f2).
However, this may not work because Synology is introducing artificial limitations (that are built-in to OpenVPN itself) on the data values that DSM will accept. The following workaround is reported to be effective:
- SSH into your Synology NAS(new window)
- Enter the command cd /usr/syno/etc/synovpnclient/openvpn
- Look for a file called ovpnclient.conf and open it with text editor
- Find the line auth-user-pass [/path/to/filename]. This specifies the location of the username and password file
- Open the username and password file with a text editor and add the suffixes described above to the username
- Click Next.

- Use default gateway on default network: checked
- Allow other network devices to connect through this Synology server’s Internet connection: check if you plan to use your Synology as a router for your whole network
- Reconnect when the VPN connection is lost: checked
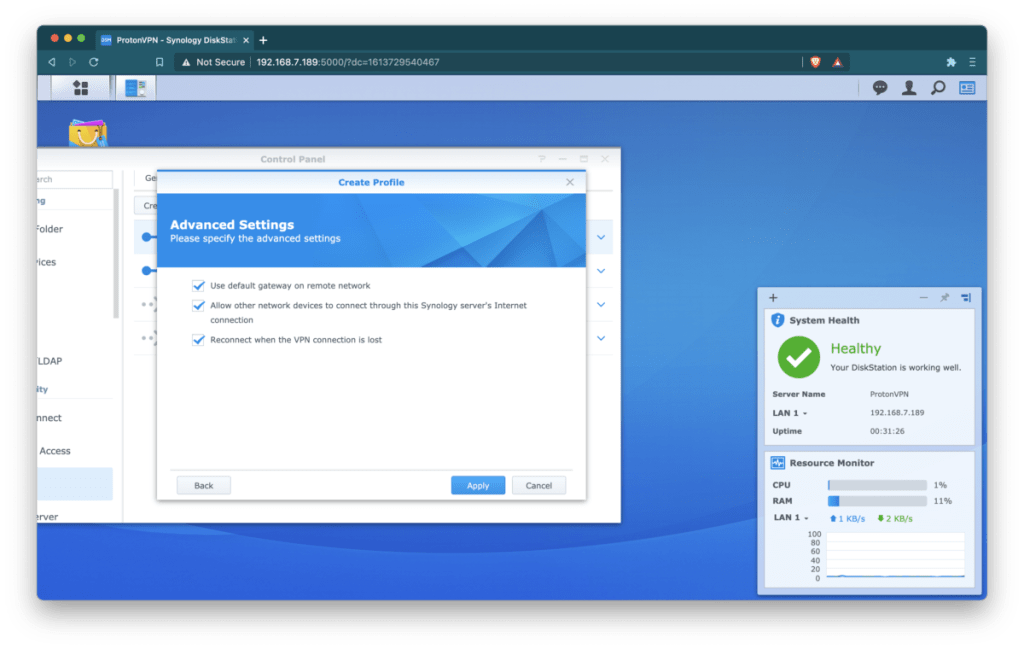
- Click on Apply
- Now click on General tab
- Check Manually configure DNS server
- Enter:
- Preferred DNS server: 10.1.0.1
- Alternative DNS server: leave blank (erase the proposed value if any)
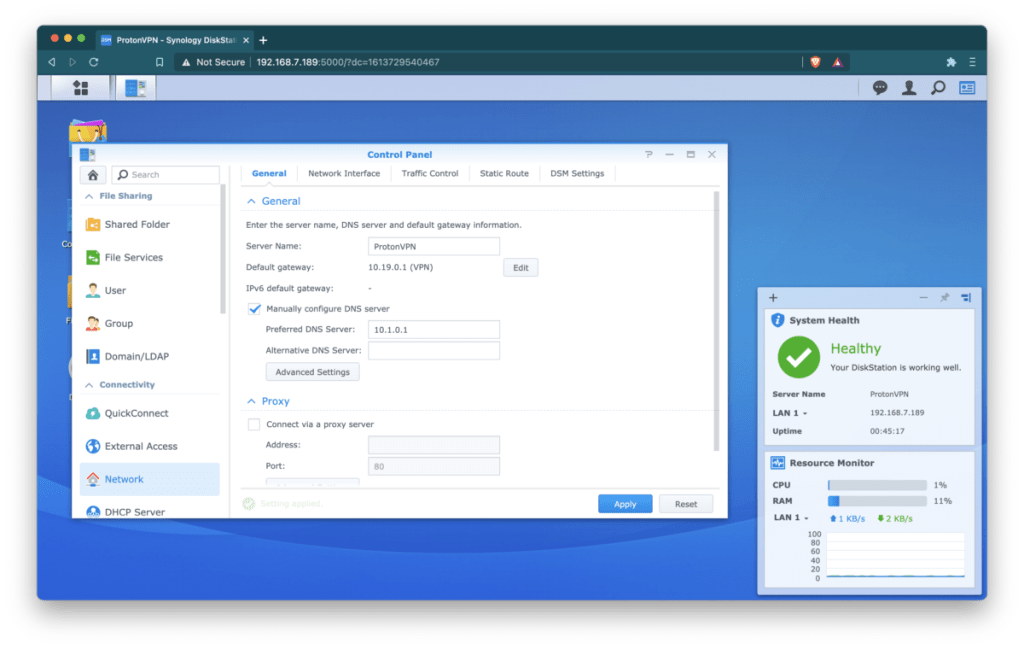
- Click on Apply
- Go back to Network Interface tab
- Select Manage → Service Order
- Verify the VPN connection is the topmost connection in the list
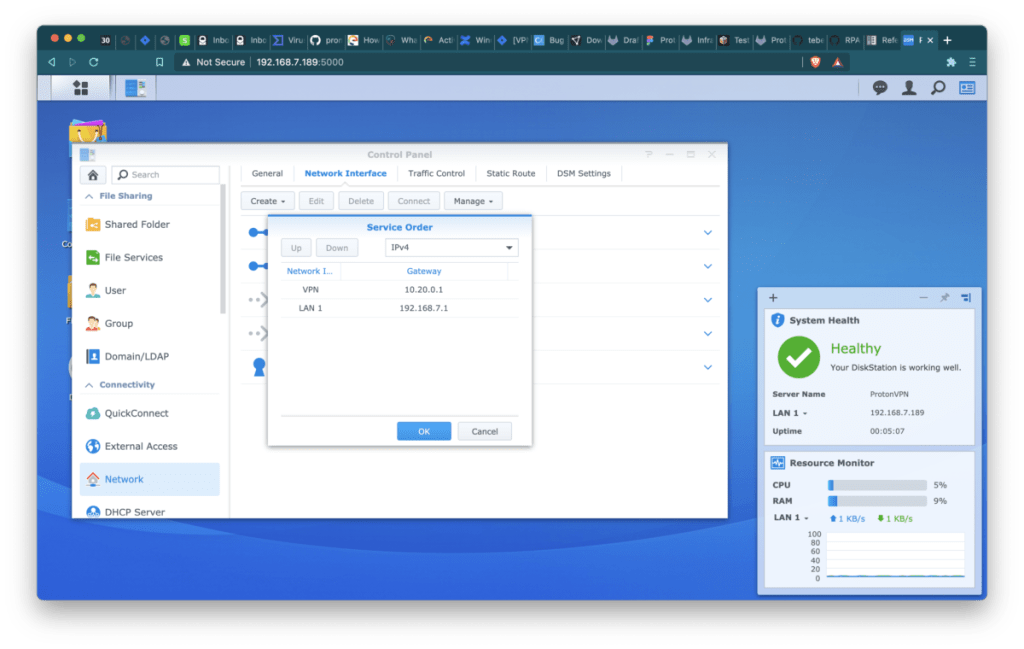
- Select your newly created VPN connection and click Connect
Your Synology is now connected to Proton VPN.

Step two (optional): setup the Synology to share the VPN connection
The following steps allow you to connect other devices on your local network to Proton VPN via the connection we have just created on your Synology. This requires you to connect your Synology between your ISP modem/router and the other networking equipment. Like so:
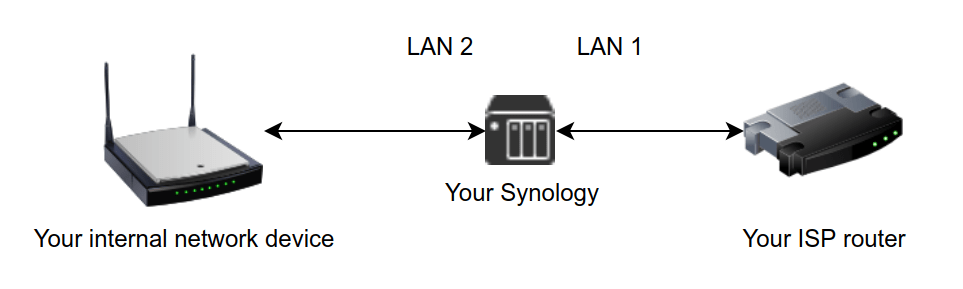
- LAN 1
- LAN 2
and the wiring is performed as in the diagram above (LAN 1 connected to ISP router, LAN 2 connected to your internal devices).
- Go to Control panel → Network → Network Interface
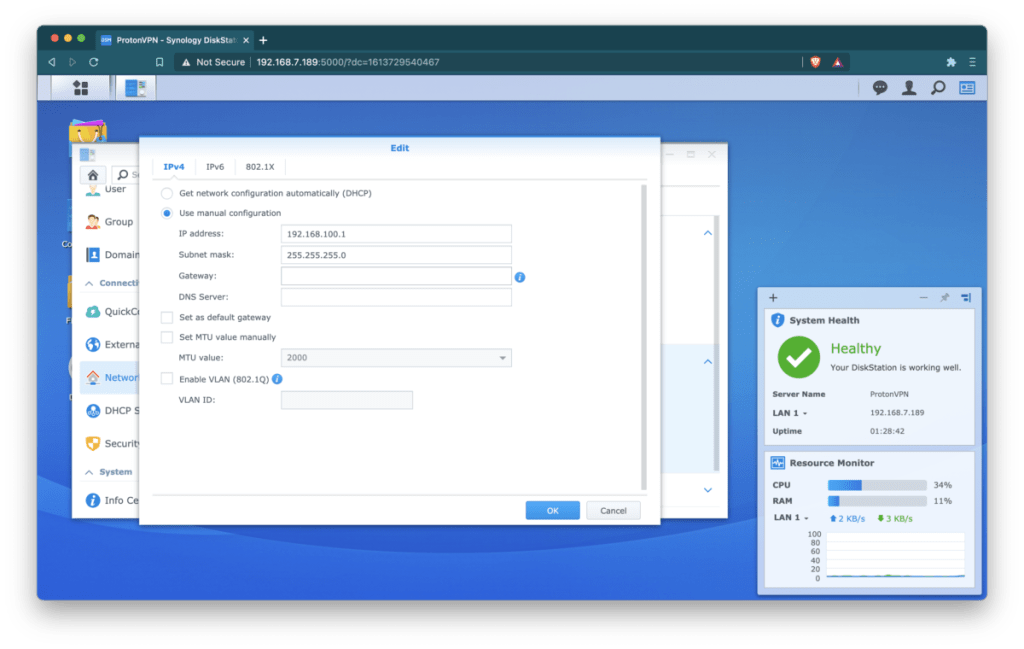
- Select interface LAN 2 and click on Edit
- Click on Use manual configuration and enter:
- IP address: 192.168.100.1
- Subnet mask: 255.255.255.0
- Click on Ok
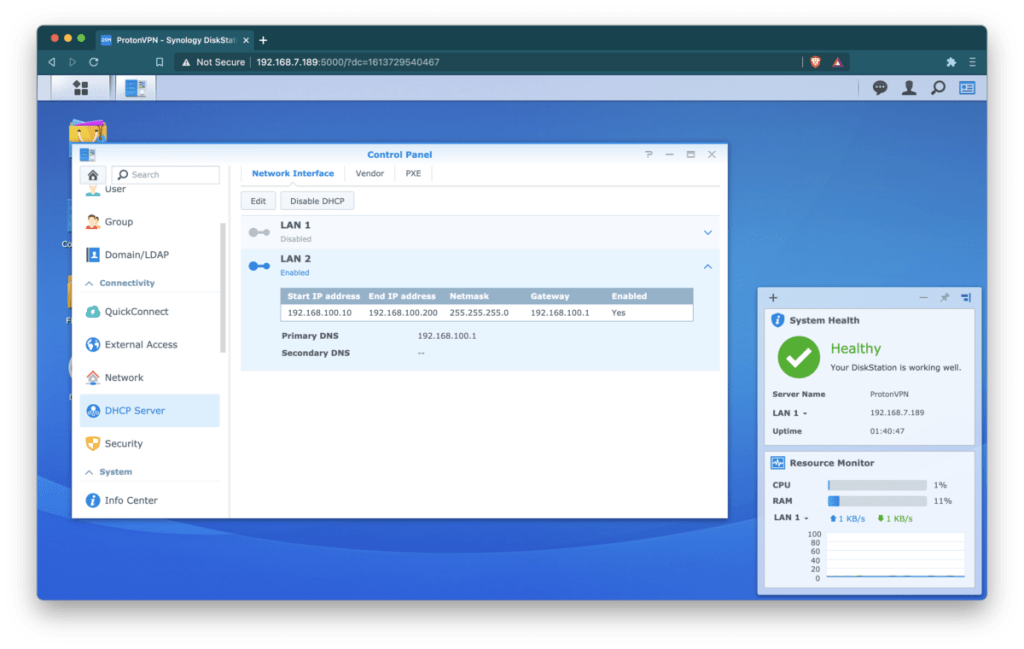
Now let’s setup a DHCP server for your internal network:
- Click on DHCP server
- Select LAN 2 and click Edit
- Enable DHCP server by clicking on the checkbox
- In Primary DNS enter: 192.168.100.1
- Now click on Add button in lower left part of the dialog and enter:
- Start IP address: 192.168.100.10
- End IP address: 192.168.100.200
- Netmask: 255.255.255.0
- Gateway: 192.168.100.1
- Address lease time: 86400
- Click on Create
- Click on the checkbox Enable on the configuration you just created.
- Click on Ok
Now all the devices connected to LAN 2 port of your Synology are accessing the internet through your Proton VPN connection.