How to torrent safely with a VPN
How to use Proton VPN for BitTorrent
Peer-to-peer (P2P) sharing is only available using one of our paid Proton VPN Plus, Proton Unlimited, or Visionary (legacy users only) plans. If you are on a Free plan and wish to torrent, you need to upgrade to one of these plans.
To do this, log in to your account at account.protonvpn.com, click the Upgrade button at the top right of the screen, and select your preferred plan.
Note that while our iOS/iPadOS app does support P2P servers, Apple does not permit P2P apps in the iOS App Store. This means torrenting is not usually possible on iPhones or iPads.
How to torrent with Proton VPN
1. Download, install, and open our app for your device.
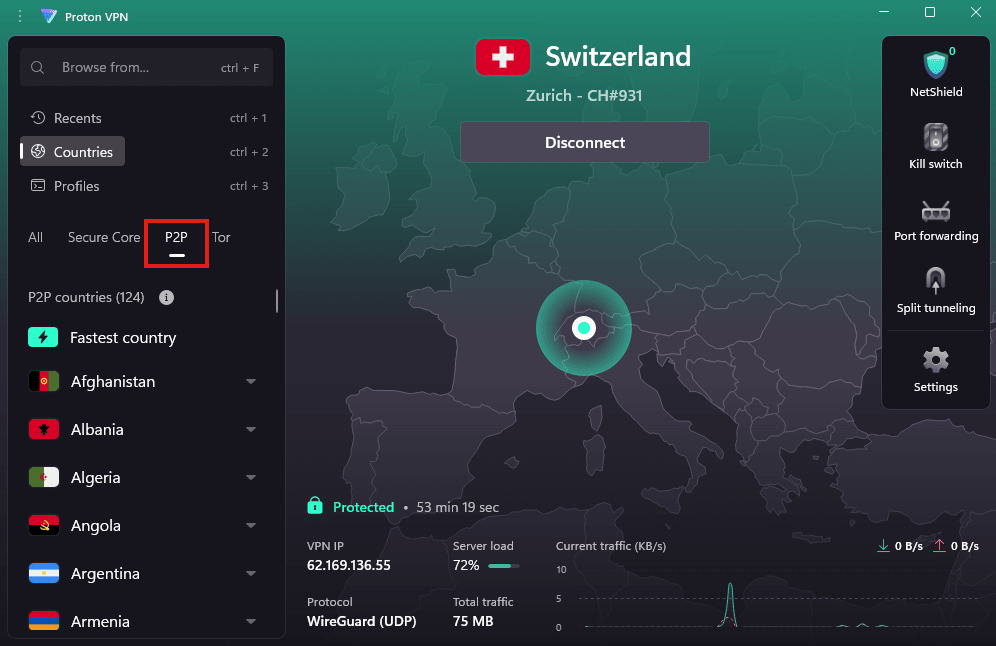
2. Connect to one of our P2P servers. You can torrent while connected to any of our Plus servers, but we recommend connecting to our special P2P servers, as these are optimized for BitTorrent network traffic.
On our Windows and Android apps, P2P servers are listed under the Countries → P2P tab.

On our other apps, P2P servers (and the countries that support them) are clearly marked with a double-arrow icon.

You can now torrent safely with Proton VPN privacy.
Learn more with our ultimate guide to torrenting
Binding your BitTorrent client to the VPN interface
Some BitTorrent clients (such as qBittorrent and Vuze) allow you to bind the client to the VPN interface. Doing this blocks all traffic to and from the client except over the VPN interface, and is therefore a good security feature.
However, if you bind the client to your physical internet interface (for example your WiFi card), then the torrent traffic will bypass the VPN interface and your IP address for that traffic will be exposed. In this situation, we cannot guarantee that our kill switch will protect you.
In the case of qBittorrent, the default configuration using Any interface can expose your IP address when torrenting.
The solution is to bind the client to the Proton VPN interface.
How to bind the client to the Proton VPN interface
Windows
In Windows, the network interface will depend on which VPN protocol you use. If you change VPN protocols, you will need also need to change the Network interface settings again in qBittorrent.
1. Open the Proton VPN app and connect to any server. Make a note of which VPN protocol you are using.

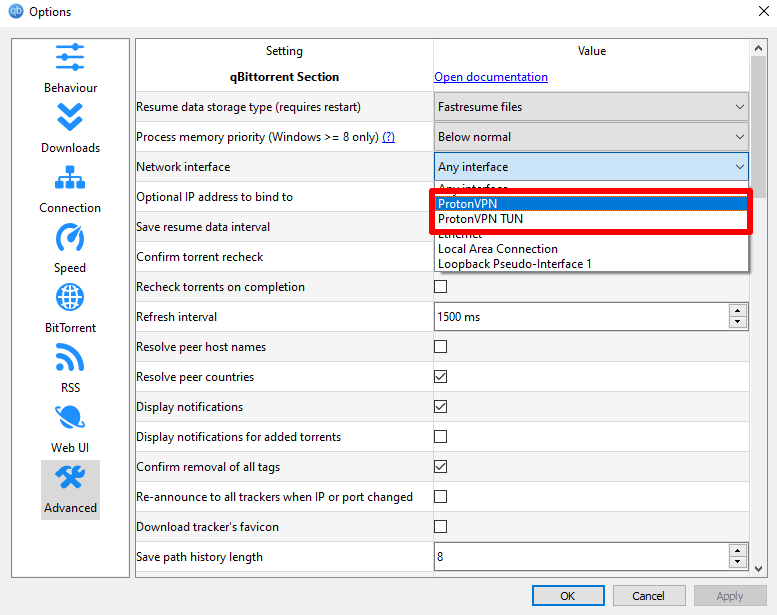
2. Open the qBittorrent app and go to Tools → Options… → Advanced → Network interface.
- If you are using OpenVPN, select ProtonVPN TUN
- If you are using WireGuard® or Stealth, select ProtonVPN

Click OK when you’re done.
macOS
Note that if you change VPN protocols, you will need also need to change the Network interface settings again in qBittorrent.
1. Disconnect Proton VPN.
2. Open Terminal and enter:
ifconfig
Leave this Terminal window open.
3. Open the Proton VPN app and connect to any server.
4. Open a new Terminal window and enter:
ifconfig
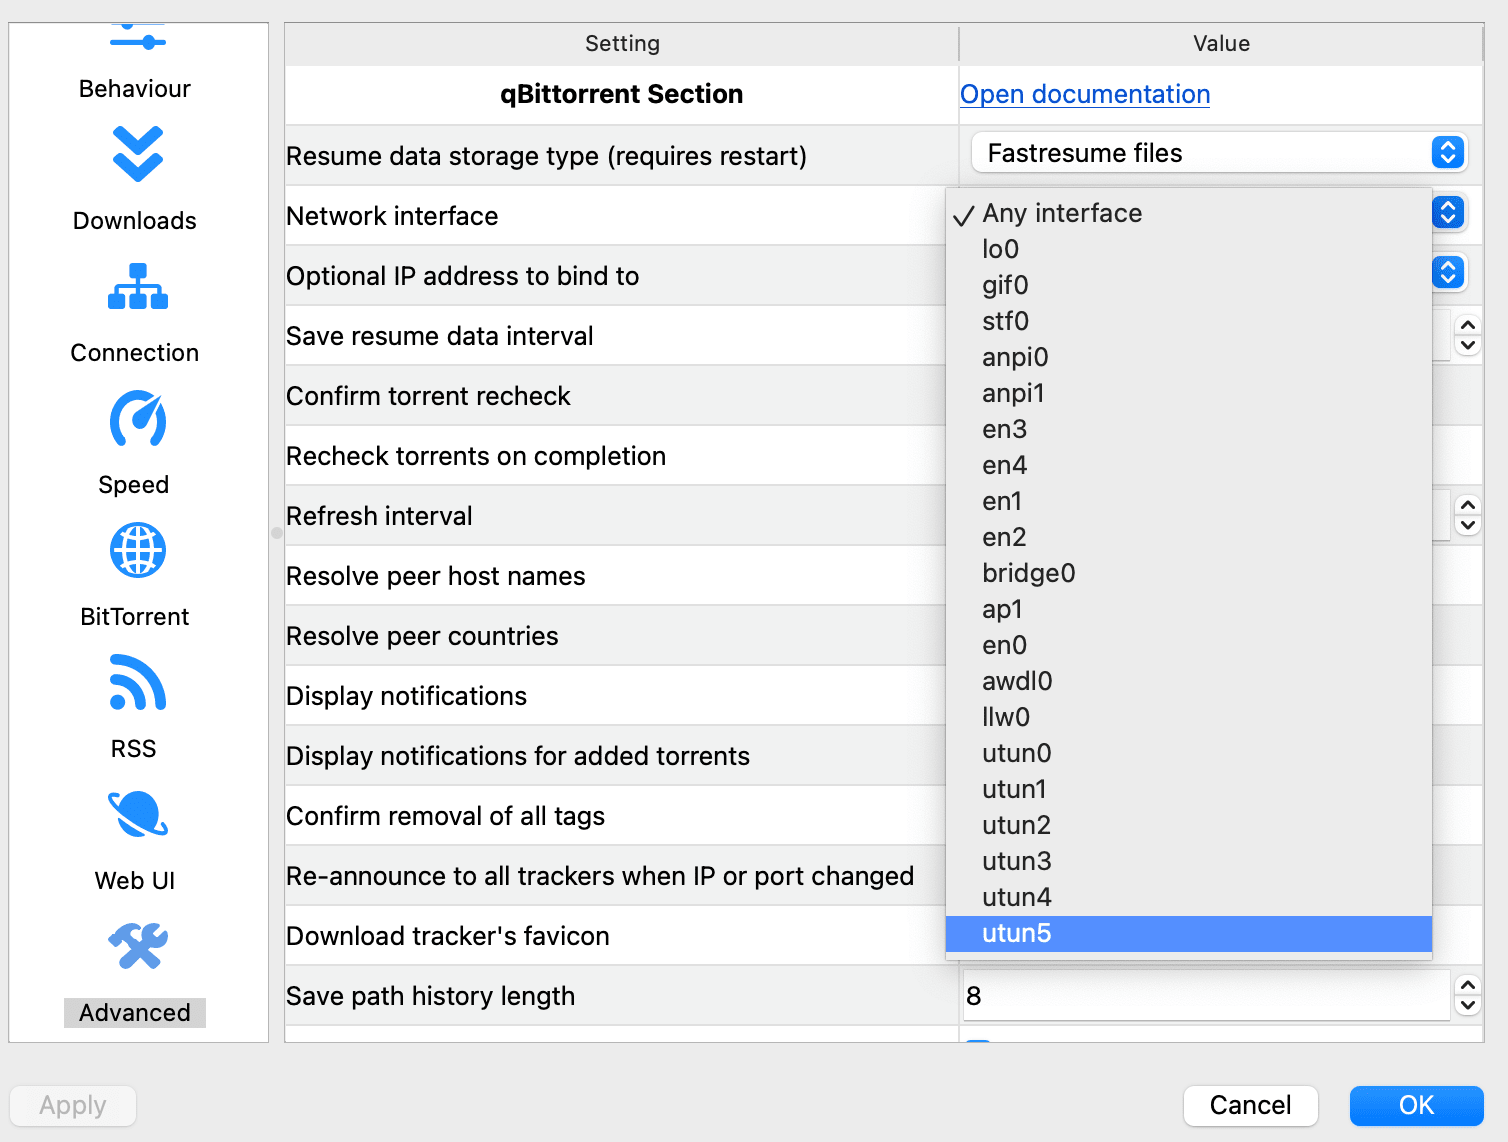
5. Compare the output from ifconfig in the two Terminal windows to identify a network interface in the second window that is not present in the first. This is the name of the Proton VPN interface.

In the example above, we can see that the VPN interface is called utun5.
6. Open the qBittorrent app and go to the menu bar → qBittorrent → Preferences → Advanced → Network interface and select the the interface name you identified above from the dropdown menu.

Click OK when you’re done.
Linux
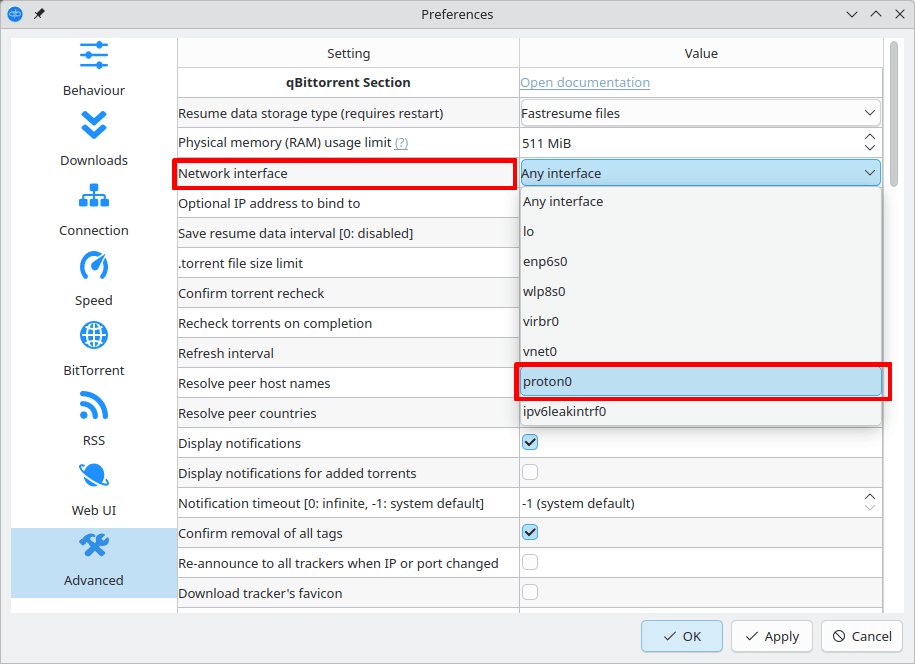
Open the qBittorrent app and go to Tools → Preferences → Advanced → Network interface and select the proton0 from the dropdown menu (this assumes you’re using WireGuard. If you’re using OpenVPN, select tun0 instead).

Click OK when you’re done.