How to set up Proton VPN on a Flint (GL-AX1800) router
This guide explains how to set up Proton VPN on a GL.iNet Flint (GL-AX1800) router using the OpenVPN VPN protocol.
Before starting, you’ll need:
- A GL-AX1800 router with firmware version 3.208 (this guide may work with later firmware versions, but these have not been tested)
- A Proton VPN OpenVPN configuration file
- A working internet connection through your GL-AX1800 router
How to set up Proton VPN on a GL-AX1800 router
1. Log in to your router’s web Admin Panel using the password you entered when you set up the router. If you need help logging into your router, please refer to the manufacturer’s guide(nova janela).
2. Go to VPN and select OpenVPN Client from the dropdown menu.
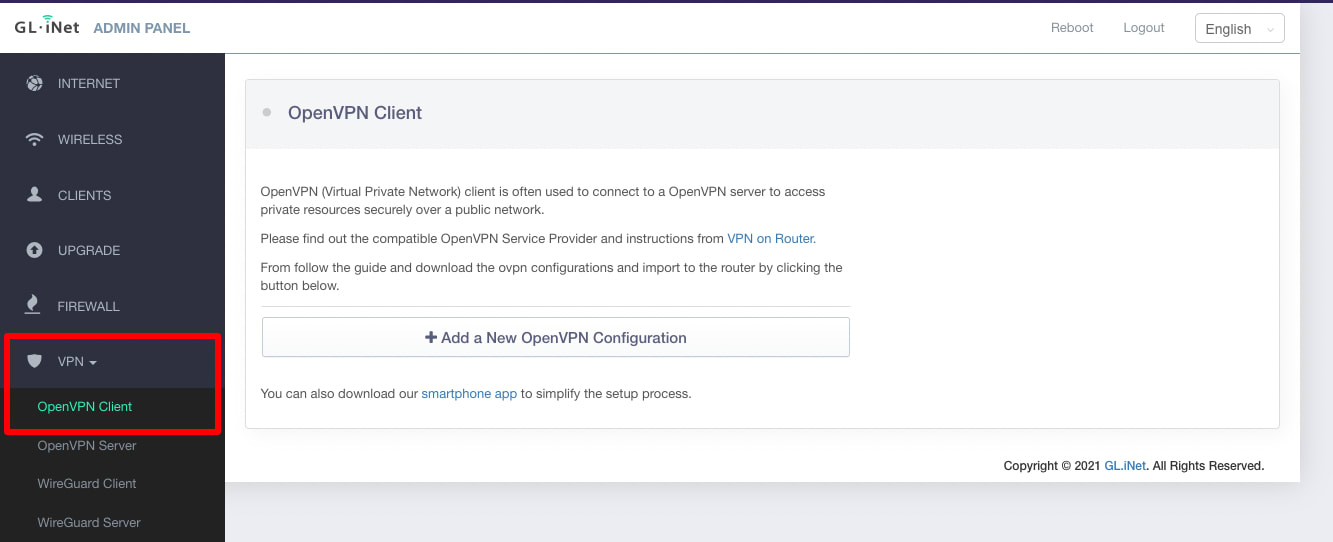
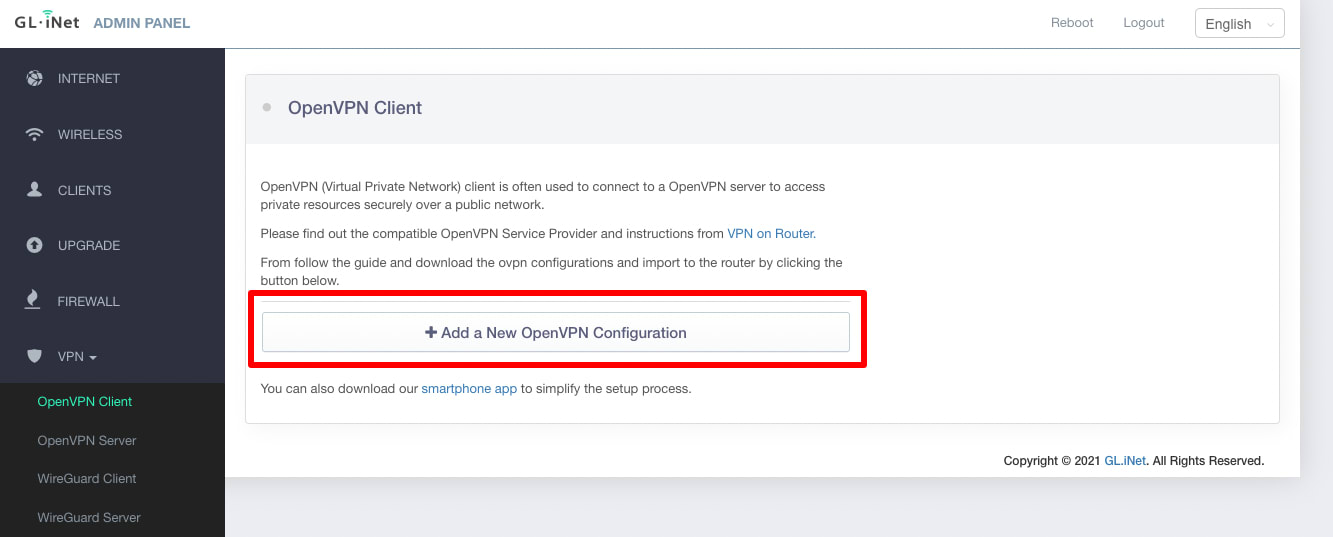
3. Click on the + Add a New OpenVPN Configuration button
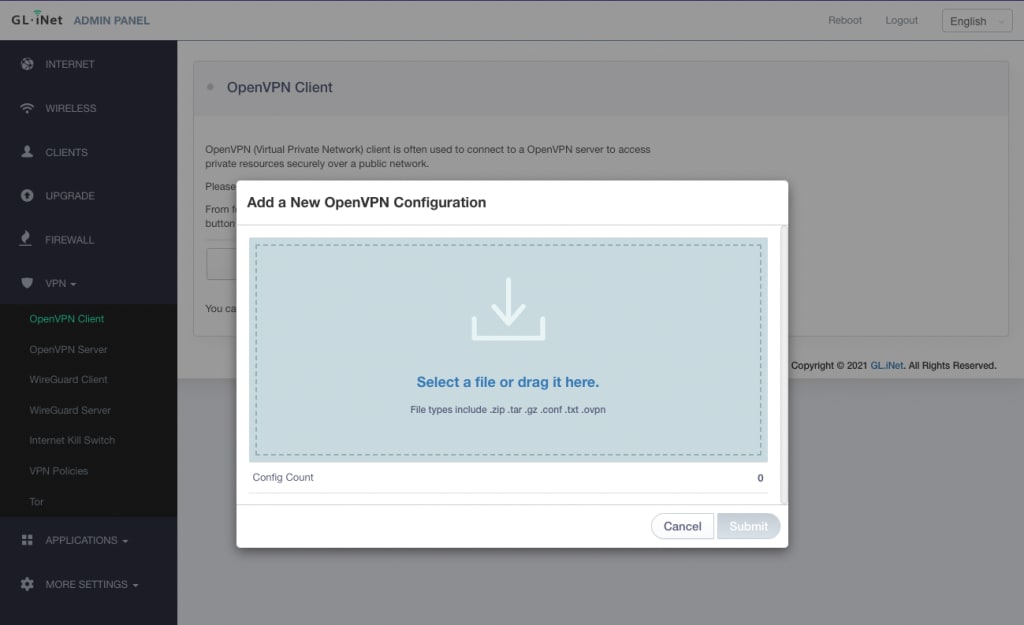
4. Drag and drop the OpenVPN config file you previously downloaded to the Add a New OpenVPN Configuration window (or Select it manually using your system’s file manager).
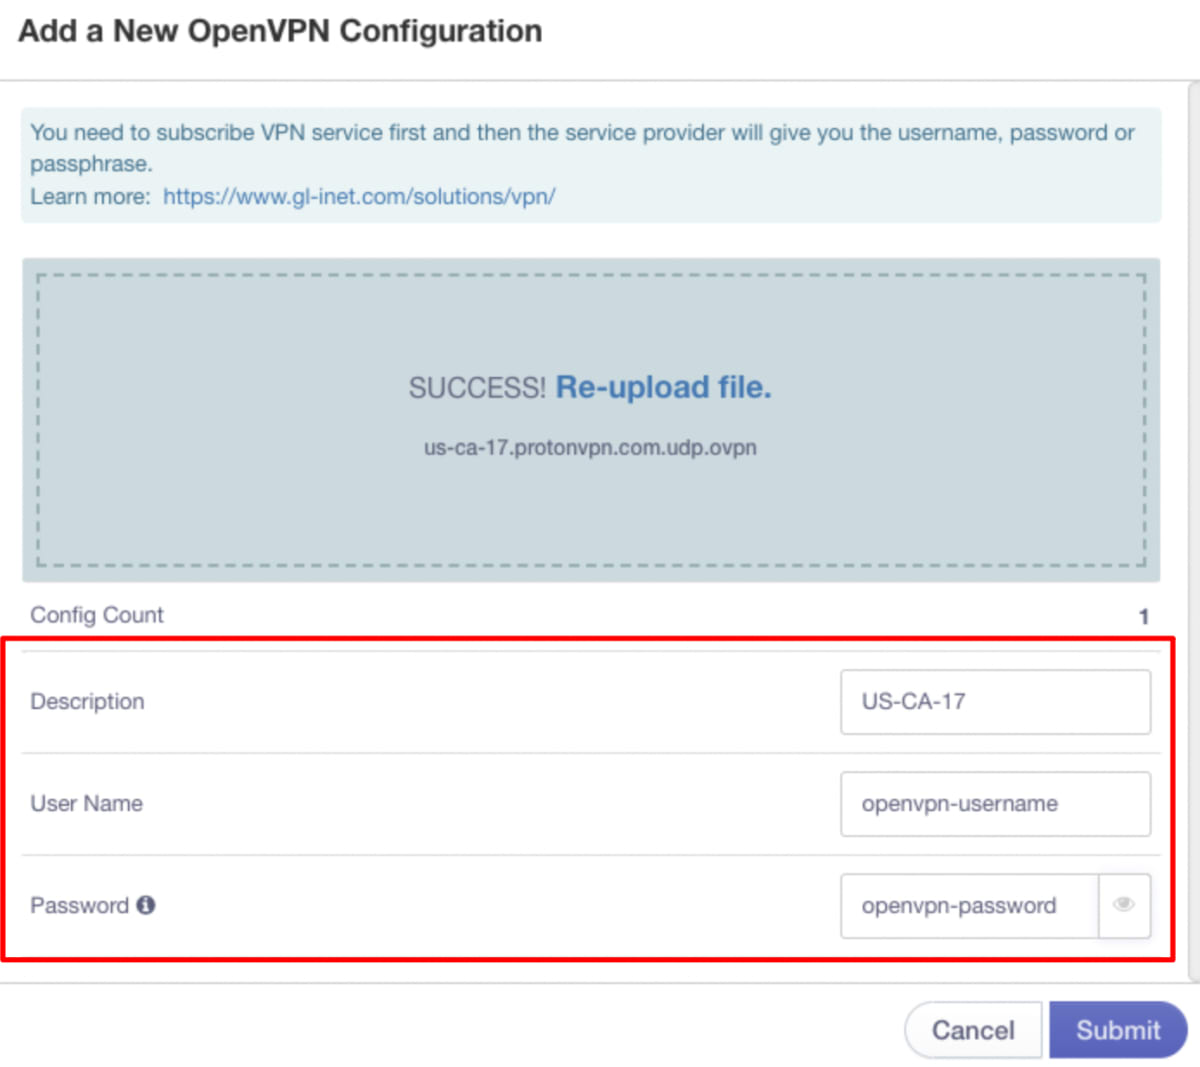
5. Once the file is uploaded (which should only take a few seconds), enter the following details:
- A description of the configuration you just uploaded. This can be anything that makes sense to you.
- Your OpenVPN username
- Your OpenVPN password
Note that your OpenVPN username and password are not the same as your regular Proton VPN username and password. See How to log in to Proton VPN for more details.
Click Submit when you’re done.
How to connect to Proton VPN
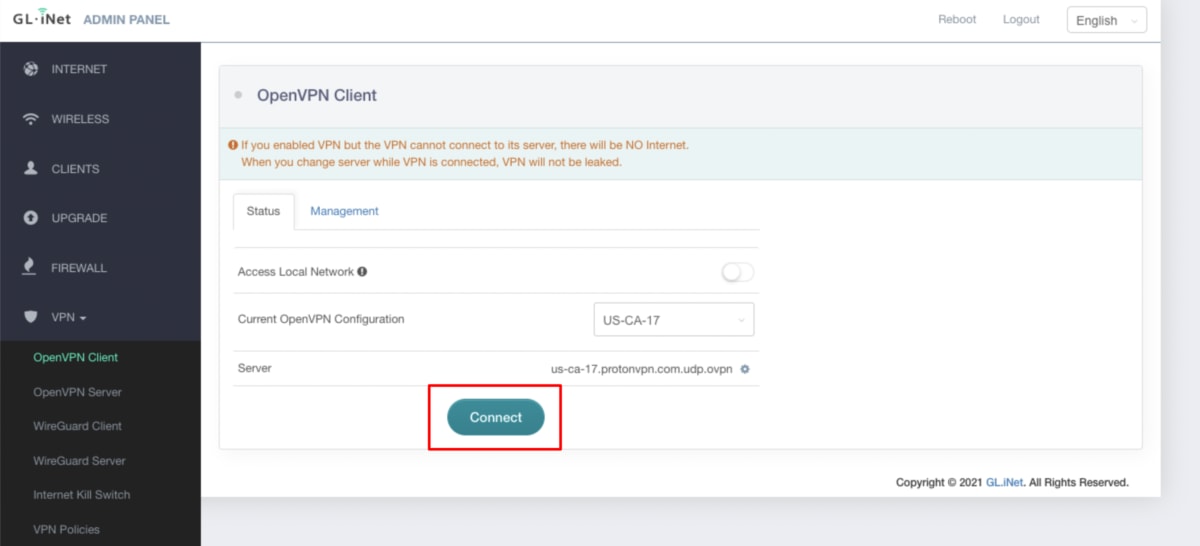
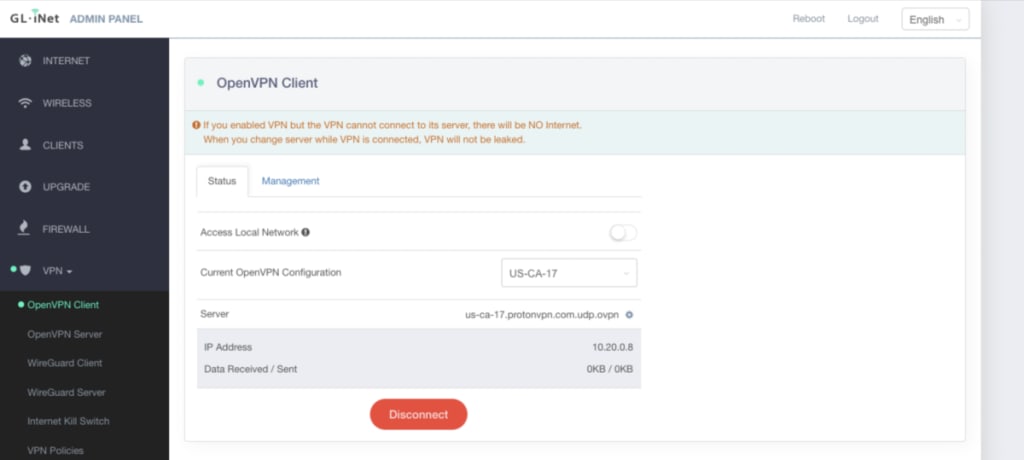
Back on the VPN → OpenVPN Client screen, click Connect and you will connect to the Proton VPN server you just configured.
All devices that connect to the internet via this router are now protected by Proton VPN privacy.
See DNS leaks when using a VPN for instructions on how to check that you do not have a DNS leak.