


How to set up your DD-WRT router for Proton VPN using WireGuard
- Lectura
- 5 min
- Categoría
- Routers
You can now protect every device on your network by setting up Proton VPN on your DD-WRT router.. This guide uses the WireGuard® VPN protocol.
You can also configure Proton VPN on a DD-WRT router using OpenVPN, but we recommend using WireGuard unless you have a strong reason to use OpenVPN.
We also have guides for setting up Proton VPN on a wide selection of other popular routers.
This guide was created using DD-WRT v3.0-r66445. Details may differ slightly on other versions.
Requirements
- A DD-WRT version that supports WireGuard: in the router’s web interface, Setup → Tunnels → Add Tunnel offers WireGuard as the Protocol Type. Not every DD-WRT version or router includes it.
- A computer connected to your router’s LAN, so you can open the router’s web interface at 192.168.1.1.
Step one: Download a WireGuard configuration file
Sign in to Proton VPN using your Proton Account username and password at account.protonvpn.com, go to Downloads → WireGuard configuration, and download a WireGuard configuration file. Be sure to select Platform: Router.
Learn how to download a WireGuard configuration file from Proton VPN
Step two: Import the configuration
1. Open your router’s web interface and go to Setup → Tunnels.
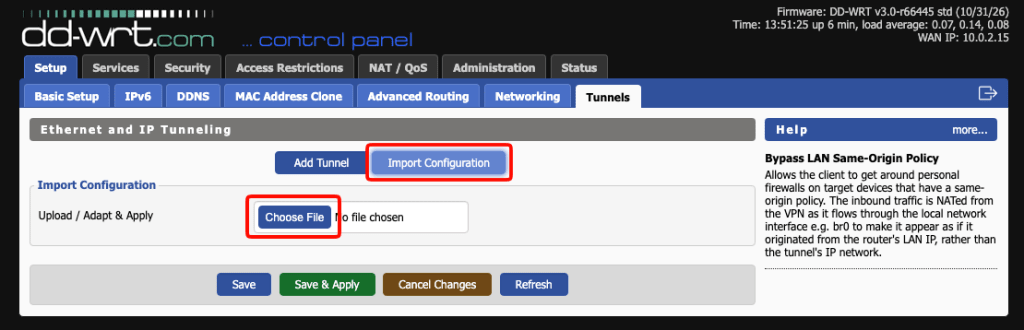
2. Click Import Configuration, then Choose File and select the .conf file you downloaded in step one. The page will auto-refresh showing the new tunnel, Tunnel oet1.
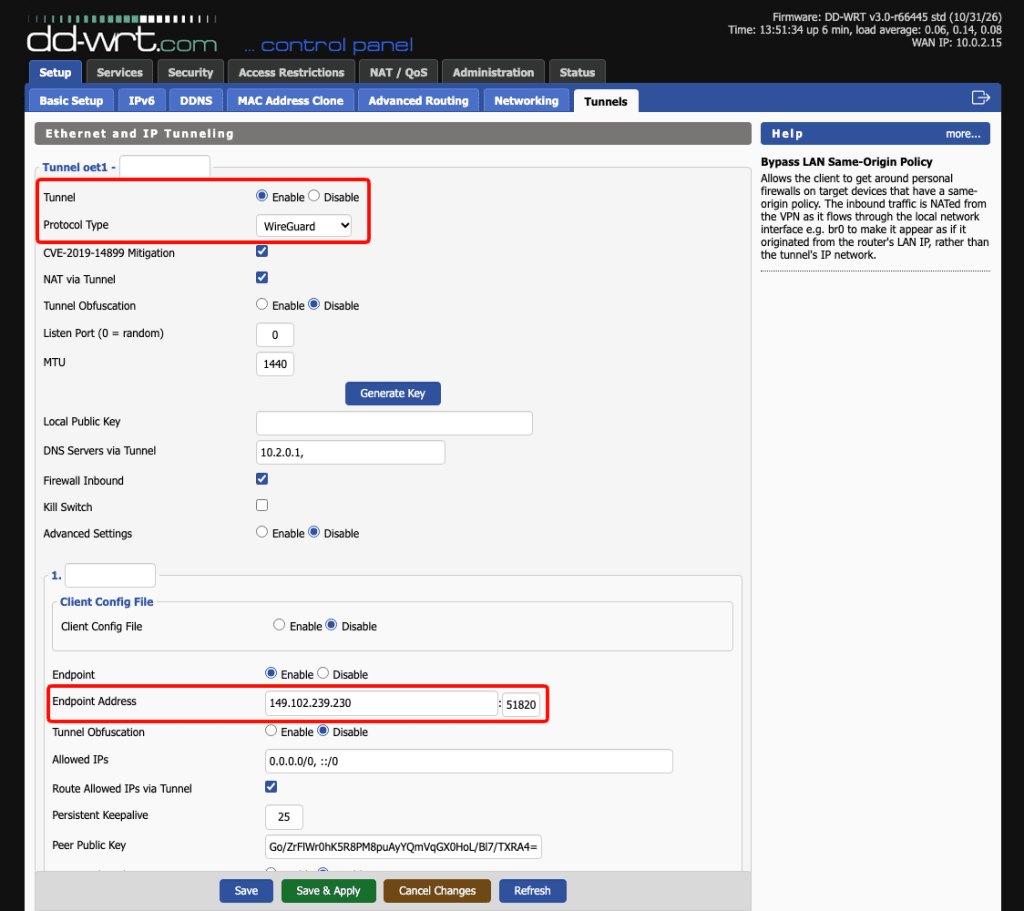
3. Check that Protocol Type is WireGuard, Tunnel is Enable, and Endpoint Address shows the server from your WireGuard configuration file.
Step three: Turn on the kill switch and connect
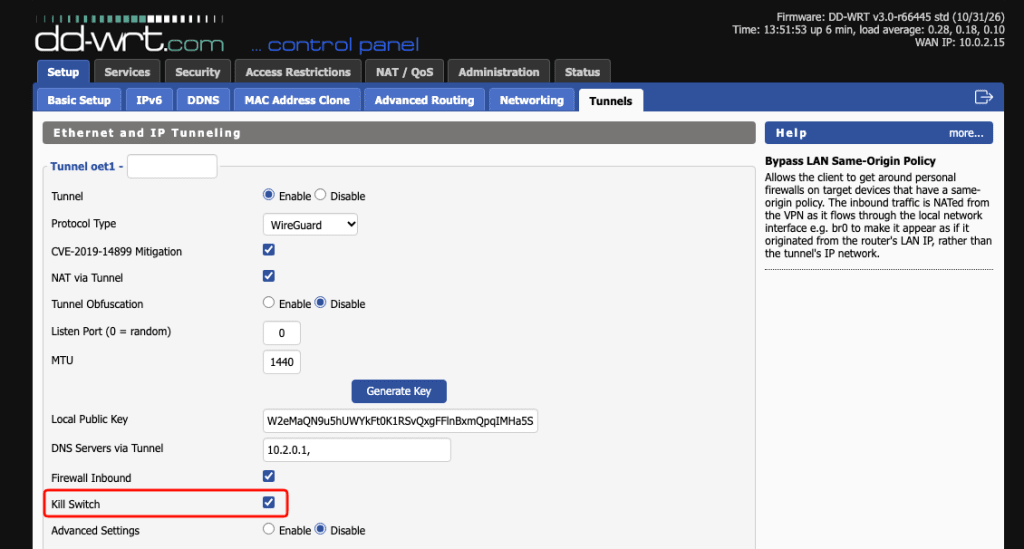
1. Under Tunnel oet1, tick Kill Switch. If the tunnel stops working, this keeps devices on your network from using your regular internet connection.
2. Click Save & Apply.
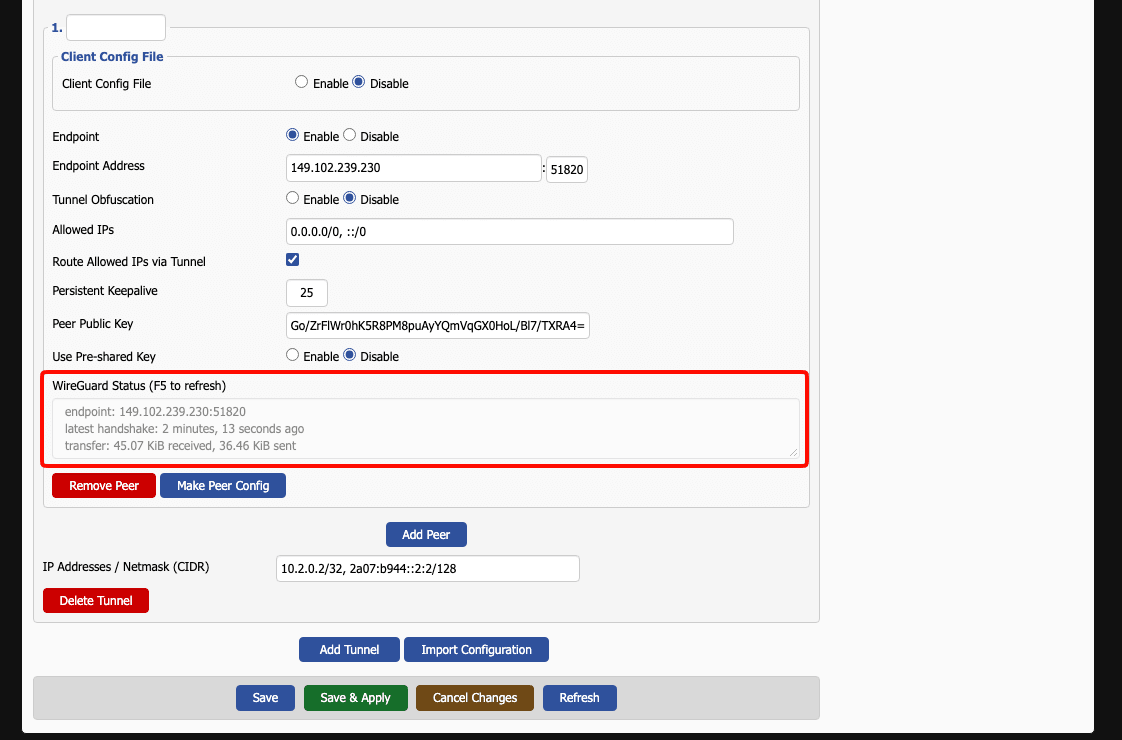
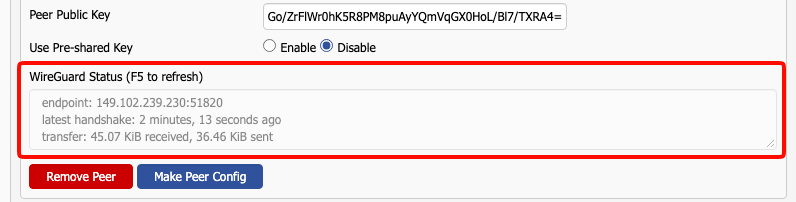
3. After about 30 seconds, refresh the page. Under WireGuard Status you should see the server’s endpoint and a latest handshake.
Step four: Configure DNS
To prevent DNS leaks, your router must use only Proton VPN’s DNS server. Without this step, after the router restarts it can also use your internet provider’s DNS server.
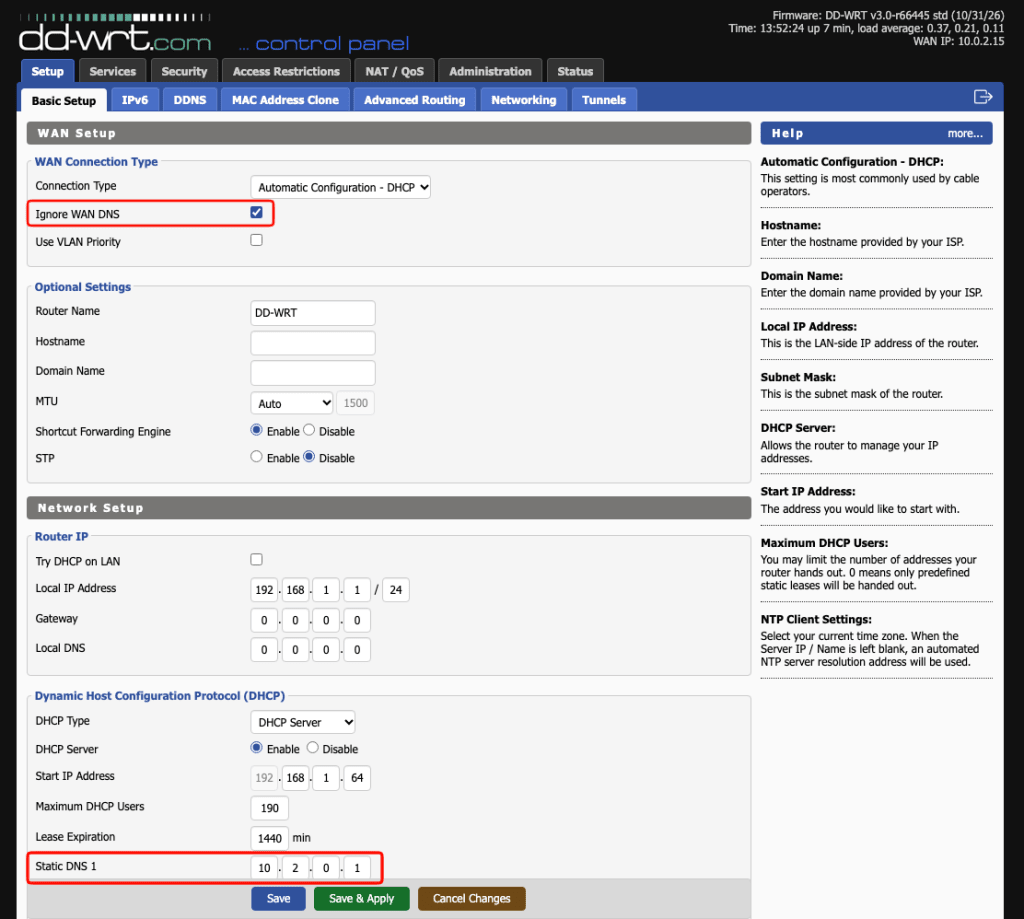
1. Go to Setup → Basic Setup.
2. Set Static DNS 1 to 10.2.0.1 (Proton VPN’s DNS server address).
3. Tick Ignore WAN DNS.
4. Click Save & Apply.
Check your connection
Go to Setup → Tunnels. WireGuard Status shows the endpoint, latest handshake, and data transferred.
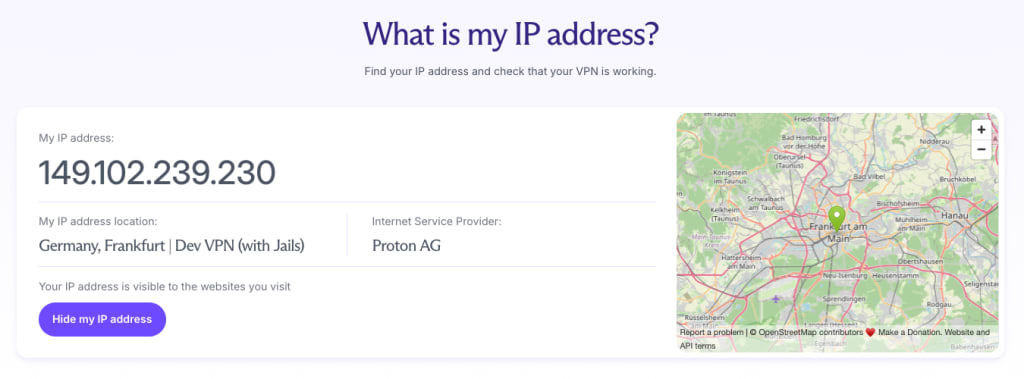
Visit our free secure IP scanner to check that your IP address location matches your VPN server.
The tunnel and these settings will persist after the router restarts.
Manage the connection
To disconnect, go to Setup → set Tunnel to disable, and click Save & Apply. Devices on your network then use your regular internet connection without VPN protection.
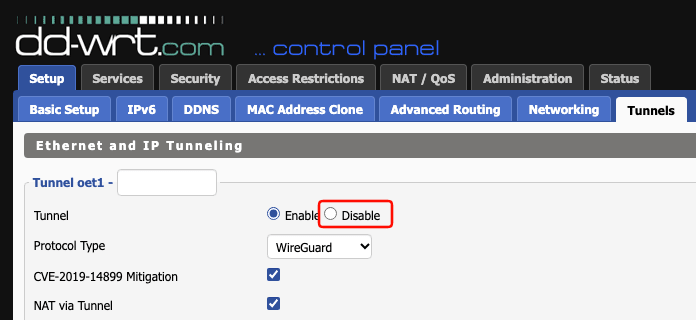
To reconnect, set Tunnel to Enable and click Save & Apply, then refresh until the WireGuard Status shows a handshake.
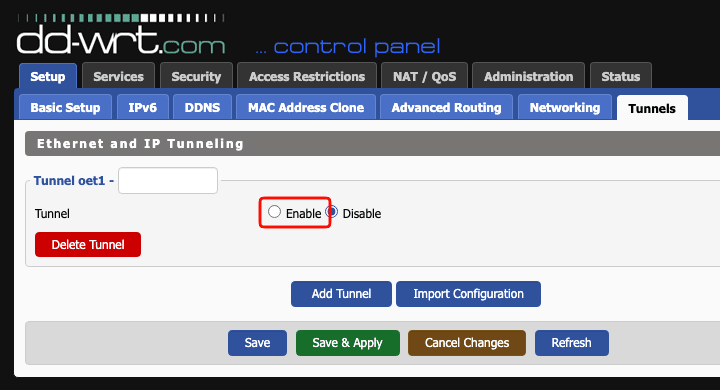
To change server, download a new configuration file, disconnect, select Delete tunnel, and repeat step two.