The most basic function of a virtual private network (VPN) is to hide your real IP address from websites you visit (and anyone else on the internet). If a VPN fails to do this, it’s simply not working.
A VPN that hides just your IPv4 address can technically be described as “working”, but it’s not doing its job properly if websites can still see your real IP address. If a VPN connection is technically working, but there are ways in which websites can see your IP address anyway, this is called a leak.
In this article, we look at how to check if your VPN is working (at all) and how to make sure it’s not leaking your IP address in any way.
- How to check that your IPv4 address has changed
- How to check for IPv6 leaks
- How to check for DNS leaks
- How to check for WebRTC leaks
How to check that your IP address has changed
An Internet Protocol (IP) address is a numerical label that uniquely identifies every device that connects (directly) to the internet. Websites you visit can usually see your IP address and therefore know who you are (and can use this information to track you across multiple websites).
\When you use a VPN, you connect to the internet via a VPN server that acts as an intermediary between your device and the internet. All that websites you visit can see is the IP address of the VPN server — not your real IP address or who your internet service provider (ISP) is.

Learn more about how a VPN works
How to test if your VPN is working
1. Disconnect the VPN, visit our free secure IP scanner(새 창), and make a note of your public IP address.
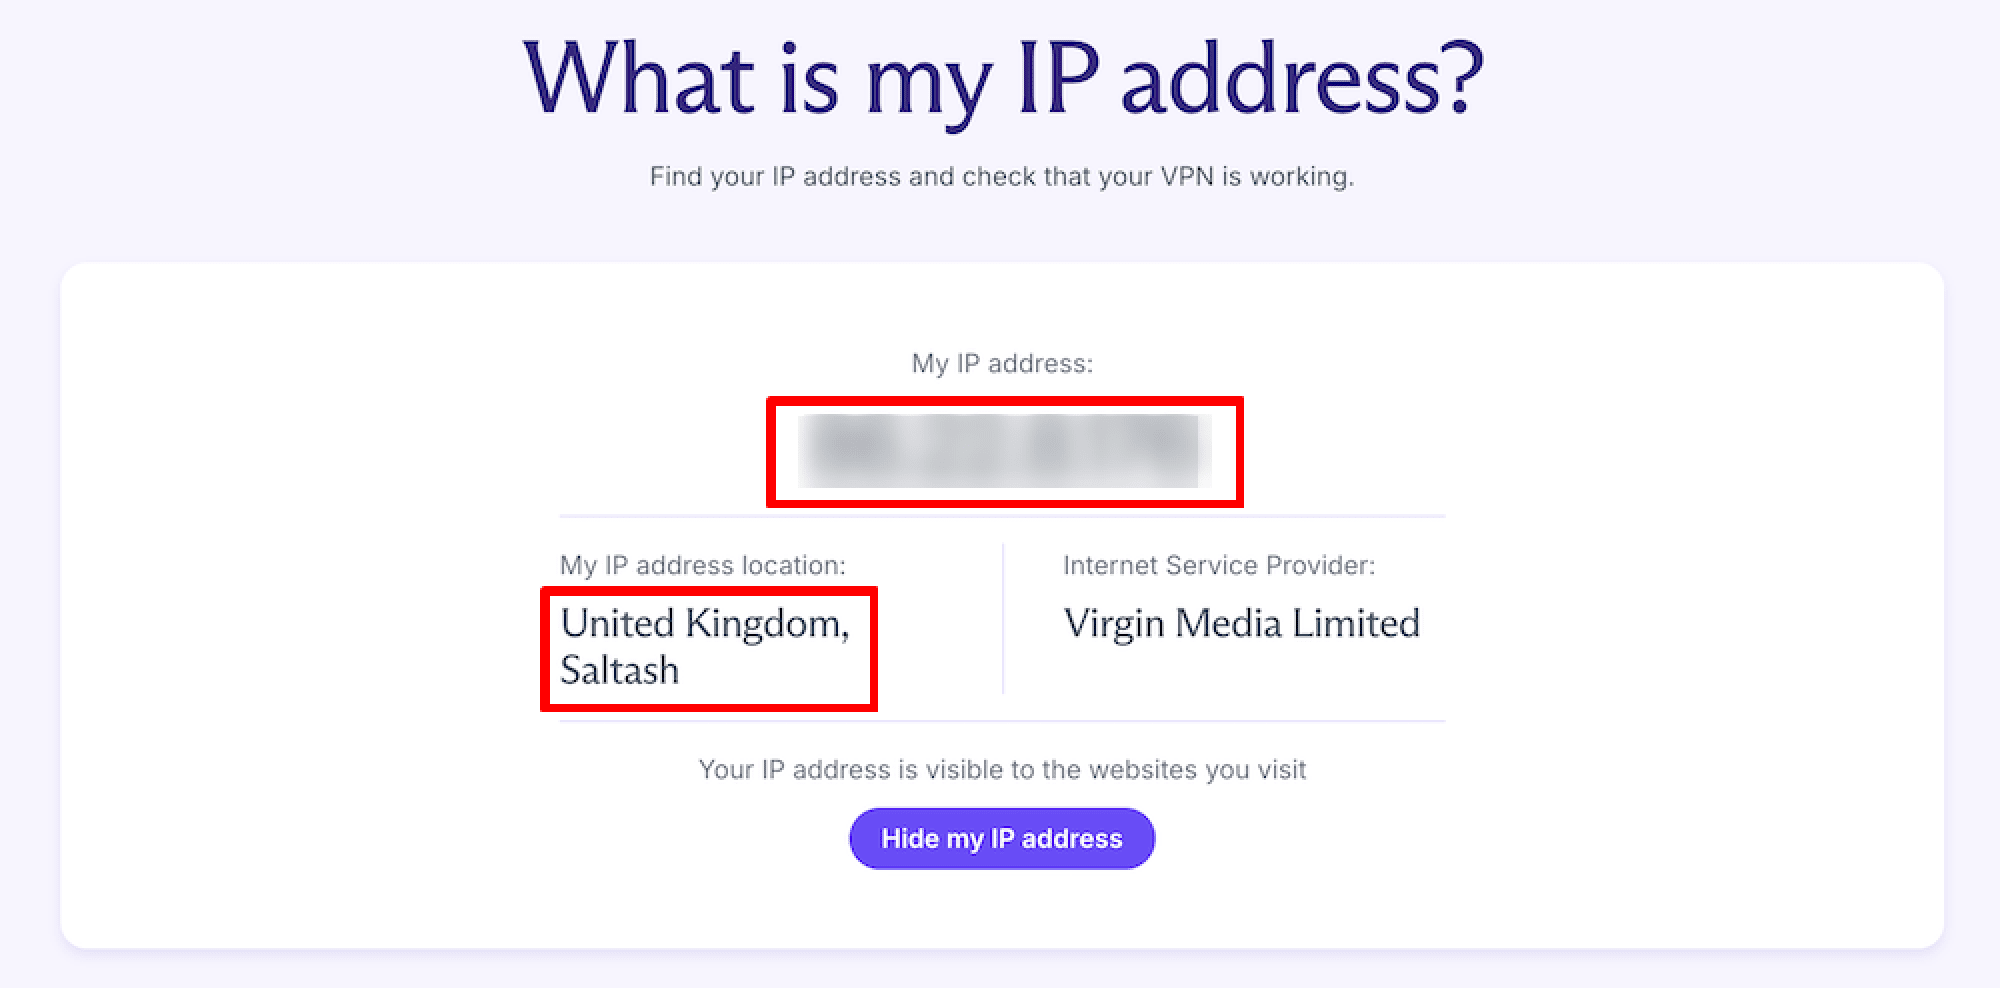
Until fairly recently, all websites (and anything else connected to the internet) used the IPv4 standard, which uses 32-bit internet addresses, creating about 4.29 billion total available addresses (we’ll get to why this is important in a minute).
If you have a short IP address that looks something like 185.159.159.142, then your ISP supports only IPv4 connections. This is by far the most used version of the Internet Protocol and is the only IP version available to 55% – 61% of people globally(새 창).
If your IP address is a hexadecimal number that looks something like 2001:db8:8a2e:370:7334, then you have IPv6 connectivity. This means your ISP supports the new Internet Protocol version, designed to address the fact that IPv4 addresses have all but run out (there are around 340 undecillion(새 창) available IPv6 addresses, so it’s unlikely we’ll ever run out of them). If IPv6 is available, most operating systems will use it by default.
2. Connect to a VPN server, visit our free secure IP scanner(새 창) again (or just refresh the page), and compare your public IP address with the address you noted earlier. If they’re different, then the VPN is working.
(Proton tip: Connect to a server in a different country to make the change in IP address more obvious).
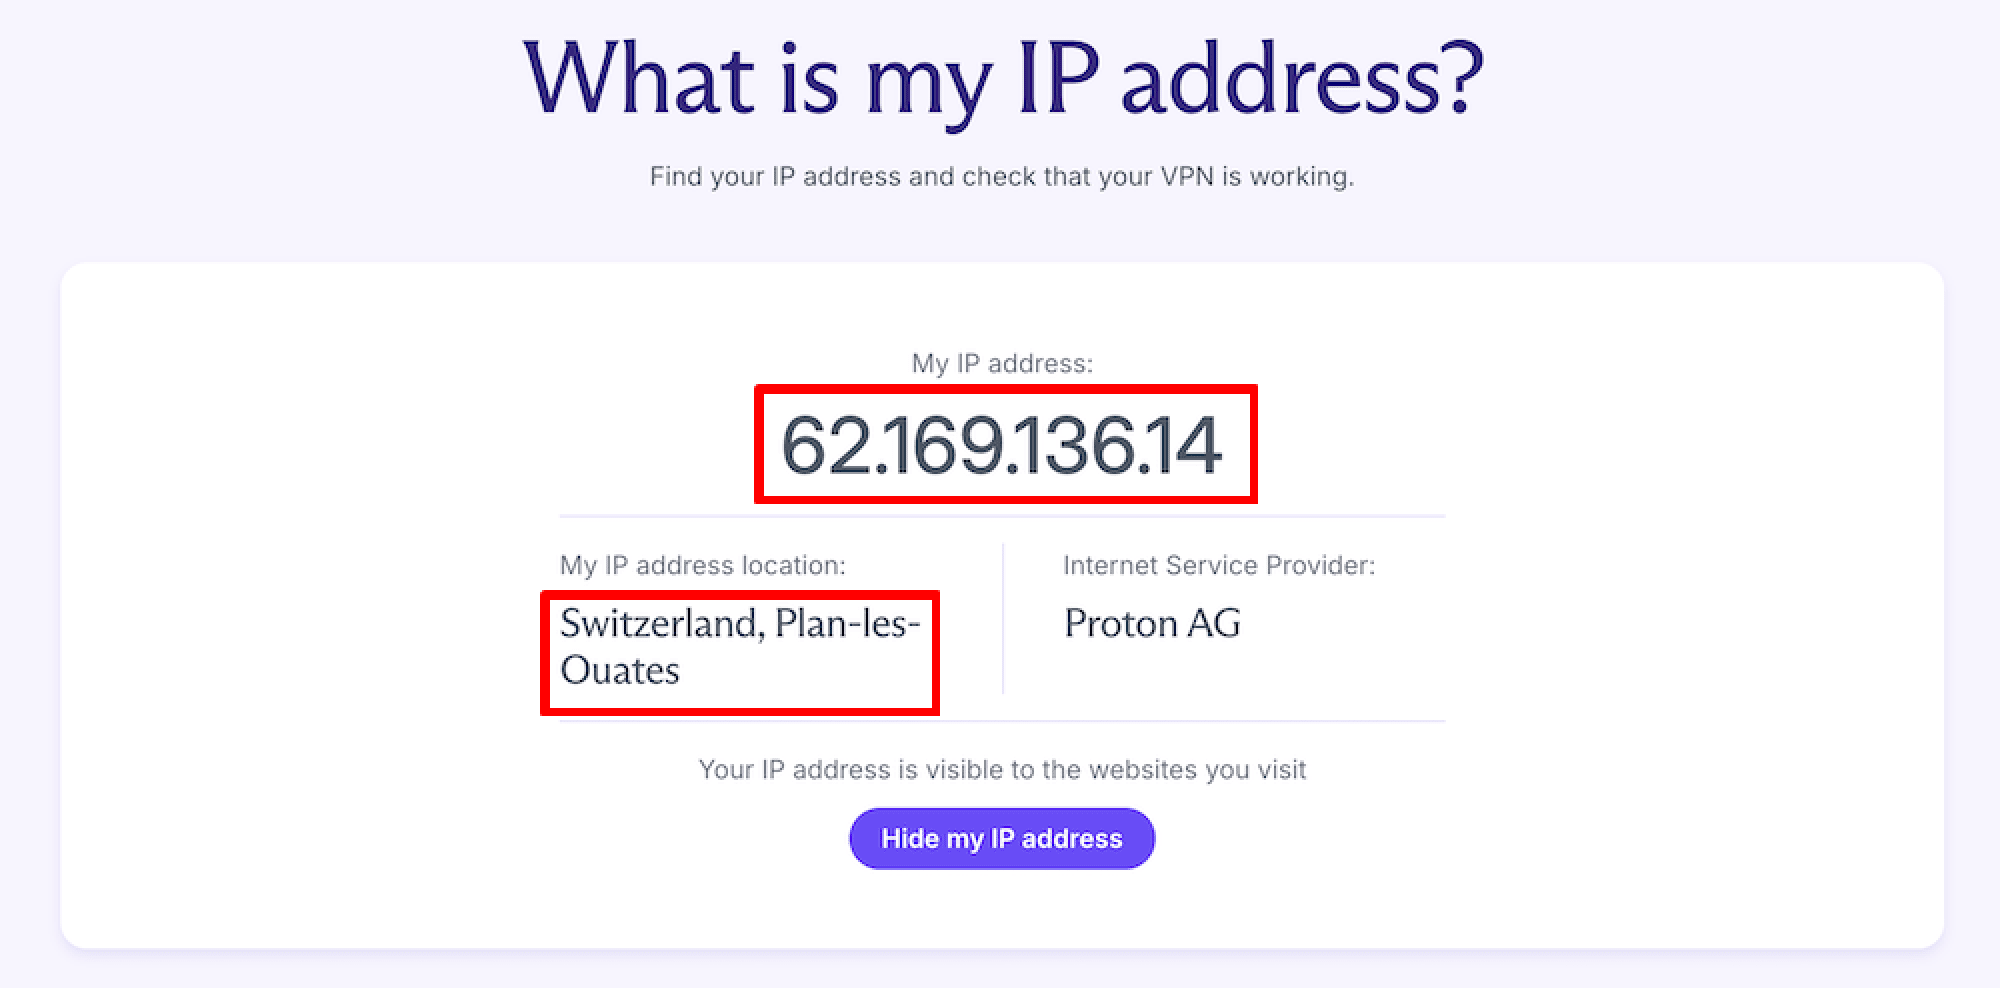
If your IPv4 address without a VPN matches your IP address when you’re (supposedly) connected to a VPN server, the VPN isn’t working. Contact your VPN service for assistance or change your VPN provider.
If your IPv6 address without a VPN matches your IP address when connected to a VPN, then the VPN may not be working, or you may have an IPv6 leak.
How to check for IPv6 leaks
What is an IPv6 leak?
Most servers still don’t support IPv6, so most ISPs that support IPv6 have adopted a dual-tiered approach. They broadcast both an IPv6 and an IPv4 address. An IPv6-capable server will look for an IPv6 connection first, then fall back to accepting an IPv4 connection if it can’t find one. This is why you’ll only see your IPv6 address when you visit our free secure IP scanner from an IPv6 address.
An IPv6 leak occurs when a VPN app successfully intercepts your IPv4 connection and routes it through the VPN server but doesn’t account for potential IPv6 connections. It therefore allows connections over IPv6, exposing the real IPv6 addresses of anyone using an ISP that supports IPv6 to IPv6-capable websites.
If you’re connected to a VPN, have an IPv6 connection, and see your real IPv6 address on our free secure IP scanner, there are two potential explanations:
- The VPN isn’t working
- The VPN is blocking IPv4 connections, but you have an IPv6 leak.
How to find out if you have an IPv6 leak
Open the Command Prompt (Windows), Terminal (macOS), or a terminal window (Linux). Terminal emulator apps are also available for Android and iOS. To find your real IPv4 address. disconnect the VPN, enter the following text, and hit enter.
curl -4 icanhazip.com
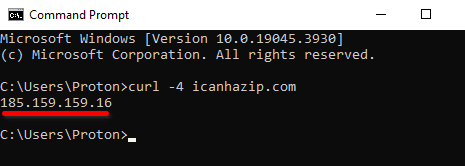
Now reconnect the VPN and run the command again. If the displayed IPv4 address is your real IP address, the VPN simply isn’t working. If it has changed to that of the VPN server, you have an IPv6 leak.
To test your public IPv6 address from the command line, enter: curl -6 icanhazip.com.
How to fix an IPv6 leak
The best way to fix an IPv6 leak is to use a VPN app that either correctly routes IPv6 connections through the VPN tunnel or is effective at blocking IPv6 connections. At Proton VPN, we’re beginning to implement full IPv6 support across our apps. Where IPv6 isn’t yet fully supported, we offer comprehensive IPv6 leak protection (that is, IPv6 connections are blocked).
It’s also possible to manually turn off IPv6 at the system level on Windows, macOS, and Linux. Until the world has reached the point where a significant number of web servers support only IPv6 connections, there is no downside to doing this.
How to check for DNS leaks
What is a DNS leak?
The Domain Name System (DNS) maps human-friendly domain names to their corresponding computer-friendly numerical IP addresses.
For example, the Proton VPN website uses the domain name protonvpn.com, which corresponds to the IP address 185.159.159.140. When you type www.protonvpn.com into your browser’s URL bar, the domain name must be converted to its corresponding IP address for computers to understand it.
This conversion process is usually performed by special DNS servers run by your ISP. Most ISPs log their customers’ DNS requests (and, in many places, are required to do this by law), as this is the easiest way for them to track what you do online.
To prevent customers from being tracked by their DNS queries, a good VPN service will route them through the VPN tunnel, where they are usually resolved by DNS servers run by the VPN service. A DNS leak occurs when you use a VPN that fails to route your DNS requests within the VPN tunnel, allowing them to be resolved by your ISP.
It’s possible to manually change your DNS provider, which means the third-party DNS provider will resolve your DNS queries instead of your ISP. Manually configuring your DNS in this way makes DNS leaks more likely to happen, so it’s not recommended if you use a VPN.
If you have a paid Proton VPN plan, another option is our custom DNS feature. This allows you to use your favorite third-party DNS provider, but the connection is routed through our VPN tunnel to ensure its secure.
How to find out if you have an DNS leak
Connect the VPN, visit DNS leak test.com(새 창), and run either the Basic or Extended test.
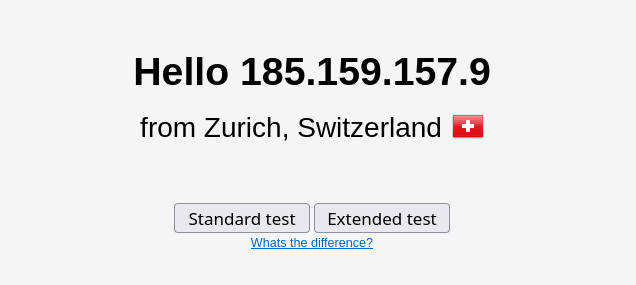
The returned results should show IP addresses belonging to your VPN service. If they belong to your ISP or a third-party DNS service that you’ve configured, you have a DNS leak.

How to fix a DNS leak
The only real way to fix a DNS leak is to use a VPN app that offers reliable DNS leak protection. Proton VPN offers robust DNS leak protection in all our apps.
An imperfect workaround is to manually configure your operating system to use a trusted third-party DNS service. This doesn’t prevent the DNS leak, but at least it means someone you trust more than your ISP is resolving your DNS queries.
Learn how to manually configure your DNS settings
When choosing a privacy-focused third-party DNS service, choose one that supports encrypted DNS(새 창) queries (DoT or DoH). Do remember, though, that using a third-party DNS service makes DNS leaks more likely to happen(unless you’re using our custom DNS feature), so only do this with a VPN if you have no other option.
How to check for WebRTC leaks
What is a WebRTC leak?
WebRTC (Web Real-Time Communication) is an open standard that allows voice and video chat inside your browser without installing any plugins or downloading any apps. It’s therefore very useful and fully supported by all major browsers.
However, the way WebRTC works can expose your real IP address to bad actors. WebRTC is a peer-to-peer protocol (similar to BitTorrent). To achieve seamless browser-to-browser communication through obstacles such as firewalls, your browser broadcasts your real IP address to special (STUN(새 창)) servers that keep a list of both your public IP addresses and your real IP addresses.
If someone wishes to initiate a WebRTC conversation with you, the STUN server will provide them with your real IP address, even when you’re hiding your public IP address with a VPN.
Strictly speaking, the WebRTC “problem” is a browser issue that is unrelated to how a VPN works. However, there is little point in using a VPN if your browser just hands over your real IP address to anyone who asks for it.
How to find out if you have a WebRTC leak
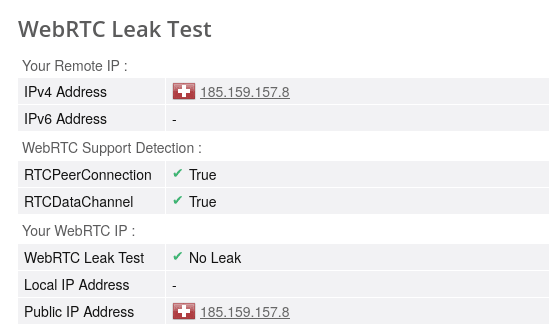
Connect the VPN, visit the Browserleaks WebRTC Leak Test(새 창) page, and wait for the test to complete (it can take a few minutes). You should only see IP addresses belonging to the VPN server. If you see your real IP address(es), you have a WebRTC leak.
How to fix a WebRTC leak
A good VPN app will use firewall rules and other platform-specific techniques to ensure your real IP address can’t be exposed by WebRTC.
It’s also possible to manually disable WebRTC on your browser.
Firefox
Type about:config in the address bar, hit Enter, and click Accept the Risk and Continue. Search for media.peerconnection.enabled and double-click the result to set its value to false.

Chrome and all Chromium-based browsers (such as Brave and Edge)
Install the WebRTC Network Limiter(새 창) browser extension from the Chrome web store. This official extension from Google allows you to manage how WebRTC connections work in your browser.

Final thoughts on how to know if your VPN is working
A good VPN app must ensure that your IP address is always hidden from websites you visit. If it doesn’t, you have a leak. Although we suggest ways to address IPv6, DNS, and WebRTC leaks in the article, the real solution is to use a VPN service that offers apps that work properly.
All Proton VPN apps are built from the ground up to include comprehensive IPv6, DNS, and WebRTC leak protection, ensuring your real IP address is always hidden.


