How to use a custom domain
If you’ve purchased a Proton for Business account, you can create an organization and assign sub-users to it. The number of users you can create depends on your plan. These sub-users can use Proton VPN.
To set up custom domain so that you use it with your Proton account:
- Add your domain to your Proton account.
- Verify your domain so that Proton knows it’s genuinely yours
- Create new users and add team members to your account
- Configure your domain registrar’s DNS records
- Note that in order to use the VPN, you would need to verify the TXT record only.
- We recommend using a sub-domain for this purpose.
- Set up your custom domain address.
Add your domain
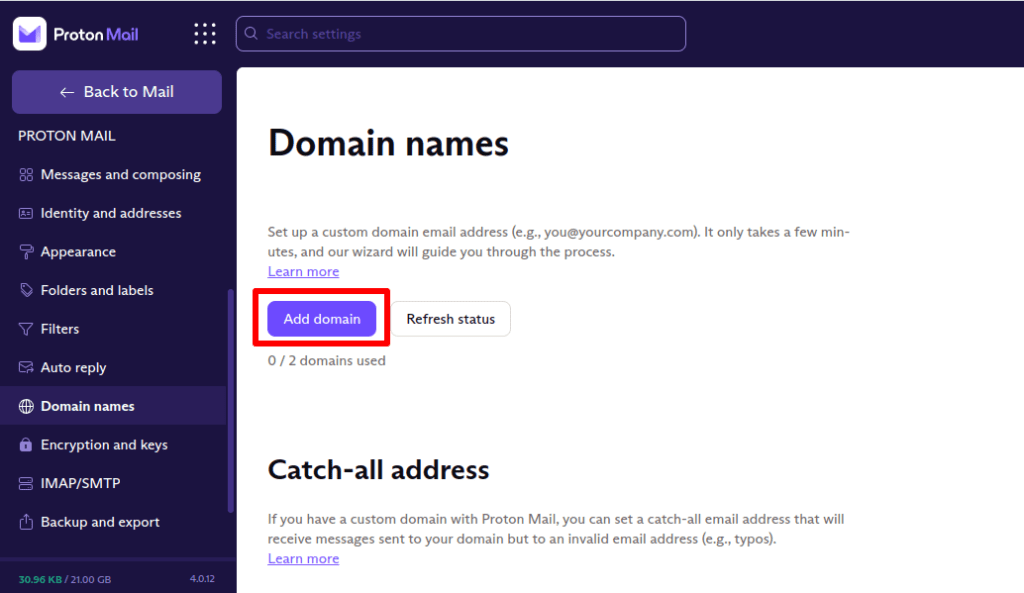
1. In your browser, log in to account.proton.me and go to Settings → Go to settings → Proton Mail → Domain names → Add domain.

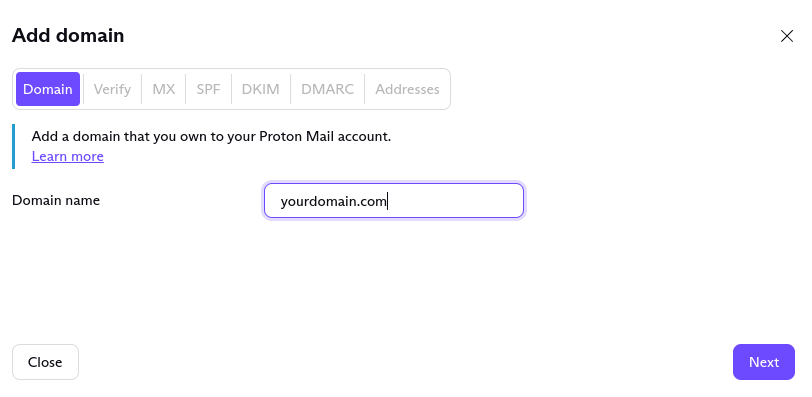
2. Enter your domain name and click Next. You might be asked to re-enter your Proton password for security reasons.

Verify your domain
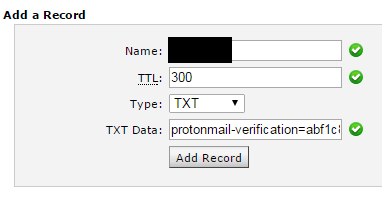
The first thing you have to do after adding a custom domain name is to show Proton Mail that you control this domain. You can do this by adding a TXT record with a unique code that Proton has generated to your domain’s DNS records in your registrar’s domain management portal.
Proton Mail servers will then look up all the TXT records for your domain and see if any match the verification code. If we find a match, then verification succeeds, and you can move on to the next steps.
Once you click Next, you will be taken to the Verify tab. You can also reach it from Settings → Go to settings → Proton Mail → Domain names → Domain by clicking on the Actions → Review button and selecting the Verify tab.

In the Verify tab, your Host Name (@) and TXT verification record are shown to the right of your newly added domain.

Click on the small Copy icon to the left of the TXT verification record to copy it to your clipboard. You can then paste it into your registrar’s domain management portal.

Wait a few minutes, then click Next to trigger a DNS check by our servers. If it succeeds, you can now move on to the next steps. If it didn’t succeed, don’t worry; our servers may still be reading old cached DNS records.
Note: If your DNS entry page does not allow you to add @ as the hostname, please try leaving this field blank when you enter the Proton Mail verification information. Some hosting providers do not provide a field for the “Host/Name”. If this is the case, please provide all other information and ignore the “Host/Name” in the Verify step.
Wait an hour and come back to the same page to see if it has succeeded. This can take up to a day, depending on your TTL setting. If it still doesn’t succeed, and you have double-checked your DNS matches the code in the setup wizard, please contact our customer support(новое окно) for assistance.
After the first verification, our servers will periodically check your domain’s DNS records and update the status of your domain. This is crucial, as it helps us keep the right verification code in your domain’s DNS settings and quickly fix any DNS issues. After your domain is all set up, if we detect missing DNS records, such as the verify record, we will warn you for a week before disabling your domain and its addresses.
Create an organization
Now that you have a domain, if you are subscribed to a plan that supports multiple users, such as Proton Visionary (legacy users only) or a Proton for Business plan, you can create an organization(новое окно) and add users(новое окно) to it.