Change your VPN protocol
- Odczytywanie
- 5 min
- Kategoria
- Protocols
Proton VPN uses several secure VPN protocols, including WireGuard, OpenVPN, Stealth, IKEv2, and Smart Protocol.
Smart Protocol automatically selects the best protocol for your connection. It’s enabled by default on all apps that support it, and we recommend keeping it on.
If you want to use a different protocol, you can change it in your app settings.
- How to change your VPN protocol
- Which protocols are available on each Proton app?
- Learn more about VPN protocols
Windows
- Open Proton VPN and go to Settings.
- Select Protocol (under Connections).
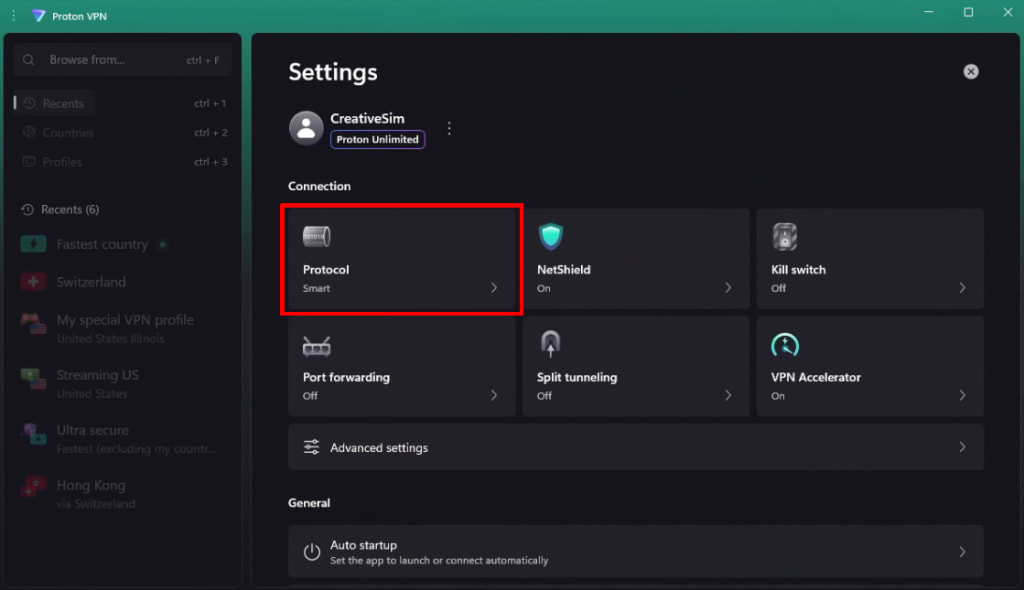
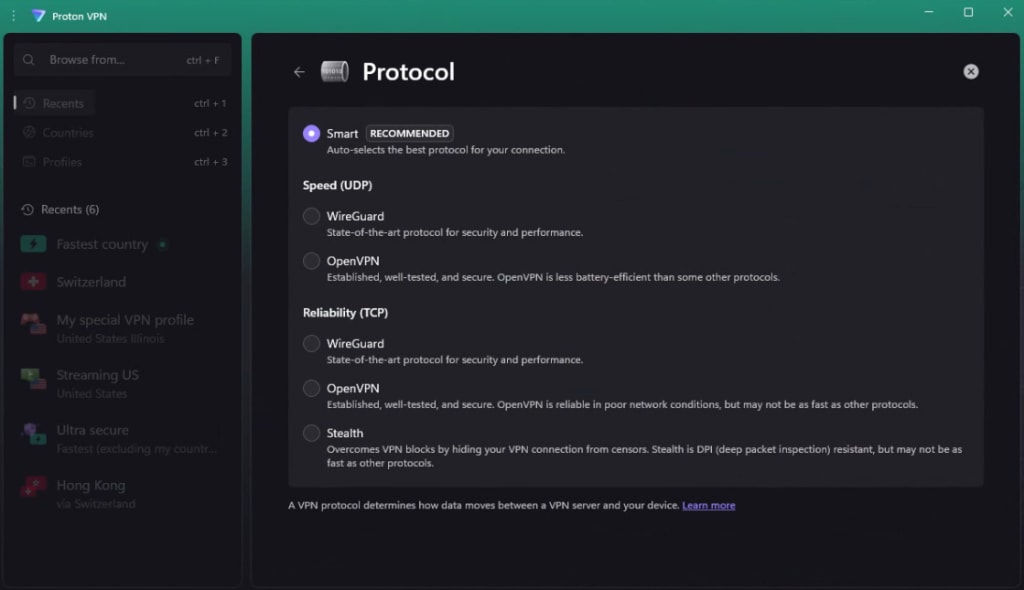
3. Select a protocol from the list.
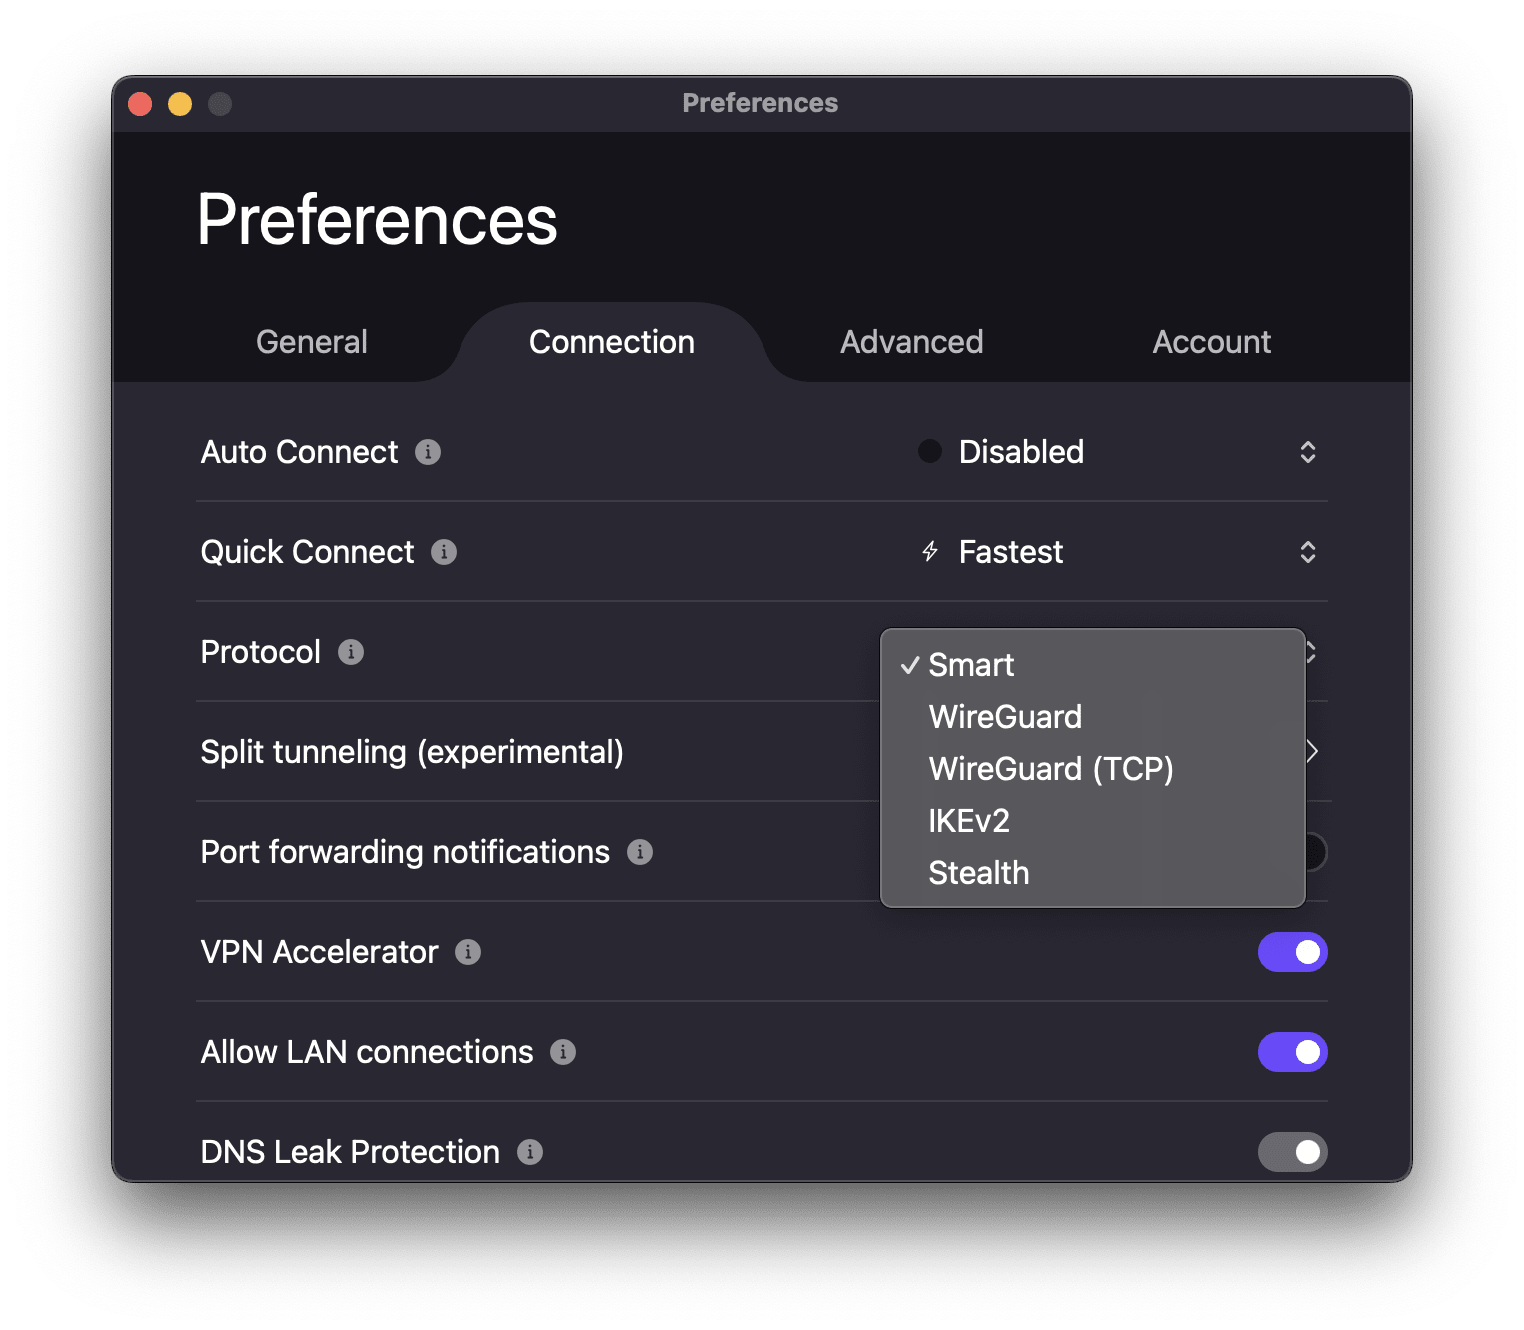
macOS
On macOS, you must install a network extension before you can change your protocol. How to install macOS network extensions
1. Open Proton VPN. Go to the macOS menu bar and select ProtonVPN → Settings.

2. Select the Connection tab and scroll to Protocol.
3. Select a protocol from the menu.
Android
1. Open Proton VPN and go to Settings.
2. Scroll to Connection and tap Protocol.
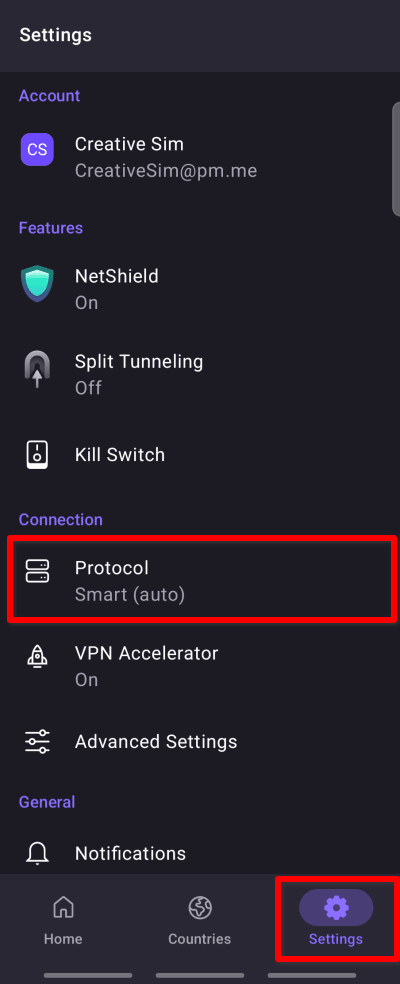
3. Select a protocol from the list.

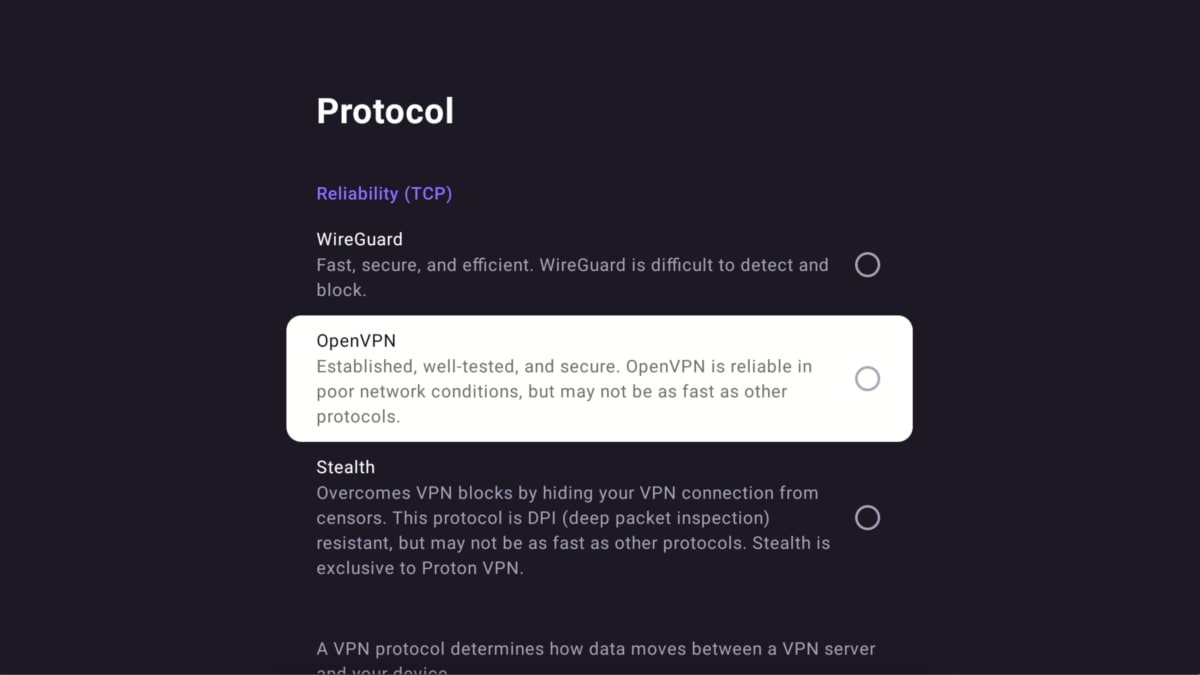
Android TV
1. Open Proton VPN and go to Settings → Protocol.
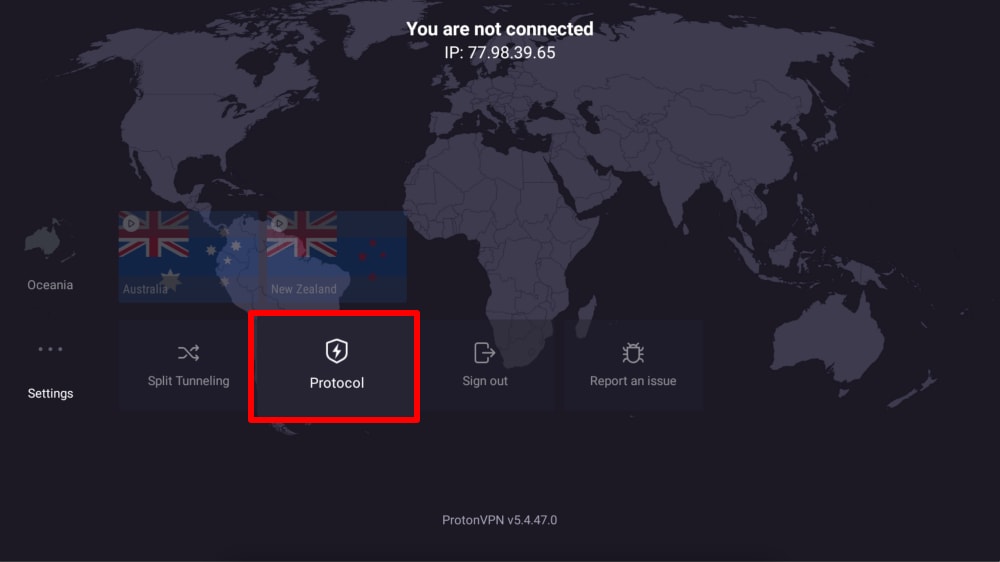
2. Select a protocol from the list.
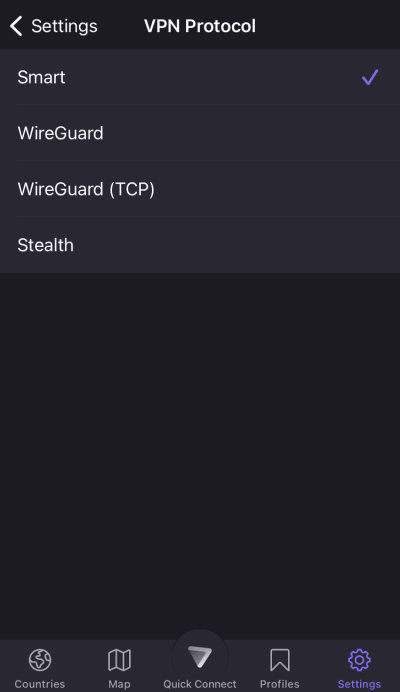
iOS and iPadOS
1. Open Proton VPN and go to Settings.
2. Tap Protocol (under Security Options).

3. Select a protocol from the menu.
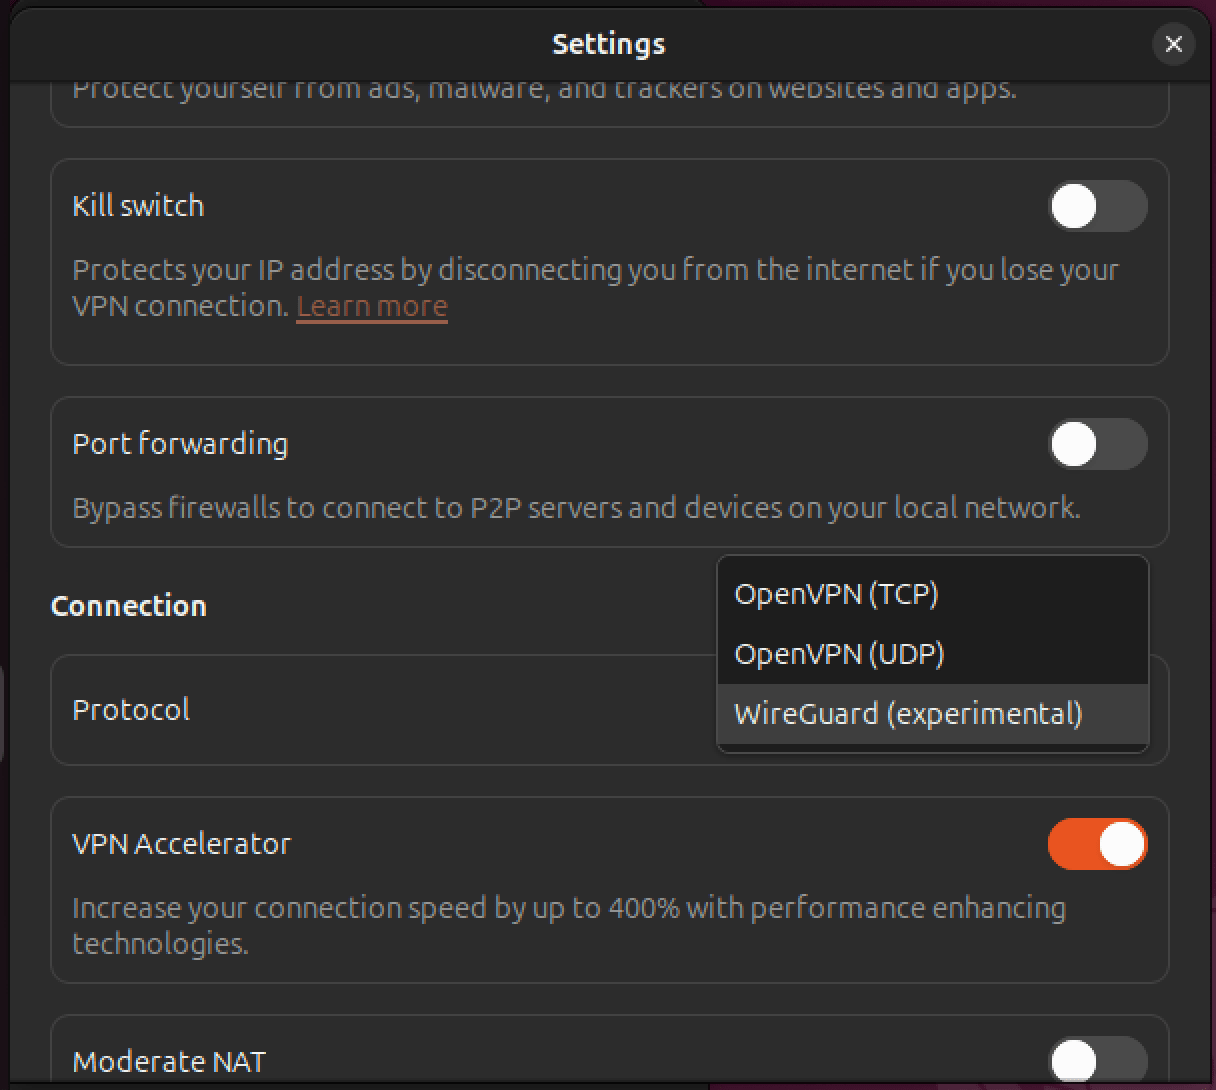
Linux GUI app
1. Open Proton VPN and go to Settings.

2. Scroll to Connection and go to Protocol.
3. Select a protocol from the menu.
Which protocols are available on each Proton app?
Smart Protocol
Automatically selects the best protocol for your connection.
- Available on Windows, macOS, Android, iOS and iPadOS.
Learn more about Smart Protocol
Stealth
Unique to Proton VPN, this protocol is designed to bypass internet blocks by hiding your VPN connection.
- Available on Windows, macOS, Android, iOS and iPadOS, Android TV.
WireGuard
A fast, modern, and secure protocol that uses less battery.
- WireGuard UDP: Available on Windows, macOS, Android, iOS and iPadOS, Android TV, Linux.
- WireGuard TCP: Available on Windows, macOS, Android, iOS and iPadOS, Android TV.
Learn about the difference between UDP and TCP protocols
OpenVPN
An established and secure protocol that is reliable even on poor internet connections.
- Available on Linux (GUI app) only.
IKEv2
A fast and secure protocol.
- Available on macOS only.