How to perform a packet capture
To help you troubleshoot a problem you’re having with your VPN connection, our support team may ask you to perform a packet capture. In this article, we’ll show you how to do this.
What is a packet capture?
A data packet is a small unit of data that is transmitted over a network (such as the internet). You can think of it like a letter — just as a letter has a sender and recipient address, a data packet has a source and destination IP address. Similarly, as a letter contains a message being sent, a data packet contains user data being transmitted.
Packet capture is the process of intercepting these data packets as they travel over your network and storing them in a file for analysis and inspection. Sending this file to our support team can greatly assist them in understanding and resolving your issue.
There are two tools we recommend for performing a packet capture: Wireshark and tcpdump.
How to perform a packet capture using Wireshark
Wireshark is a free and open-source GUI packet analyzer capable of doing much more than just packet capture. It’s available for Windows, macOS, and Linux.
1. Download(ventana nueva) Wireshark. On Windows, install npcap when prompted (this is required for packet capturing). On Linux, Wireshark is available via most package managers and can be installed on Debian-based systems with sudo apt install wireshark.
2. Run Wireshark. On Windows, you should run as an administrator(ventana nueva) to ensure you can access all network interfaces.
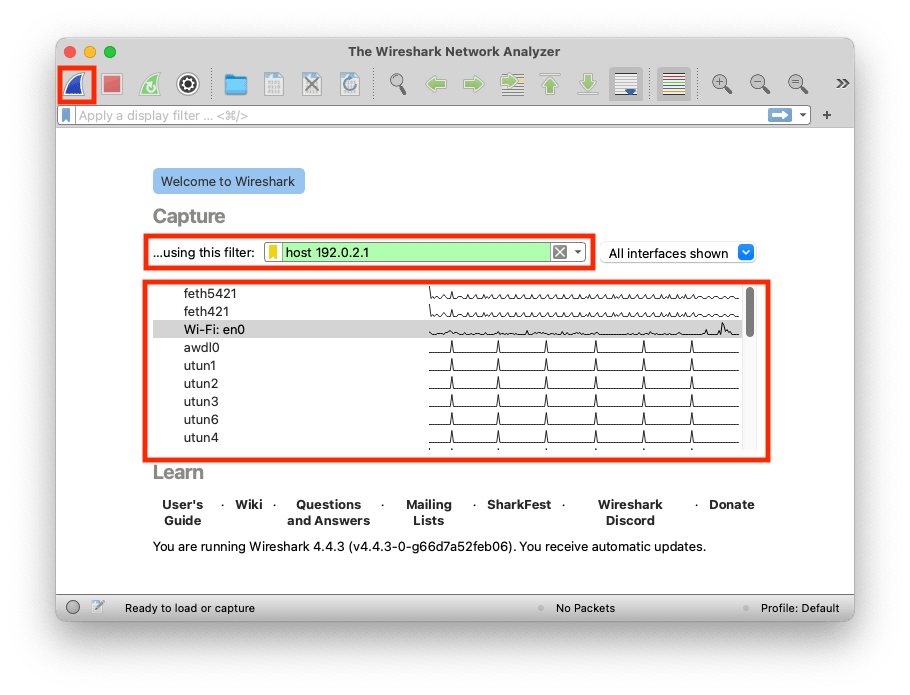
3. Select the interface you wish to capture packets from (for example, Ethernet, Wi-Fi, the VPN tunnel interface, etc.). Our support team will assist you with this based on the nature of your problem. If you haven’t been asked for a specific interface, select the VPN tunnel interface by default.
If asked by our support team, enter a capture filter(ventana nueva) (text string) to limit the types of packets that are captured.
4. Click the blue shark fin icon to start capturing packets.

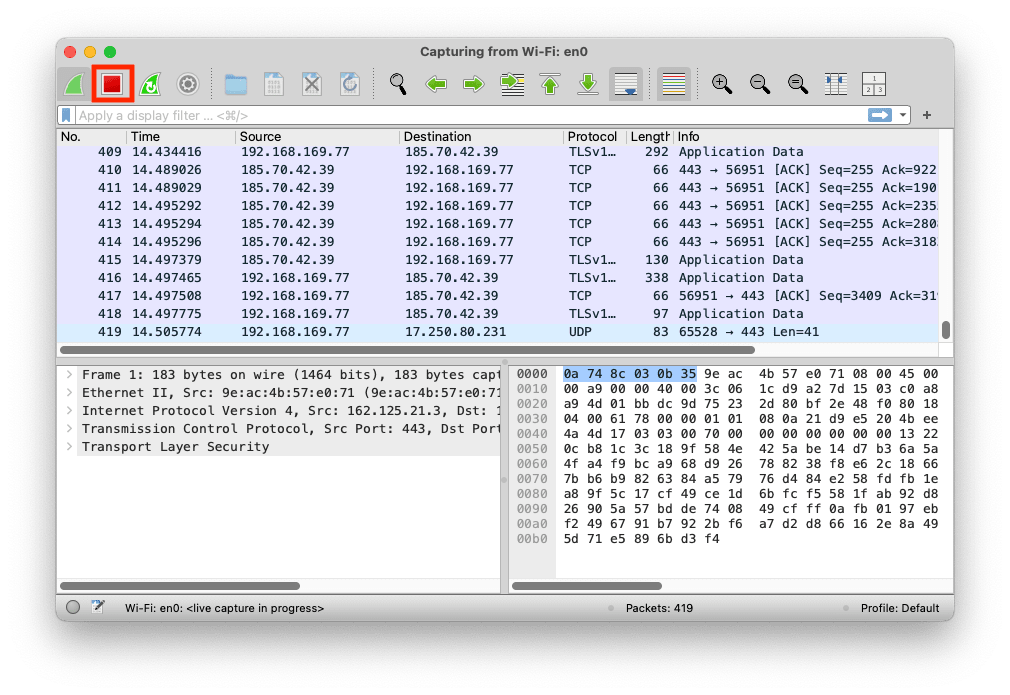
5. Wireshark will begin capturing all traffic on the selected interface. Our support team may ask you to enter a display filter(ventana nueva) (text string) into the Apply a display filter field. Allow capturing to continue for a few minutes or until the issue you’re reporting occurs again. During this time, our support team might ask you to perform certain actions (such as connecting or disconnecting the VPN).
When you’re done, click the Stop button.

6. Save the captured data as a file. To do this, click the Save the capture file icon and select a location on your system to save the .pcapng file.

You can now send this file to our support team for analysis.
How to perform a packet capture using tcpdump
tcpdump is a command-line tool built into macOS and most Linux distributions (if not, it can be easily installed. For example, using sudo apt install tcpdump on Debian-based systems). On Windows, you can download and install WinDump(ventana nueva), a Windows version of tcpdump.
1. Open a terminal window on your computer. (On macOS, open the Terminal app. On Windows, open either the Command Prompt or PowerShell app — make sure to right-click on it and select Run as Administrator. On Linux, open your favorite terminal emulator from your app drawer).
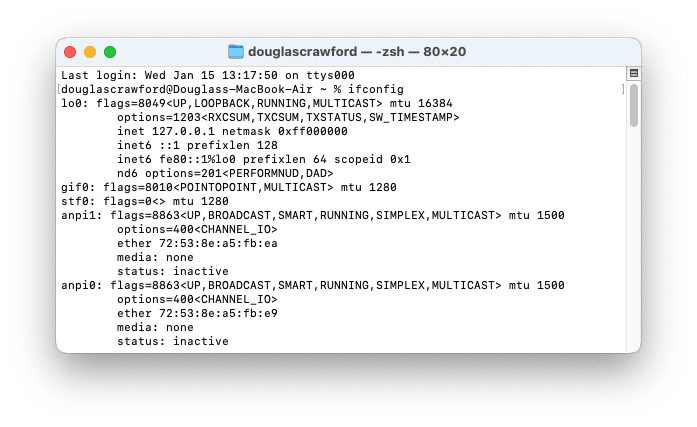
2. Enter ifconfig (or ipconfig on Windows) to see a list of interfaces on your device.

3. Enter the following command:
- Windows: tcpdump -i <interface> -w capture.pcap
- macOS and Linux: sudo tcpdump -i <interface> -w capture.pcap
Replace <interface> with the name of the interface you wish to capture packets from (e.g., eth0, wlan0, or en0). Our support team will assist you with this based on the nature of your problem. They may also ask you modify this command to include filters that will help with our investigations.
4. Allow capturing to continue for a few minutes or until the issue you’re reporting occurs again, then press Ctrl+C to stop the process. During this time, our support team might ask you to perform certain actions (such connecting or disconnecting the VPN).

5. A file named capture.pcap will be saved to your Home directory (or wherever you ran the tcpdump command from). To find your default Home folder on:
- Windows — Open Explorer and go to C:\Users\yourusername
- macOS — Open Finder and press the keyboard shortcut Command (⌘) + Shift + H
- Linux — Open your file manager and go to /home/yourusername/ (or type cd /home/yourusername/ into your terminal)
You can now send this file to our support team for analysis.